Andrea's blog
Wedding Gift Personalized Sign - B'ivrit - in Hebrew
My cousin Yasmin is getting married in a few days - in Israel, where she grew up and has lived most of her life. She's my only girl cousin (out of 10 grandkids) and so we've always shared a special bond - even though we only see each other one in a blue moon.
Since I couldn't be there for the wedding, I'm having to live vicariously through my mom's photos on Facebook, which though it isn't at ALL the same, will have to suffice.
I wanted to send Yasmin a special gift though to let her know I was thinking about her and to celebrate her new married life. So of course I decided to send her a handmade personalized sign for her and her new husband. Obviously, an English version wouldn't be quite right for their home in Israel, so with the help of my aunt (to get the spelling just right), I designed a Hebrew version of my "First Names w/Wedding Date" sign for them:
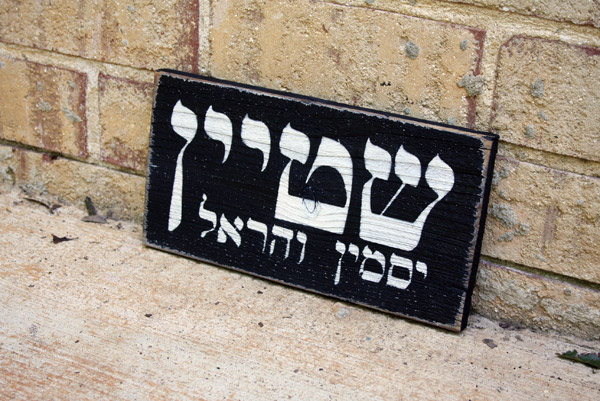
1ft x 6in - Black - Custom Personalized Sign Design
The large font is their new last name and beneath it reads their first names. Remember, Hebrew is read from right to left!
DIY Jewelry Organizer - Revisited
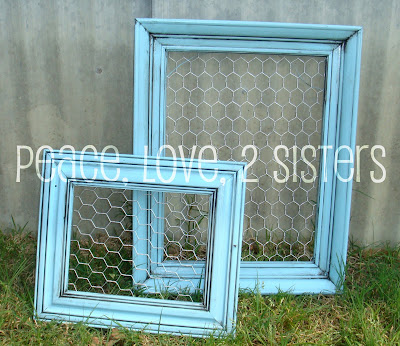
A while back, I made myself a jewelry organizer for my closet from a picture frame, wire and fabric. But, after dropping earrings on the floor over and over and over again (because of the fabric backing & wire not having enough space between them) I decided to give it another shot with a new design.
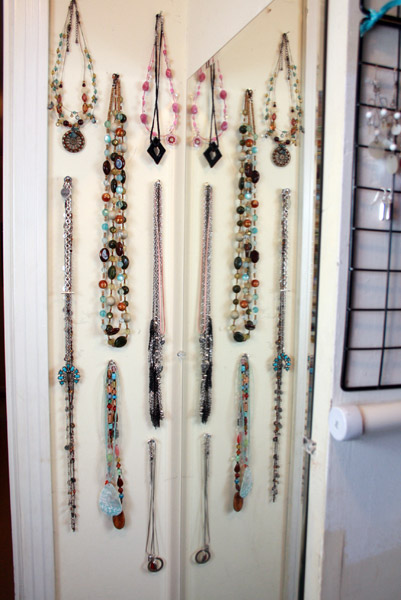
I went digging in my garage and came back with two metal cube panels, several nails and some ribbon.

I liked the idea of the metal cube pieces, because if you face them the right way, the cross-bars leave a natural space between them and the wall that allows the earrings to hang freely. Plus, using the grid means I can easily stagger the earrings so I can see them all well and they won't get tangled up together.

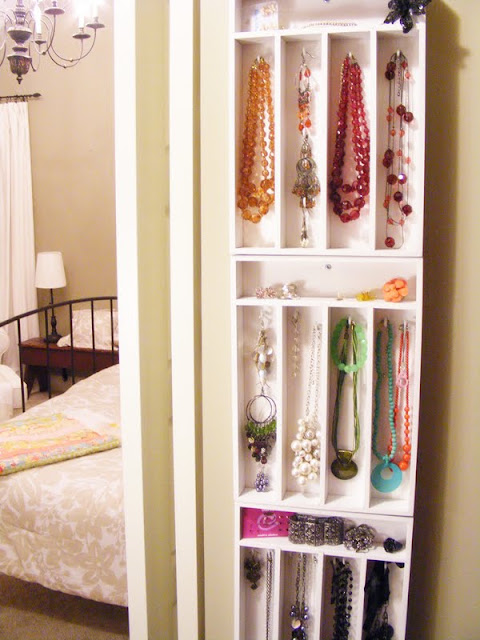
I used ribbon to tie two panels together and secured the top two corners with screws. The bottom is secured with one screw to hold it still.
Since this grid solution didn't work for my necklaces, I simply added some staggered nails directly to the wall.
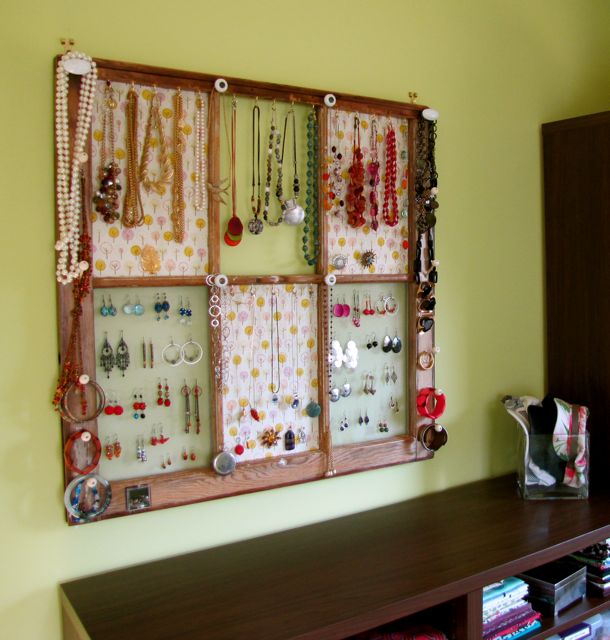
Let's hope this solution is a little more user-friendly! I'm not the only one looking for a great jewelry organizing solution. Check out these great ideas that I found on pinterest:

Numbers on the Mailbox
 While I was out of town for the month of July, traveling with the kids, Ben enjoyed 3 1/2 weeks of solitude at home. That's a lot of time for itty bitty handyman projects!
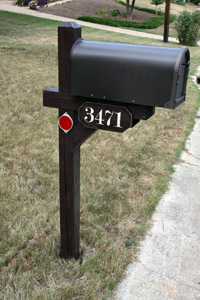
Among many nice little surprises, I came home to shiny new doorknobs on all our outside doors (yes, he changed the locks while I was gone!), new shelves in the pantry, and a brand new mailbox. And, if you have seen our old mailbox, you know that this was a WAY overdue project - as in we probably should have done it the day we moved in 4 years ago.
So, since he very nicely waited for me to get home to add numbers (because he knew I'd want to paint my own street number sign like the one by our front door), I figured it was time I got on that project before another 4 years passed. We were looking for a make-it-better, but it-doesn't-need-to-be-perfect look, so within a 5-minute conversation we made a quick design decision and I got to work.
Here's a look at our old mailbox, the new mailbox I came home to, and then new mailbox w/a snazzy new paint job on the post & a brand new street number sign.
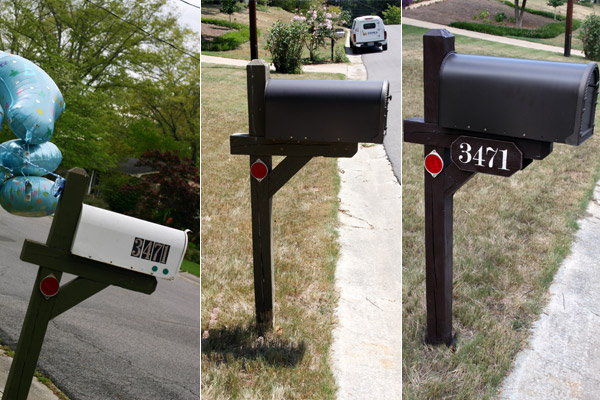
 Though I certainly wouldn't be opposed to some color at the street (I do love these colorful mailboxes), Ben is a little more conservative in his outdoor decor choices, so we opted for a make-it-blend, not too fancy monochromatic look. So all I did was make two beveled 1ft street number signs, give the post a new coat of paint, and slapped that baby back together. I started at noon, and was done with the whole shebang by dinner (didn't want to miss any mail!)
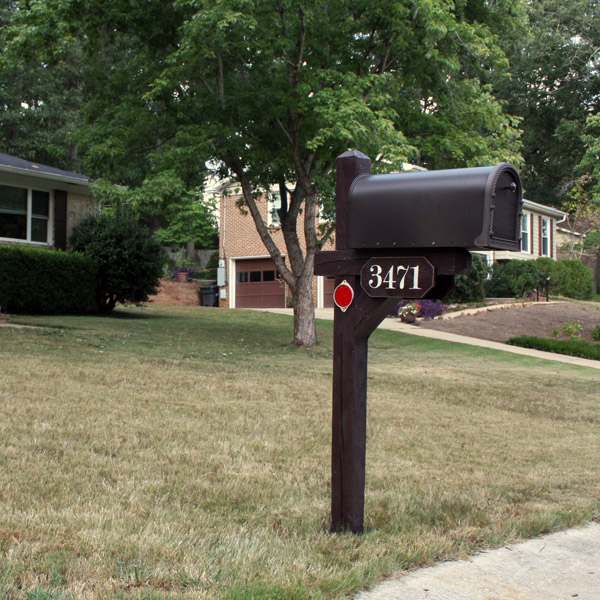
Yes, some flowers would look nice at the bottom of the post. Maybe someday! One project at a time...
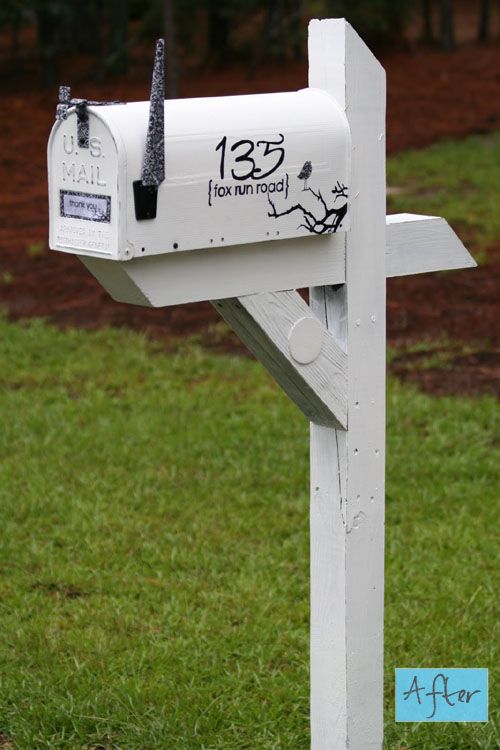
Here's some more mailbox curb appeal for your day!
- turquoise & red mailbox
- unusual mailboxes (some silly stuff here!)
- mailbox makeover (I won't lie...she did it better than me!)


Except now I really want one of these:

How's your mailbox looking these days?
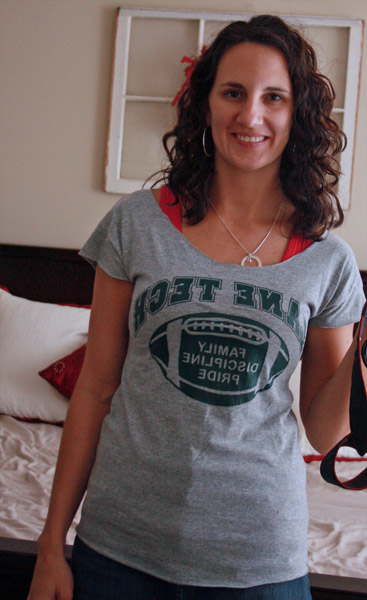
Fitted Tee Tutorial - Scoop Neck
 A few weeks ago I learned how to make a large t-shirt into a fitted tee shirt. Very cool, right? But...I still had some trouble figuring out how to make the sleeves look right since the REALLY big t-shirts had such low shoulder seams. Plus, the necks seemed awfully high and confining on some of the shirts I tried it on.
Since I'm NOT a seamstress of ANY kind, I went looking for some solutions and landed on this scoop-neck version that I think might be just what I needed.
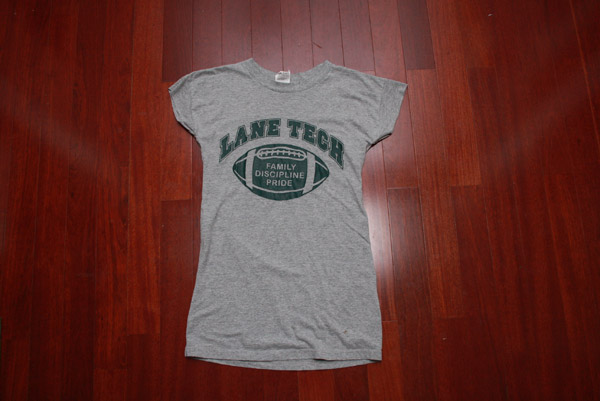
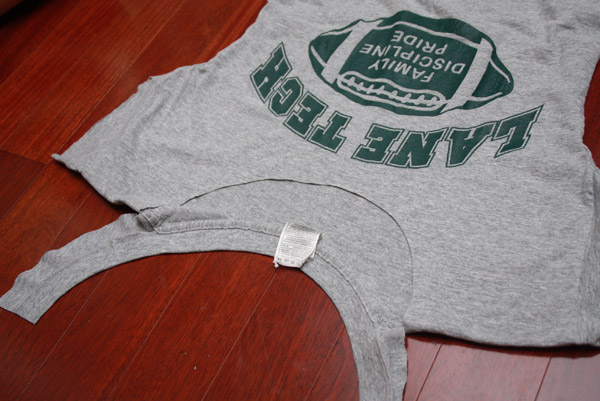
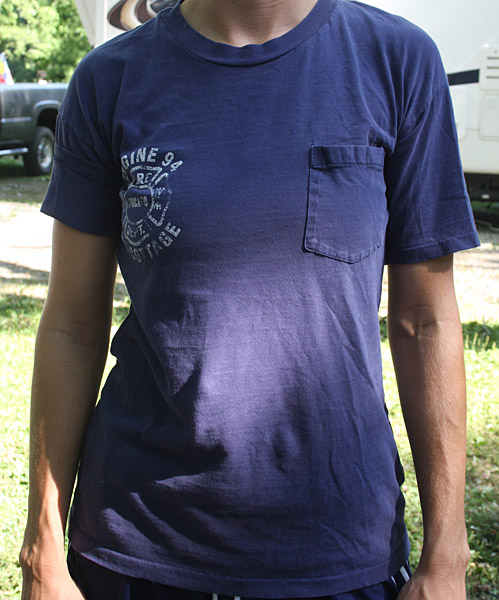
Here's what I started with and the link to the tutorial for how to get from a large t-shirt to a fitted t-shirt:
It worked great with my navy fire department shirt, but with this shirt, I wasn't happy with the neckline or the sleeves, which meant I hadn't worn it yet and wasn't sure whether I liked it. So, I figured it couldn't hurt to get a little scissor happy on it again in an effort to "save" it once more.
I went back to youtube.com for some inspiration, and sure enough, found this video by ashleybrashier about "How to cut your shirt into a scoop neck".
Here's how it's done:
Lay your shirt on a flat surface.
Make a small snip on each shoulder about an inch from the collar. You can also put the shirt on and mark where you want to cut, but I've found that about an inch works perfectly for me, while keeping the shirt on my shoulders (instead of becoming an off-the-shoulder shirt).
I also make a cut down the center of the front collar, so that I have a mid-point to cut towards to make an even scoop across the front.
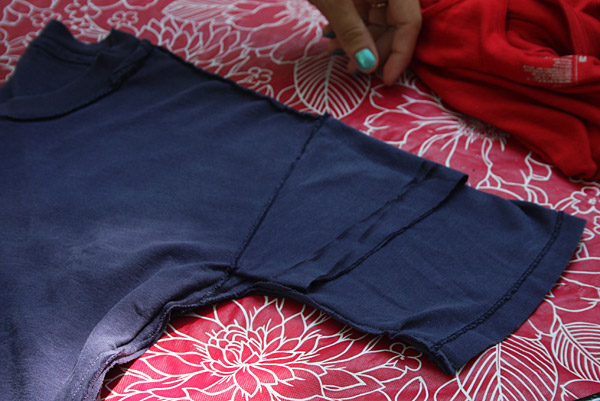
When you've finished cutting the front scoop, it looks a little like this:
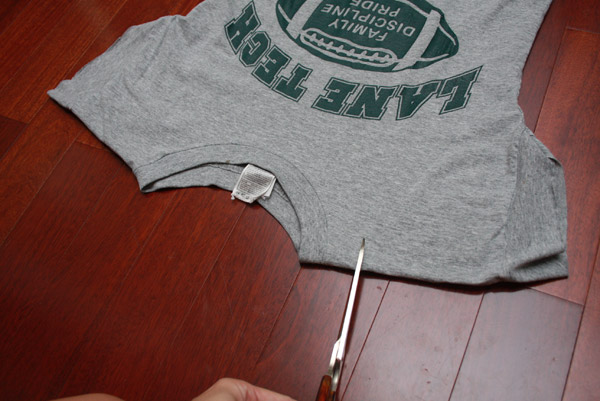
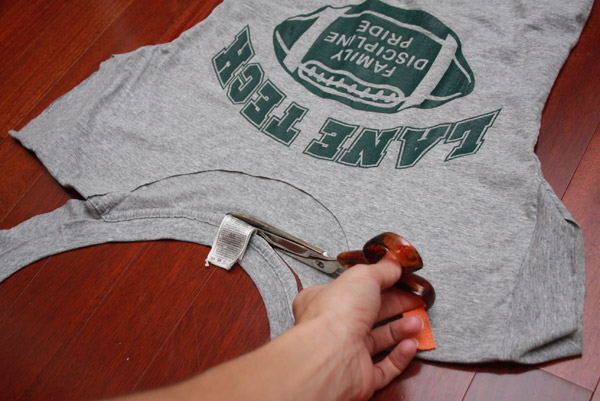
Cut the back of the shirt straight across directly underneath the collar band.
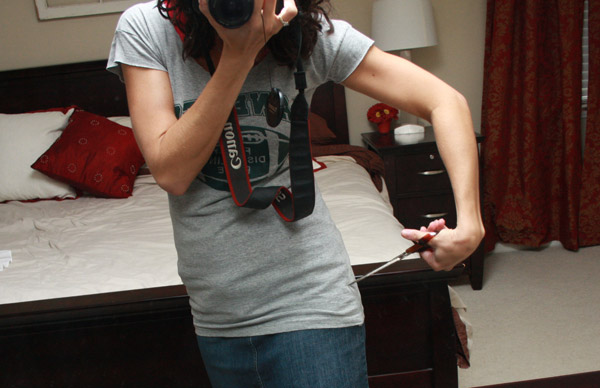
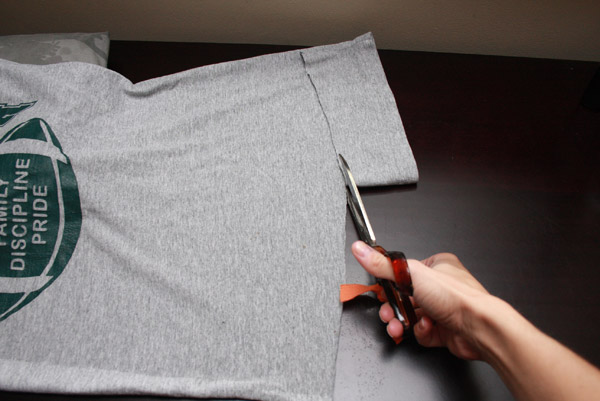
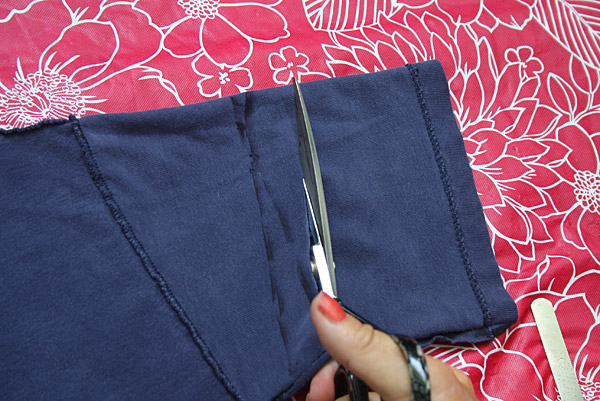
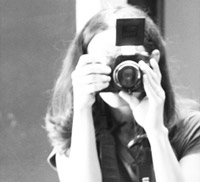
Next, try on your shirt and mark where you want the length to be cut. I just used my scissors to cut a little hole on one side. (PS...I don't recommend holding a camera in the other hand while snipping! That's just for this tutorial pic!)
Lay the shirt back out on a flat surface and begin cutting across the bottom of the shirt where you marked.
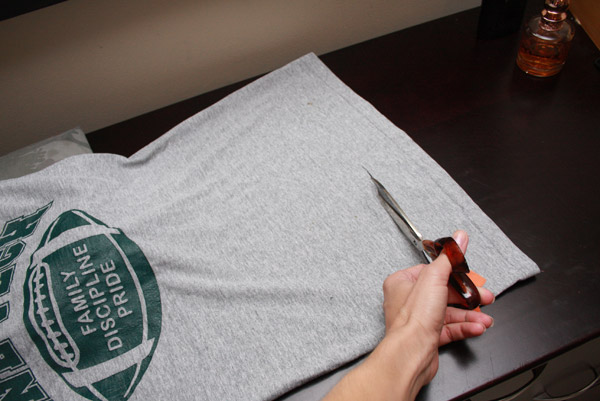
I like to cut a small curve in the front, and then fold it over to match the other side.
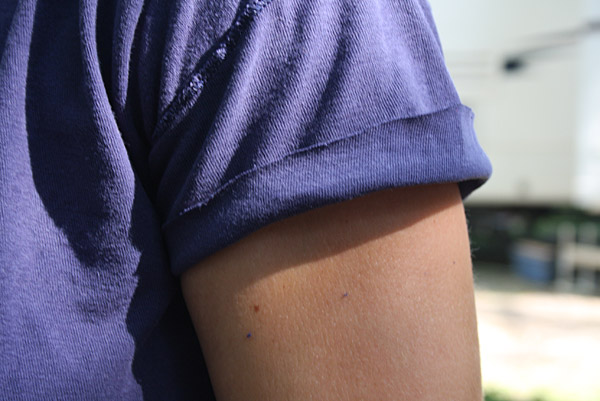
For this shirt, I decided not re-cut the sleeves (yet), but you could cut them just after the shoulder seam to give the shirt an even more cropped-sleeve look. I'm going to try this short little sleeve out first and see what I think.
But that's it! It's significantly more comfortable with this neckline, and (I think) a little more fashionable. My husband still rolls his eyes and just sees me in a cut-up tee shirt. But that's a guy for you. :)
Large T-Shirt to Fitted Tee Tutorial
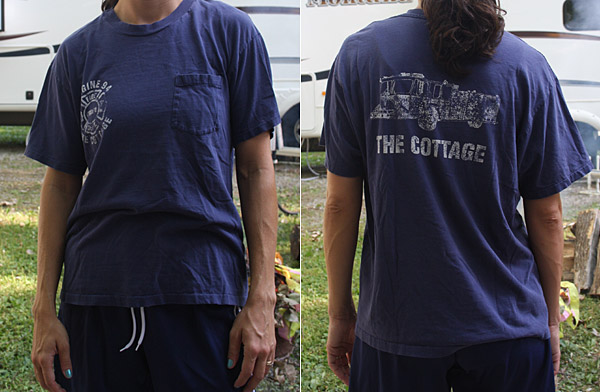
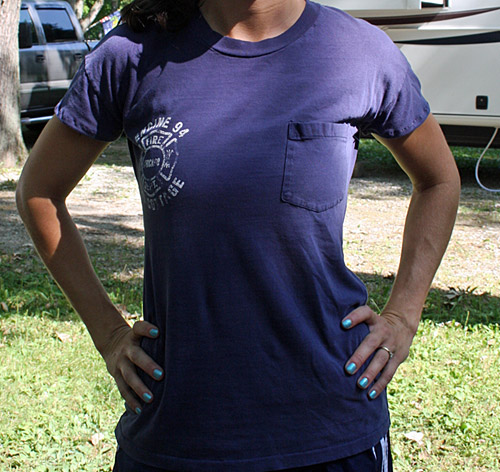
I have these two t-shirts that I love. They're soft, comfortable, and have good worn (and sentimental) designs on them. But, I never wear them for anything other than around the house because they are large men's t-shirts and look completely shapeless on me. Then I found this great tutorial on YouTube for how to make a big t-shirt a fitted shirt! - T-Shirt Surgery: How to Make a Shirt Fit
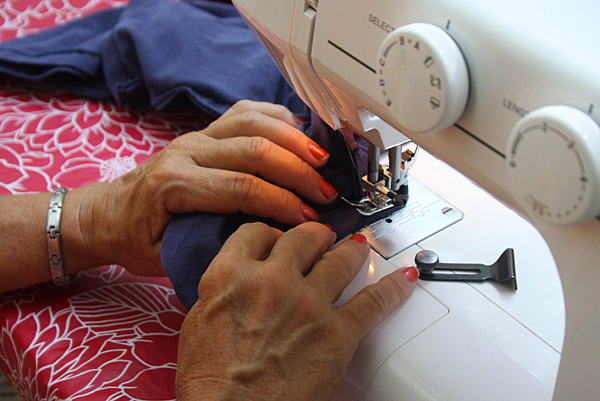
So, while I was staying with my mom at her camper this summer (she lives & travels in an RV), I asked her to help me try it out. So yes...we broke out the sewing machine next to the campfire. Strange, I know, but it gave us a project to work on!
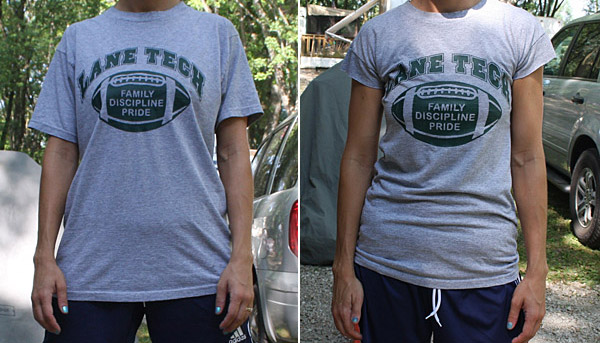
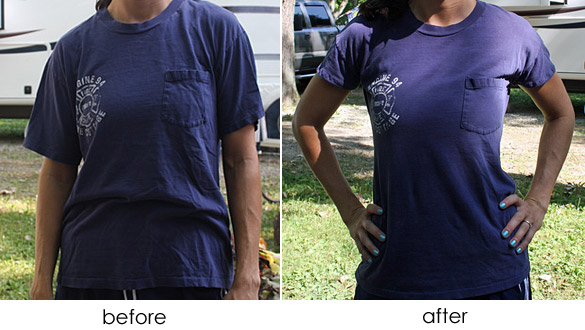
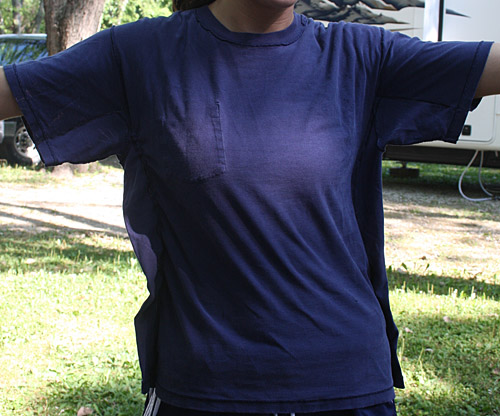
First, a before & after look at the t-shirt we did. Oh yeah, I know you love those electric blue fingernails. :)
So, here's how it's done.
-
Start with a t-shirt you love that's just too big
-
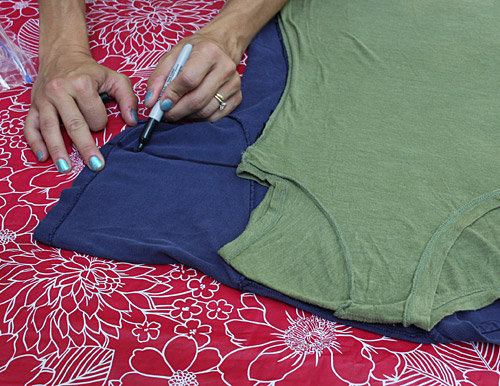
Turn the shirt inside out and lay a shirt that DOES fit you on top of it, lining up the collars so that you can be sure it is centered over your large t-shirt.
-
Trace the shirt that DOES fit you onto the large t-shirt. Turn both shirts inside out so that you don't mark on the front of the shirts. I used a sharpie, but you'd be better off to use a washable marker, chalk or a fabric pen. When you do the sleeves, try to make your line parallel to the top shoulder.
-
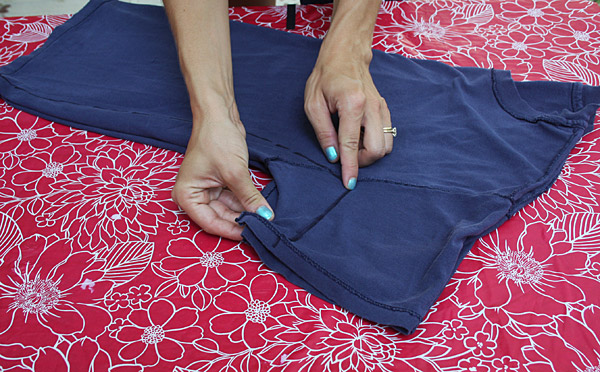
Next, fold the large t-shirt in half to make sure that the armpit marks line up. Mine did match up, but if yours don't, you can just re-mark them to match.
-
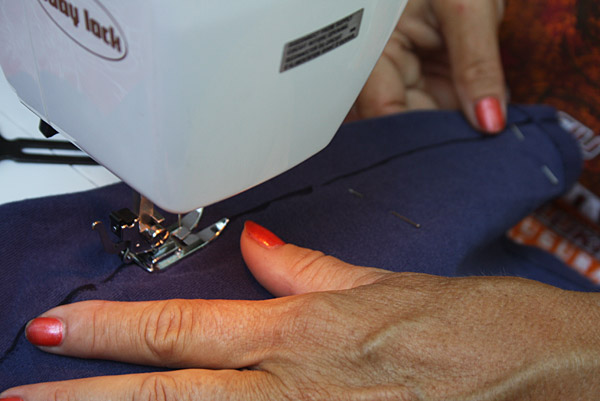
I went ahead and pinned the front and back of the shirt together, so that it didn't slip while we were sewing.
-
Sew along your traced lines. Or, in my case, have your MOM sew along the traced lines. :)
-
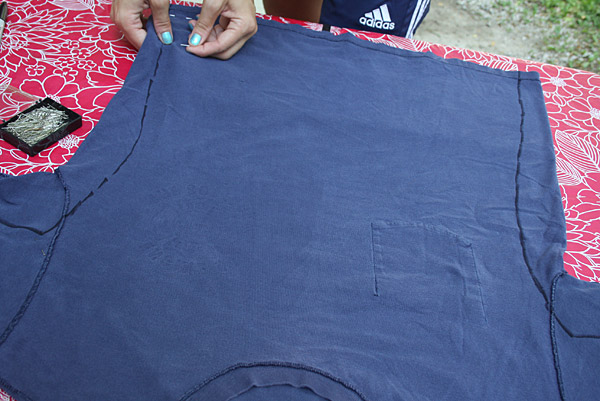
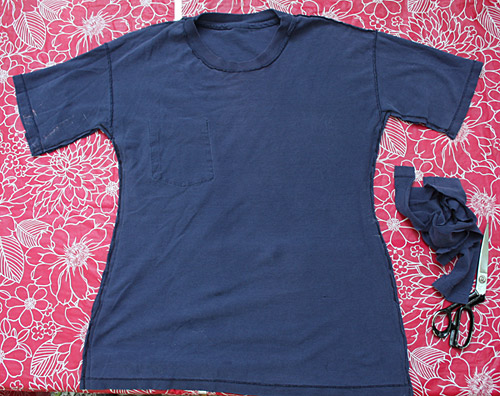
Try on your shirt (inside out) to see how it fits. Mine was still a little big, so we sewed it up again about a 1/4" more on each side. Then it looked like this:
-
If you like the fit, then you can trim off the excess fabric.
-
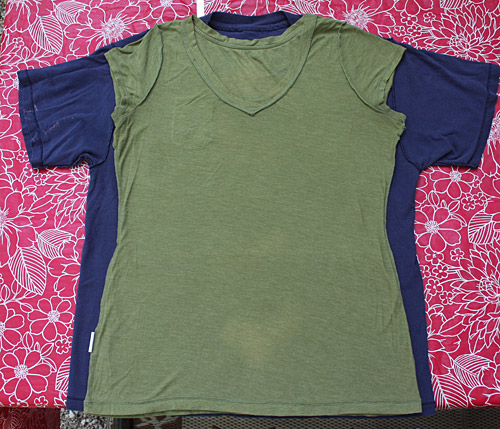
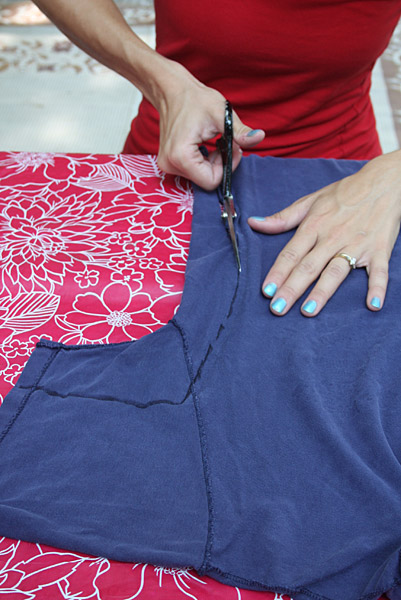
Turn the shirt right-side out and try it on. You can leave it as is, with longer sleeves, or you can cut & hem them - which is what I decided to do.
-
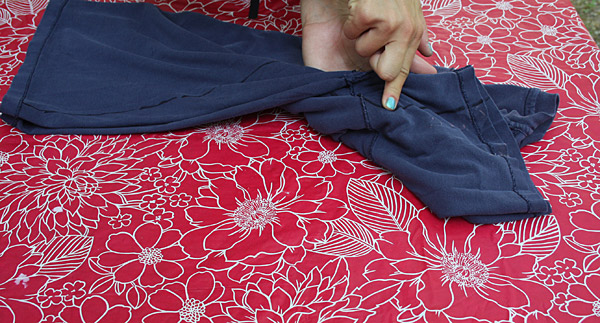
While I was wearing the shirt, I marked with a pin the length I wanted the sleeves to be. Then I took it off, turned it inside out again and drew a line. Okay, two lines, because I remembered that I wanted to angle the sleeve a little bit. Then I cut about 5/8" past the line (to allow for a hem).
Try it on and make sure it looks the way you want it to look.
-
Fold the shirt in half and cut the other sleeve to match.
-
Hem both sleeves.
-
You're done! Try it on & love the new look - preferably with cute jeans...not gym shorts and bright blue fingernails. :) But hey...we don't all do our crafting while looking our best, right?
Thanks to brianagayle for the video tutorial & tips! I'll be using this technique often I think. :)
Posing Large Groups of People for Family Portraits
 It's been my job for the past several years to take our extended family portraits anytime our family is all together (and conveniently dressed nicely - usually on our way to church, at a holiday or on a beach vacation). It's a job I love, and so far we've almost always had good results. But it's not easy, and I've learned a few tips & tricks along the way that can help get a shot that everyone will love.
Family Portraits
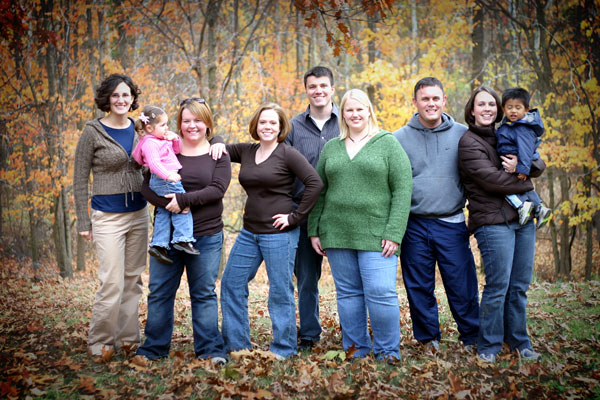
Let's start with photographing a nuclear family. Since I'm usually dealing with families with small kids, and I'm not PAID to take portraits (I'm a hobbyist, not professional) - I stick to the basics. My main goal is to get one good shot of everyone in-focus and looking at the camera - a smile on each face is a great bonus!
We usually take these portraits outside, so I look for a shaded, evenly-lit area with an uncluttered background, under a tree, in a field, in front of a row of trees, or if I'm really lucky - on the beach. :)
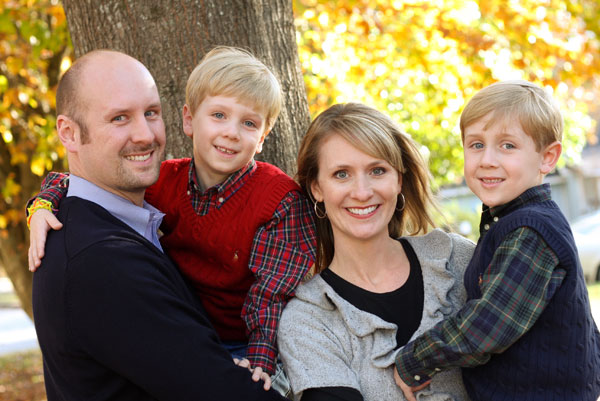
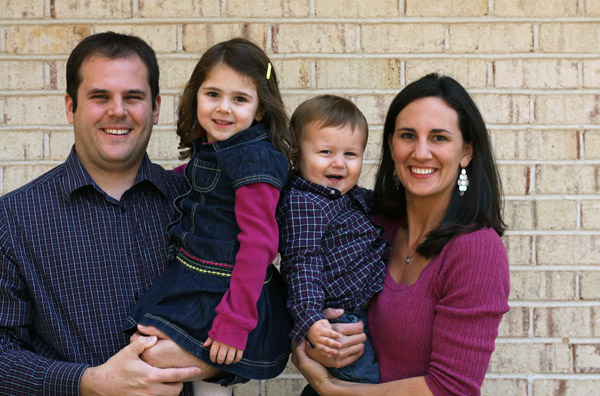
Since I deal often with people of varying heights, ages and attention spans, I like to have the adults hold the kids if they're small enough. The kids are usually happiest and most-focused this way anyhow - and then I can line everyone's faces up across the frame. All that "hugging" and "holding" helps everyone stay close together (and often makes them smile) and it lets me get a tight shot of all their faces. Sometimes, as in the case of my brother & sister in law on the right (below), I'll arrange them on a hill or ask Josh to crouch down a little bit to meet the rest of his family - a large height difference can be very tricky!
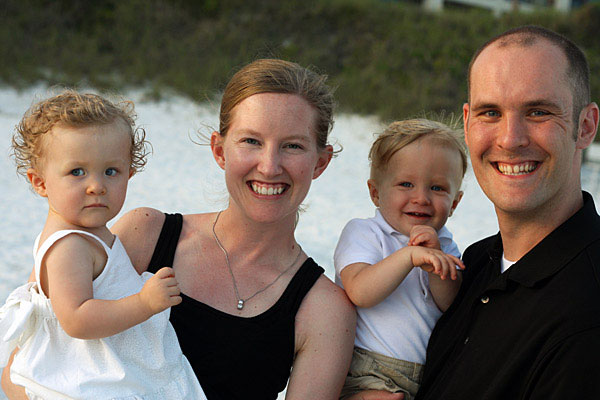
I shoot on AV priority with a Canon 40D SLR camera, setting my aperture to about 5.0 in an effort to get all my subjects in focus, while keeping a blurry background. I most often use my Canon 50mm 1.8 fixed lens and just take a few steps back so that I'm far enough away to get everyone in the shot.
If I'm not going to be *IN* the photos, then I do not use a tripod for these portraits, which allows me to move around and adjust my angles to get everyone lined up well in the frame. If I am included in the portrait, then I love to use a tripod to set up the shot and frame the picture, leaving space for myself. Then I set the self timer, press the shutter and book-it fast to get in the shot before it snaps the photo! My son thinks this is hilarious and truly, it's often the only way we can get him to smile.
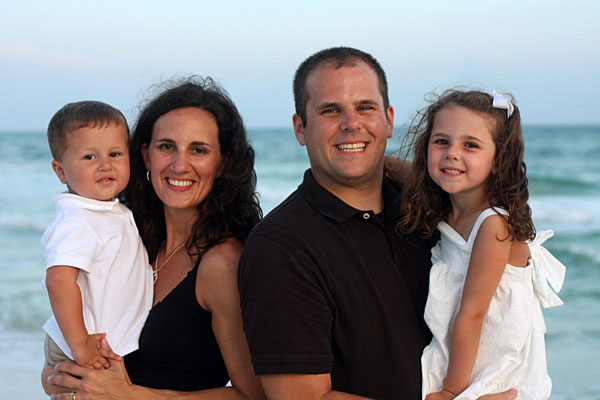
*The beach photo of my family on the right was actually a fabulous shot taken by my sister-in-law. She's my protege...trying to steal help me with my job as family photographer. :)
Repeat after me - you only need ONE great photo. Especially with small kids, don't irritate everyone and wear down your welcome by trying every pose under the sun. That said...take a TON of pictures. Digital images are free - take advantage of it. It's not uncommon for me to take 20-30 pictures of the same pose, waiting for everyone to be looking & smiling, hair-not-blowing, eyes not closed, and parents-not-talking. That's where the insane speed of an SLR camera is VERY helpful.
If we have a cooperative bunch, then next I'll ask them to sit down and make themselves comfortable. Sitting helps the adults and teens relax a little and then they also have their laps free to hold heavy toddlers or preschoolers in place. The main thing here is to make sure everyone is comfortable - and LOOKS comfortable. If they aren't...they won't look it!
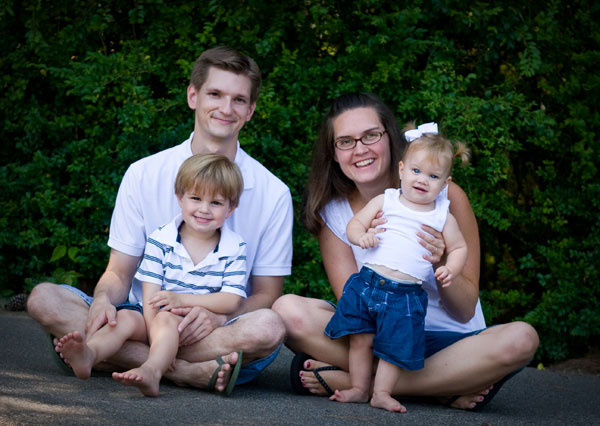
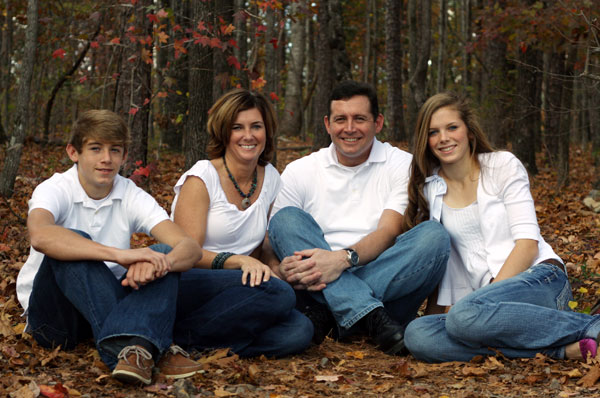
I'm also a fan of having everyone crouching down together, especially next to standing kids. I often ask my subjects to put their arms around each other, lean on each other a little bit, and even have kids sit on their knees to show the relationships and give the whole family look more connected to each other. Plus, then I can get a shot of them from up above, simplifying the background of the photo, as in the photo below on the left, where I included more of the leaves on the ground as the background instead of the trees behind them. And...in case you weren't aware...everyone looks skinnier looking up at the camera, so that's always a bonus. :)
Extended Family Portraits
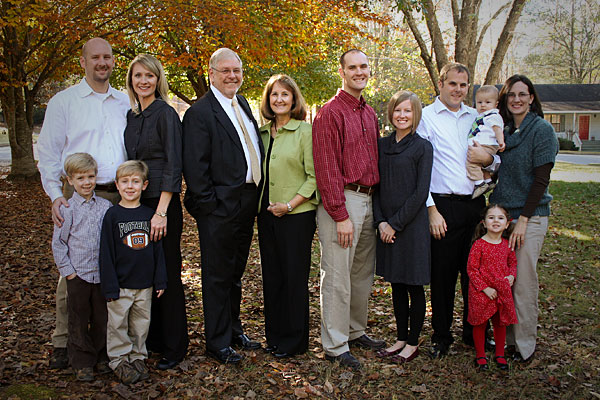
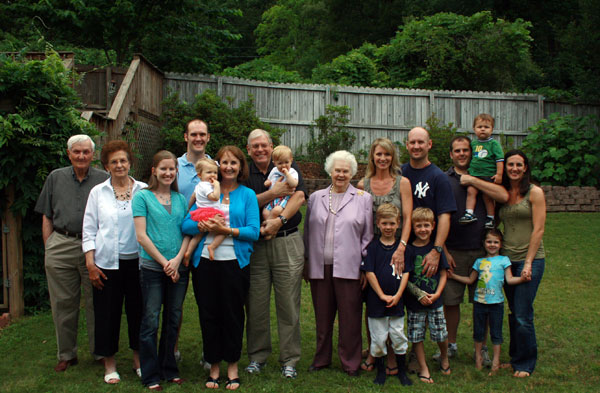
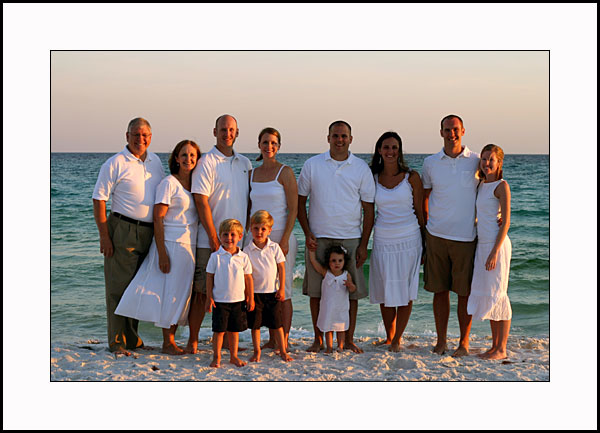
When you add in several families or a larger group of people, it gets a little tricker to pose everyone. Depending on the number of people, I'll either line everyone up again or put them into rows or sub-groups, taking into consideration their relationships & height. For instance, I'll have couples stand together, arrange everyone in boy-girl-boy-girl pattern or move really tall people to the center while the more vertically challenged move to the outside or front row.
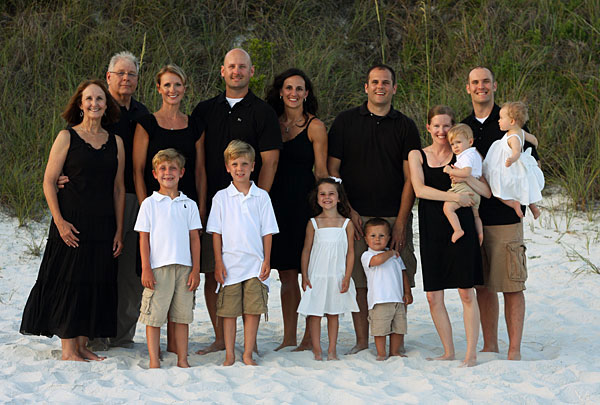
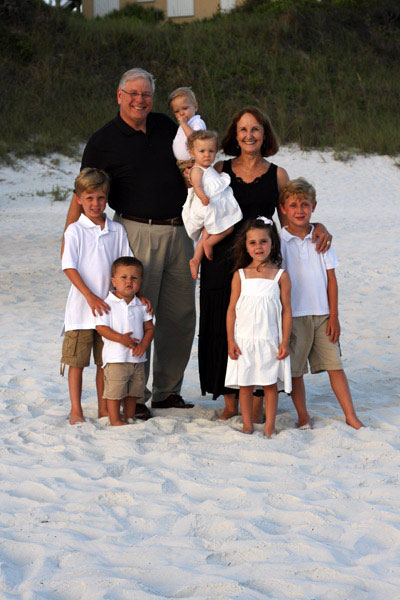
The beach photo on the left (below) could have been arranged better by having my husband and I scoot over to the right just a smidge to fill in the hole above my petite sister-in-law's head. Oh, and had the 1-year old-twins been willing, they would have looked awfully cute sitting in front of their parents in the sand -- but c'mon folks, the shot we got was nearly a miracle with all those kids and me sprinting in the sand to get into the center of the photo!
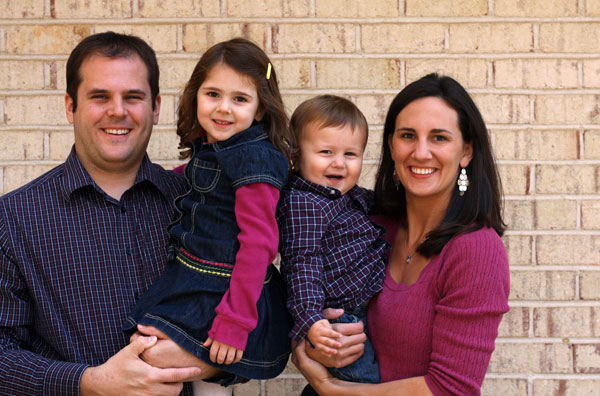
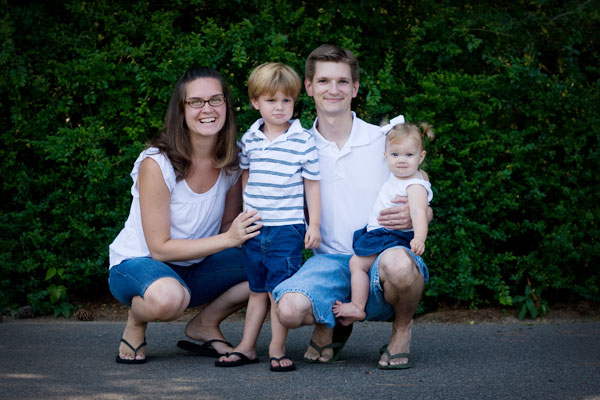
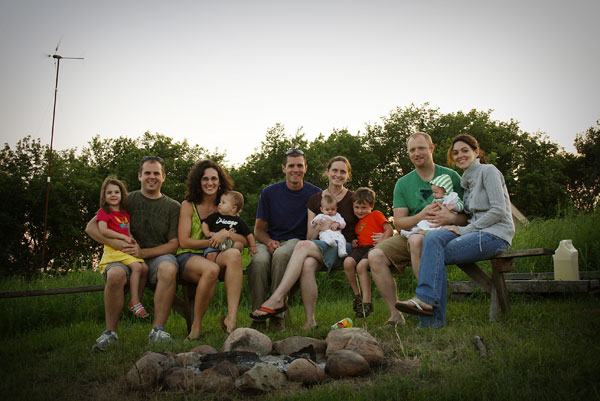
The photo on the left (below) was an impromptu photo of three families of friends. We set the camera on a table, lined up on the benches with our kids in our laps, and smiled for the timer. I love the casual and happy together-ness it exudes.
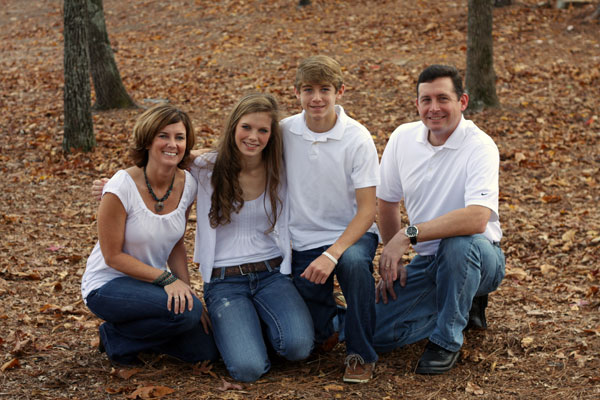
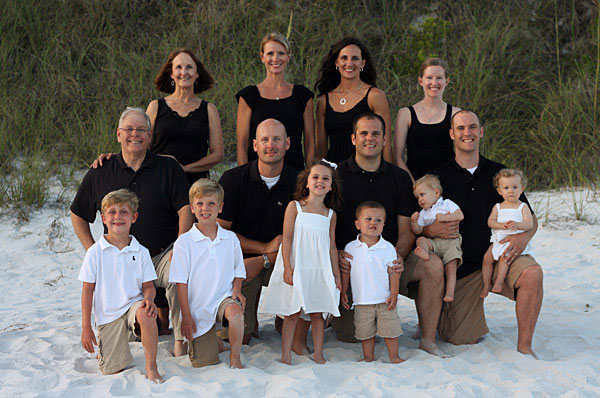
In the photo on the right (below), we asked the kids to stand/kneel/sit in the front row, dads to kneel in the middle row, and the moms stood in back. By having the tallest people (the dads) kneel in front of the women and behind the kids, we were able to create three levels of faces, that were all fairly close together, letting us get a tighter shot of the whole group, and creating a pyramid-like grouping.
Spontaneously Photographing Very Large Groups
When I'm at family events, holding my camera, I'm often asked to get a picture of the whole group. Since it's not a planned portrait setting time...we do this VERY quickly - like in about 5 minutes. It happens kind of like this:
Me (shouting): Okay everyone to the backyard! Stand right here. Families together! Get close. I can't see Uncle Josh. If you can't see me, I can't see you. Everyone look this way! Grandpa, get a little closer to Grandma. Mom, hold the baby on your other side. Okay, I can see everyone. I'm going to stand on the end next to Ben. Everyone ready? *press shutter* - RUN - RUN - *smile* - SNAP. Okay stay right there!!! RUN - RUN - *check image*. Let's do another one!
I'm usually only allowed about three of these before the babies start wiggling and crying and smiles begin to fade as everyone looks longingly at the cake inside waiting to be eaten. Perhaps a wireless remote would be helpful here so I could take several shots at once!
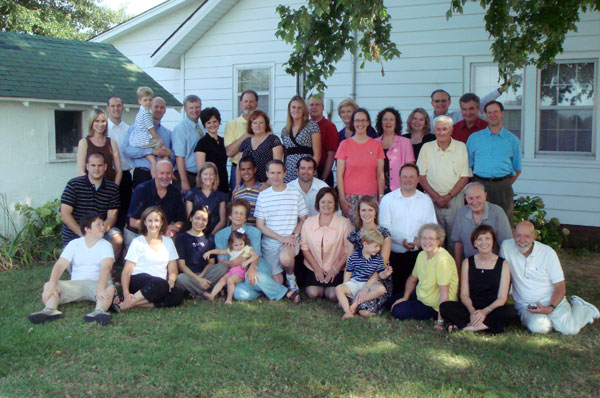
When you're taking a wide shot of a large group of people, I recommend going wide enough to get everyone in the frame from head-to-toe. There's nothing worse than having half of the group cut off at the ankle or elbows. If you aren't aiming for a head-and-shoulders-only shot of everyone, then go ahead and include everyone's entire bodies and leave a border of the background around the whole group.
Photographing Groups of Kids
Next let's talk about portraits of a large group of kids, and not-so-many adults. I'm still working on the logistics of mastering this, because kids are tricky...but I've had a few successes (or at least not utter failures).
Primarily, I've worked with grandparents & their grandkids and I simply surround the grandparents with the kids, letting them hold babies, younger kids' hands or placing a hand on an older child's shoulders. It helps keep everyone in place and creates a circular or triangular trail of vision around the photo.
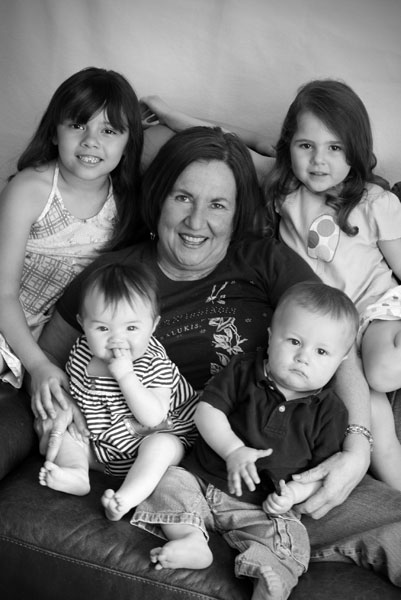
In the photo on the right (above), we used the arms and back of a couch to surround "Noni" with the older grandkids while the babies sat (held securely) in front of her as Noni lay sideways on the couch.
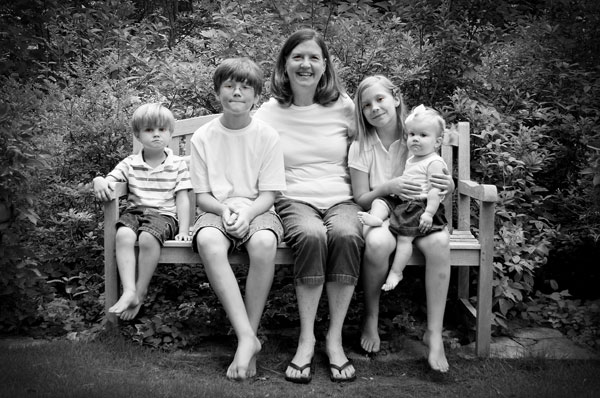
In the photo below, a park bench made a perfect spot for Grandma & her grandkids to squeeze together, creating a triangle of faces.
Older kids can also be very helpful in holding the toddlers and babies still - so use them if you're lucky enough to have a range of ages in your kid-filled portrait.
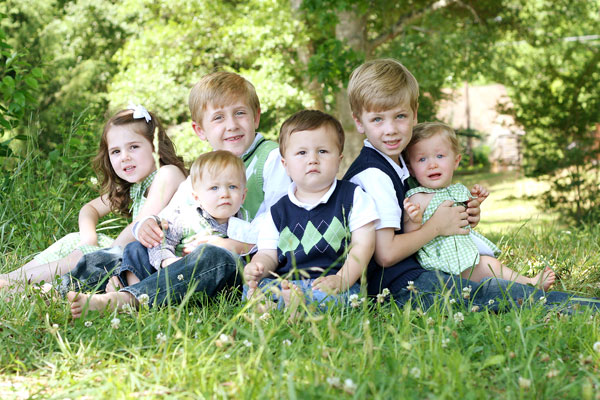
Our Steed cousins portrait attempt this spring was a little rough because the youngest two cousins weren't quite old enough to cooperate and the oldest two weren't quite old enough to keep the babies in check. My friend Molly Bridges (a local Birmingham, AL area photographer) took on the impossible task of photographing the 6 Steed grandchildren - all under age 7. With a crying baby girl, a stoic and serious toddler, and a big-boy with a just-broken arm, it just wasn't gonna happen in our quick little mini shoot. I think we'll keep the Steed parents in the photographs for another year or two before we can give this cousins-shot another try!
But smiling or not...Molly did a great job of positioning the kids so that we could clearly see their faces, staggering and layering them to add an interesting dimension. Plus, the foreground blur of the grassy field turned out so beautiful!
Getting Everyone's Attention
Now...getting everyone to look at the camera at the same time - let's talk about that.
My best recommendation is to have no more than 1 person stand directly behind you to make silly faces and catch the attention of all the subjects. EVERYONE else would ideally be completely out of sight.
This doesn't actually happen much for me. Usually I have a crowd of family members jumping and dancing behind me. But, my self-timer pictures with no one but the camera to look at proves my theory on this. In my experience, the less there is to look at, the more likely everyone will look at the camera. The more moms, dads, cousins, grandparents, etc. there are that try to make everyone laugh and look, ends up making the whole experience more chaotic, stressful, louder, and less-successful. Plus, I've been known to step right on top of my "helpers" toes as I move around to get the shot. I make no apologies for that. :)

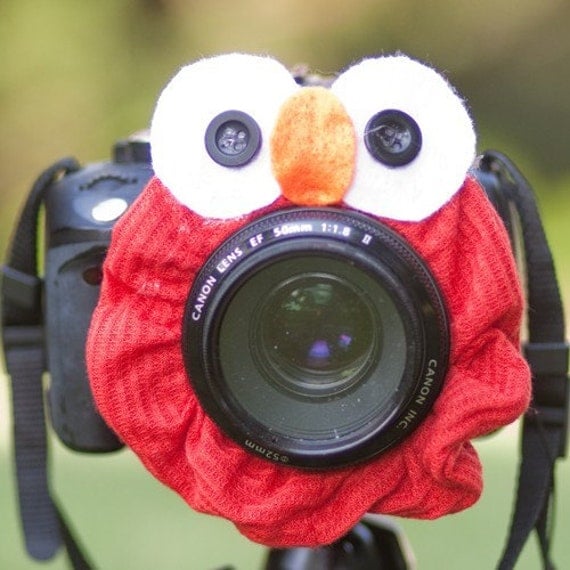 And I'm TOTALLY making myself one of these Elmo-like camera buddies to stick into my camera bag to help me out the next time I attempt that Steed cousins photo!
No Fail Artistry
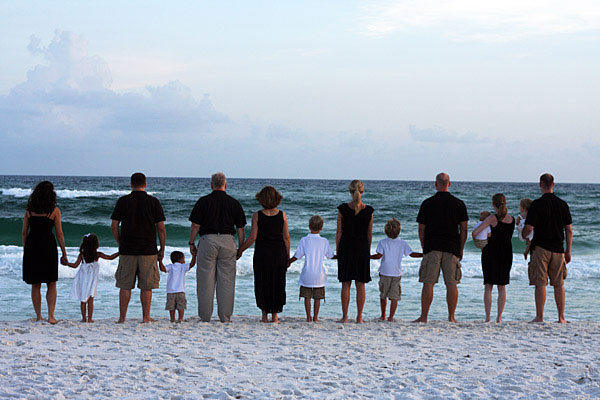
When all else fails...turn everyone around! No one will know what they were looking at, if they were smiling, and you'll get a sweet shot like this:
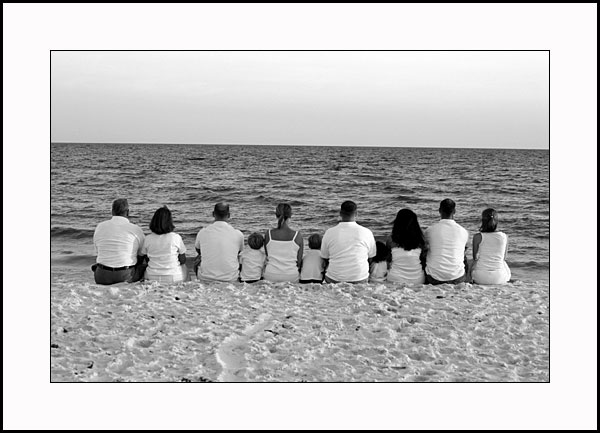
or this:
I hope this helps give you a few tips and tricks to try the next time you're asked to take (or choose to attempt) a large family portrait. Happy shooting!
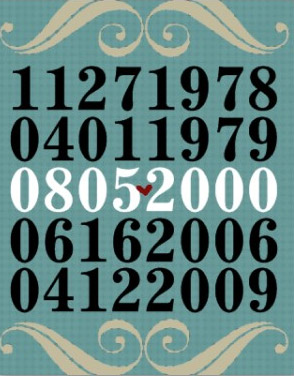
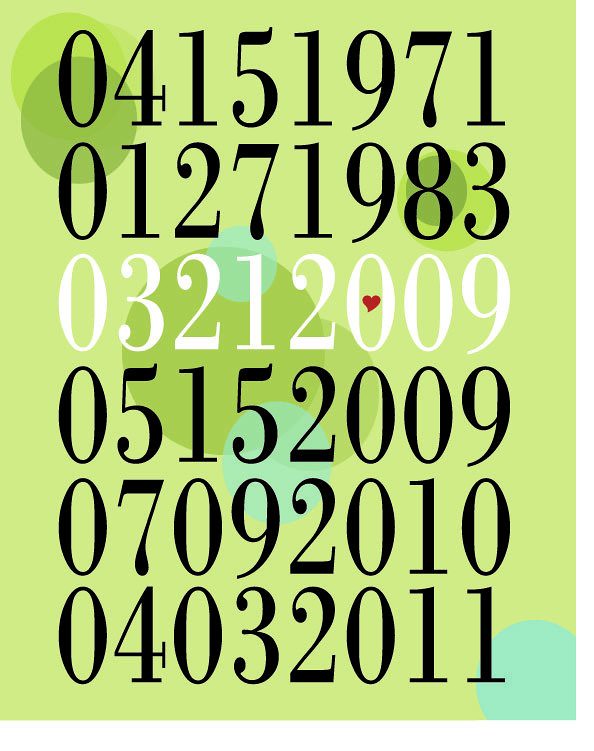
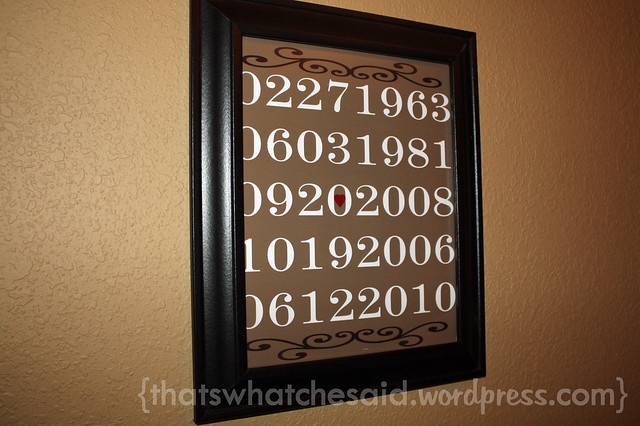
Dated Art in Action
You've seen my gallery wall and my Dated Wall Art artwork in action at my house. Here's another version I found on the web this week at the Glitter and Grits blog:

I love how Heather used the format of my Dated Wall Art poster, but then added her own twist, featuring her & her fiance's birthdays, their wedding date, first date, and engagement anniversary. What a great idea! And let's not forget that fabulous white painted frame around her gallery wall...it grounds it perfectly! Well done. Thanks for sharing how you used your (de)Signs by Andrea poster in-action.
She's not the only one either! Check out these great ways others have used this design & idea:


365 Days of Pinterest Creations


ixoye307 on flickr


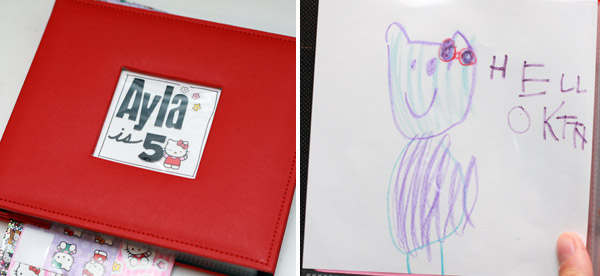
Hello Kitty Birthday Party - 5 Year Old
For Ayla's 5th birthday she requested (okay I might have suggested - instead of a princess or Dora theme) a Hello Kitty themed birthday party. Though she might have been slightly guided in her choice, she jumped on board and was very excited about it! She helped me with all the planning, looking for ideas, shopping for and making decorations. We started by making an idea board in Pinterest:
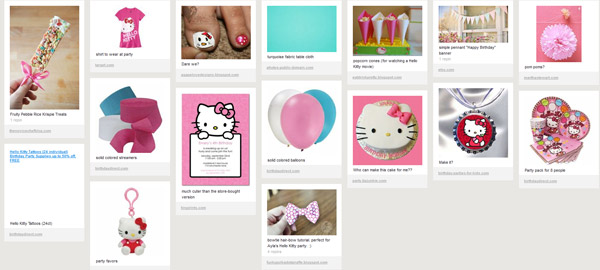
And though we didn't use all those ideas, they got the creative juices flowing. So here's what we DID end up with - a simple, low-key playdate birthday party for six little girls.
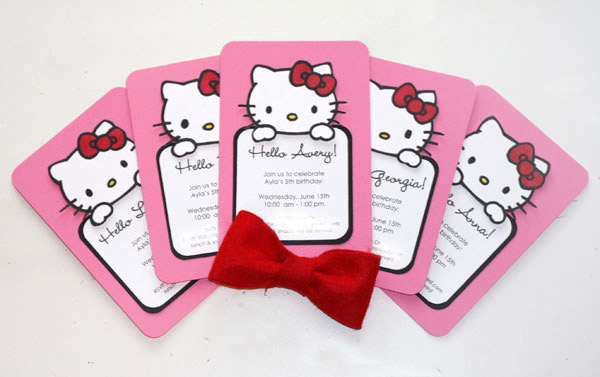
Invitations:
I fell in love with the design of these Hello Kitty Simple Sign invitations from Tiny Prints. I ended up making my own instead of buying them, primarily because I had all the materials at my desk the day I wanted to make them, but buying them wouldn't have cost much for the 6 I needed. If I had been making more than that I would have bought them. I also personalized each invitation for the girl we were sending it to. :)
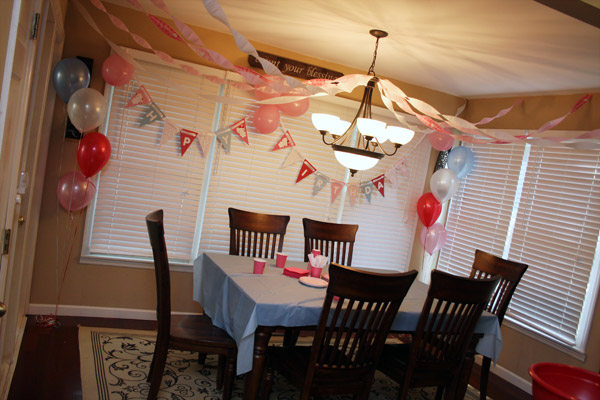
Decorations:
We kept the decorations fairly simple and only decorated in the dining room -- streamers, balloons, a handmade banner and a blue plastic tablecloth. I did buy some Hello Kitty themed plates, but stuck with light pink colored dessert plates, hot pink napkins and hot pink cups.
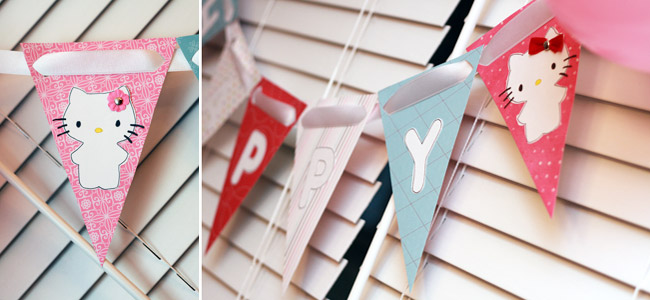
I made the "Happy Birthday" banner using the same technique as I showed in this handmade birthday banner tutorial using patterned paper and cardstock. Then I added some handmade Hello Kitty paper dolls to the ends of each banner, which I cut using this Hello Kitty font and my Silhouette.
Food:
Our party was from 10am to 1pm, so we served lunch. Ayla's menu request - pizza & pears. I added in pineapple and popcorn for a very simple lunch (all starting with P's). I had planned to do a semi-homemade cake by buying a round white cake from the store and drawing a Hello Kitty on top of it, but my VERY talented friend offered to make me the dream cake I'd been eyeing (see it up there in my Pinterest board?). She did an AMAZING job:

Activities:
This is where I'm weak in the party-planning department. It's just like when I was little and my siblings wanted me to play Barbie with them. I liked to set up the house, get all the dolls dressed up, and then just look at it. I forget that everyone else wants to PLAY. But I did diligently look for activities (with Ayla) that we could do with 6 little girls at her party. We considered making necklaces, or paper dolls, or doing a bingo game, but keeping time, resources & money in mind, here's what we settled on:
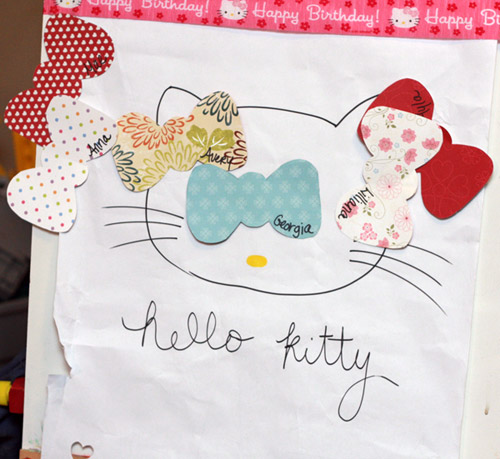
Pin the Bow on Hello Kitty - I drew a Hello Kitty head on Ayla's easel and cut paper bows out of patterned paper. Then we used a scarf as a blindfold and ended up with a pretty silly looking kitty.
Draw Hello Kitty - I gave each girl a 6" x 6" piece of white cardstock and asked them to draw their own version of Hello Kitty and decorate it with stickers. We put each girl's page into a small scrapbook that we'll add photos to for Ayla to remember her birthday party.
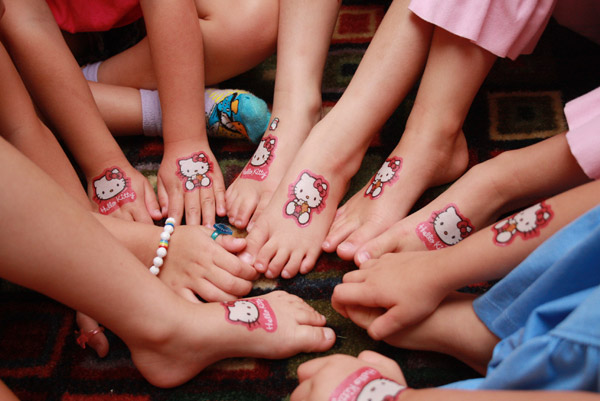
Hello Kitty Tattoos - I bought a 24-pack of Hello Kitty Tattoos at the party store, so each girl got 2 tattoos. They all enjoyed that and they got to practice counting to 30 each time we applied a tattoo. Look at all those tan little feet. These girls have been swimming this summer!
Play - These girls are 4 & 5. They played together most of the time in Ayla's room. :)
Movie - After lunch and presents, while we waited for their parents to arrive, the girls sat on the couch with a big bowl of popcorn and watched a 30 minute Hello Kitty episode on Netflix.
Favors:
No party is complete without favors. We raided the Target $1 bins and came up with pencils & erasers and notebooks for each girl. Plus of course, the felt Hello Kitty hairbows that I made and which were a big hit.

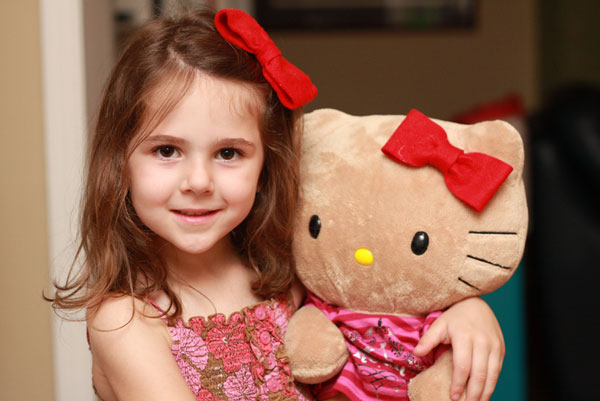
And...finally, I couldn't resist buying Ayla this SUPER adorable Hello Kitty t-shirt from Target to wear to her party:

There you have it. A super-pink, super-easy, super-cute Hello Kitty birthday party.
SLR Camera & Accessories: My Recommendations
 I'm often asked what kind of camera I recommend -- I guess because I'm always taking photos and I walk around with a big ol' honkin' huge camera, people think I have some authority and expertise.
Well, I don't know about all of that, but if you ask me what *I* think, as an amateur, hobbyist, not-for-hire, mom photographer - here's what I'll tell you:
Camera Recommendations:
Unfortunately, I don't have a recommendation for a point-and-shoot camera. I rarely use them, and when I do, they don't compare well to my SLR, so I just don't know much about the different point-and-shoot models and options, etc. Sorry!
I've always used Canon SLR cameras, so that's what I will recommend. That said, I'll bet the Nikon and other brands are fabulous too. I just haven't used them, so I couldn't say from experience.
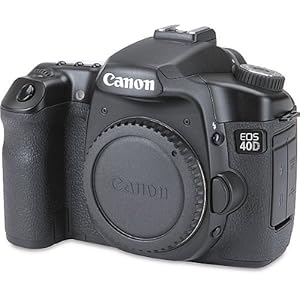 My current camera is the Canon 40D. I love it. I use mostly manual settings on it because I don't always love the auto-setting results it gives me. So I've learned the manual settings and techniques while using this camera.
Most of what I do is trial and error, but I typically shoot on AV priority and change the aperture based on the lighting and number of subjects in the photo. Low number (2.0) for less light, less subjects, and a higher number (5.0) for more subjects.
I also adjust the ISO - using a low number (200ish) for lots of light situations and a higher number for low-light situations (up to 1600, which is grainy, but still helfpul especially when a flash won't reach your subject as in a really large room).
I bought the 40D almost 2 years ago (instead of another Rebel) because I wanted the high ISO ability - up to 1600 (great in low light) - a super-fast recovery speed, and wasn't as interested in the video features that are available on many digital SLRs now (though now I might be more swayed toward that option). Also, since I bought a refurbished model, it was in my price range. So far, I've been very pleased.
My old camera was the original Canon Rebel. They have released several newer models since mine was introduced, all of which are a great deal and a great camera, especially for someone just getting started with an SLR camera. When I had that camera, I almost always shot with automatic settings, but with no flash. I wasn't brave enough to try the manual stuff then! I would definitely recommend the EOS Rebel series though.
PS: Don't be lured by oodles of megapixels. They're nice, they're great, but you can get a great 8" x 10" or 11" x 14" print with a 6MP image. You don't *need* 14MP for every photo. Most of the time I shoot on 6MP. Thousands of 14MP image files will fill up your hard drive fast! I only use the 10MP setting (the highest on my camera) for special occasions or portraits that might be cropped or super-enlarged for printing.
Lenses:
Let's talk lenses. Lenses make ALL the difference in the final image. My Rebel came with a kit lens - the 18-55mm zoom lens. It's kind of "eh" if you ask me. But..it's the only lens I used for years, so I can't bad-talk it too much. And it's still my only wide-angle lens, so I do pull it out occasionally when I need a wider angle shot.
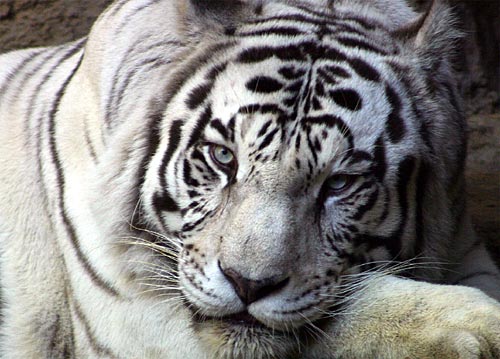
Eventually I bought a Canon 75-300mm zoom lens. I use it mostly for outdoor events when I'll be farther away from the action - the zoo, sporting events, beach, etc. It's a great lens, and takes fabulous shots, but it's heavy to carry around and my kids are usually too close to me to take photos of them with it. Someday it'll be great for sporting events. For now, I like to use it to get up close and personal to this beautiful beast (taken through glass at the zoo):
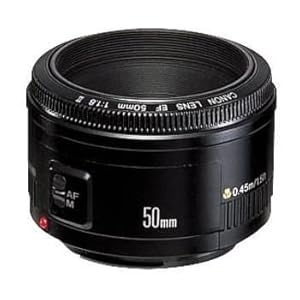 Then, I bought my favorite lens - the Canon 50mm fixed 1.8 lens. Some call it the "thrifty fifty" because it costs right around $100 and takes great portrait photos with low aperture (lots of great blur behind the subject of the photo). That also means it does well in low light situations without a flash, which is nice when you take pictures indoors, but don't like using an on camera flash (solution for that later). I highly recommend this lens for anyone with little kids. Even though it doesn't have any zoom, it's usually at just the right distance for great portraits of the little guys and girls. Occasionally I wish it was a wider angle (like when Paxton is crawling into my lap or running towards me while I try to take photos), but most of the time, this is the lens you'll see on my camera. In fact, I've bought it twice, because I dropped the first one and it broke. At only $100 it was worth immediately replacing.

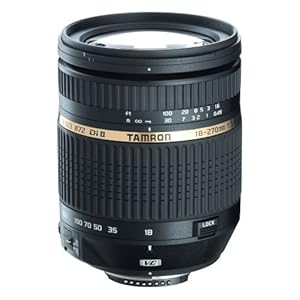 Now...on my WISHLIST is the all-inclusive ultra zoom lens - theTameron AF 18-270mm. If I could sell my 75-300mm & 18-55mm to buy this lens, I would. But, I'd still be short about $500, so I better sell a few more signs first. :) It appears to be a great all-purpose lightweight lens that would be especially wonderful for traveling. I would LOVE to try it out one day.
Flash:
Don't use the on-camera flash unless you have absolutely no choice. Blech. Those pictures usually look terrible - washed out, flat and boring.
A bounce-flash is nice, I used to have a Canon Speedlite flash that I liked. It could bounce light off of walls, cielings, etc. However, it was bulky, ate batteries, and was an expensive piece of equipment. I sold it a few years ago when I needed to replace my Rebel with a new camera since it had sa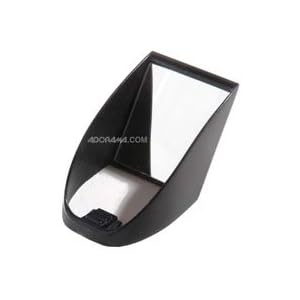 t unused for several years and I haven't really missed it.
Recently, I discovered this fabulous jewel - the LightScoop. At only $30 it does what I loved about the Speedlite, for MUCH less, and it doesn't require any batteries and is extremely lightweight. SCORE. It uses a mirror to bounce light off of a light-colored ceiling or wall and softens the photo perfectly. It's best in rooms with low to mid-height ceilings, and might not be a good choice if you have really tall or dark painted ceilings (like it wouldn't work in your car). But if you're like me and have white 9ft ceilings in your house -- it's perefect! Check it out:
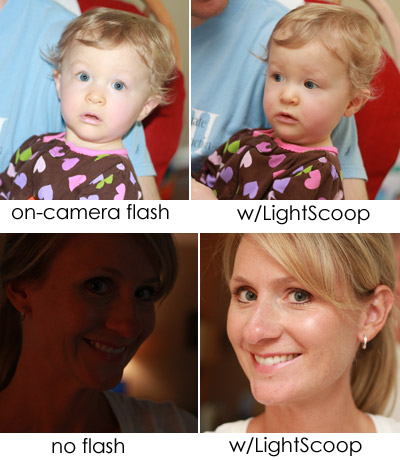
Cool, huh? My indoor photography style has been changed forever. Love this new toy.
Accessories:
And of course, there are a few extras you'll want to have when you make a jump to an SLR camera.
-
A good memory card (or 3). I use a Kingston Elite Pro 8 GB 133x CompactFlash Memory Card, and since I dump my pictures to my hard drive daily, I NEVER fill up my memoy card -- but it's a big one, so I shouldn't! It is definitely worth having at least one backup though.
-
Speaking of backups - a backup battery is a VERY good idea. I've been left with no battery power at the beginning of a big event more times than I care to admit. Though I will say, I'm very impressed with how long the battery lasts. Often a week or more, depending on how often I use the camera.
-
 A lens-cap keeper for each lens. It's annoying to hold them, keep track of them, and even more annoying to lose them and not have anything to protect your lens. These little rubberband-like straps keep the lens cap attached to the lens -- definitely more helpful there than squashed in your back pocket.
-
A UV Protection Filter for each lens. These are a very good scratch insurance policy. It's so much easier to replace a $12 filter rather than your $300 lens. Going to the beach? You better have one of these on each lens!
-
A tripod. I wouldn't be able to get my self-timer full family photo shots without a decent tripod. Ours is kind of a mid-range Ambico model, with a quick-release mounting system. It works sufficiently and we also use it for our video camera. A mini-tripod that fits in your bag would also be a good investment if you do a lot of traveling, though I don't have one of those...we just drag the big tripod with us to the beach for our family portraits!
-
On my wish list - I still haven't bought one, I guess because I like that self-timer-running-to-get-into-the-picture-rush - is a wireless remote shutter release. Then I wouldn't *have* to do the running back and forth and could take several shots at once when you got it framed the way you wanted it.
-
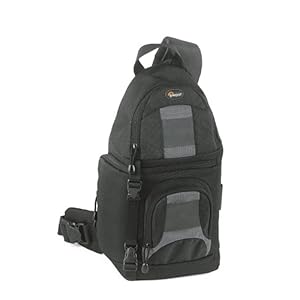 And, finally with all that stuff...you need something to carry it in and protect it. There are all kinds of REALLY cute camera bags and options out there, but I have a pretty basic backpack style bag, simliar to this Lowepro Slingshot 100 all-weather digital camera bag. It holds all my gear, plus my wallet, keys, phone, gum, and of course a diaper & wipes & a snack. Let's be honest, we all need a multi-purpose bag that lets your hands be free! This one does the trick. Plus you can whip it around to the front of you to get what you need without taking the whole bag off. It was a fabulous solution when we went to Disney World a few years ago.
Photo Editing Software:
Finally, I highly recommend finding a photo editing software program that you like. I started with Paint Shop Pro years ago, then switched to an old version of Adobe Photoshop 4.0 and then within the past couple of years have switched to Adobe Photoshop Elements. It's a cheaper version of Photoshop with many of the same bells and whistles. I've really enjoyed learning all about it and using it to enhance my photographs. I know there are other software programs that are cheaper and that people love as well...but if you ask for my help - this is the software I know, so I won't be much help with the others. :)
And there you have it folks. Those are my digital SLR camera & accessories recommendations. Take them for what they are - from a photo-lovin' mom of two preschoolers, scrapbooker, blogger, and artist - and NOT a professional photographer. :)
If you have other questions about the equipment I use or what I recommend, post them here and I'll try to update this post as necessary!
Here's a list of all the products I mentioned:
- Canon EOS 40D 10.1 MP Digital SLR Camera
- Canon EOS Rebel Series
- Canon EF-S 18-55mm f/3.5-5.6 IS SLR Lens
- Canon EF 75-300mm f/4-5.6 Telephoto Zoom Lens
- Canon EF 50mm f/1.8 II Camera Lens
- Tameron AF 18-270mm f/3.5-6.3 Lens
- Canon UV Protection Filter
- LightScoop
- Ambico V-0554A 58-inch tripod
- Wireless Remote Shutter Release for Canon 40D
- Lens Cap Keeper
- Kingston Elite Pro 8 GB 133x CompactFlash Memory Card
- Adobe Photoshop Elements V9.0
- Lowepro SlingShot 100 All-Weather Digital Camera Backpack
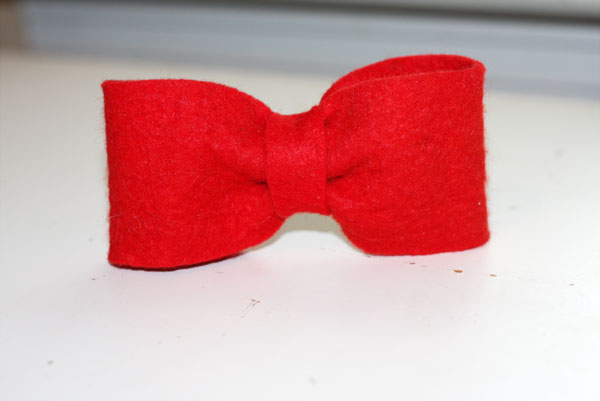
Hello Kitty Bow Tutorial - Felt Hair Bow
For Ayla's 5th birthday party next week, we decided to invite a small group of girls and have a Hello Kitty theme. Since we invited only 5 girls, I thought it would be fun to give each girl their very own "Hello Kitty bow" as one of the party favors. So I made them...of course.
I looked around for some bow-tie style tutorials, and found a great one, but it required some machine sewing and precision - which I *can* do, but it's not always very pretty (or precise). So, when I realized I had plenty of red felt and hair clips on-hand already, I altered the tutorial to make it a little easier, a little cheaper, and without quite as much sewing.
-
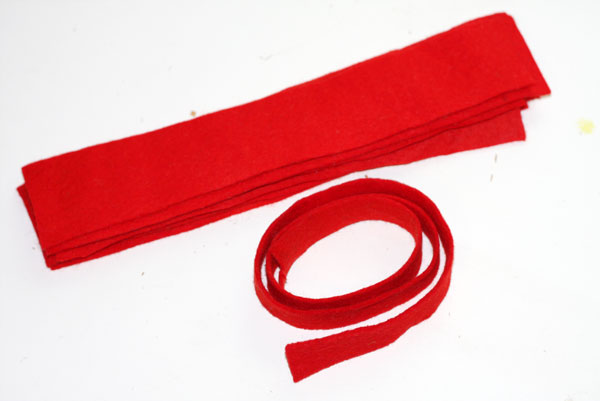
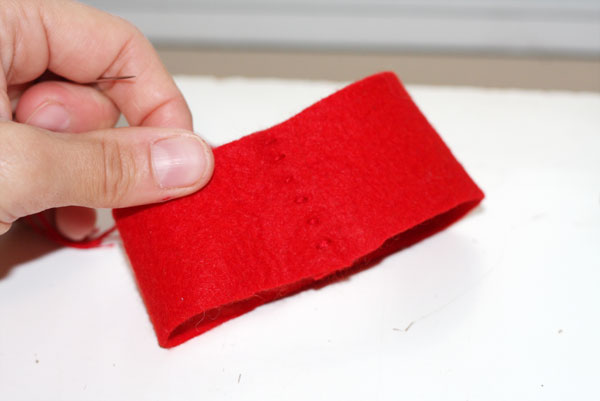
Cut felt strips, about 2" x 9". I made 8 bows, but you only need one of these strips per bow. Plus, then I also cut a strip of felt about 3/4" wide and a couple feet long to use as the wrap around the center of each bow.
-
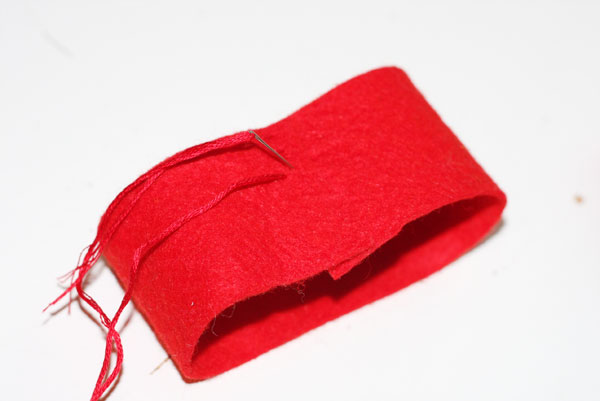
Next I hand-stitched the 2" x 9" strips to make a loop.
-
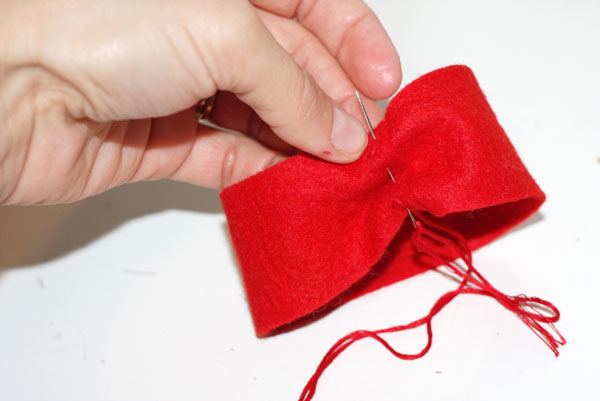
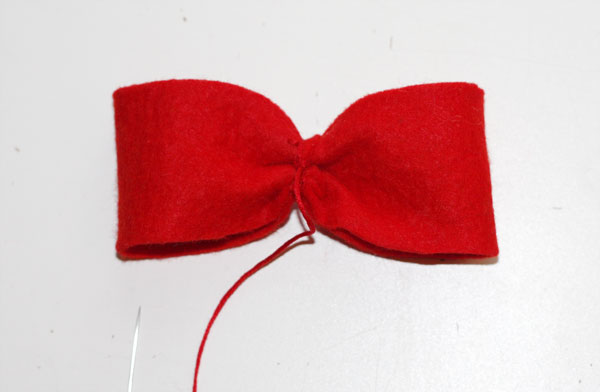
Before cutting the string, I did a loose stitch up the center of the bow (through both sides of the loop) and pulled it taught to create a gather in the center. Then I wrapped the string around it a few times and secured it with a few stitches.
-
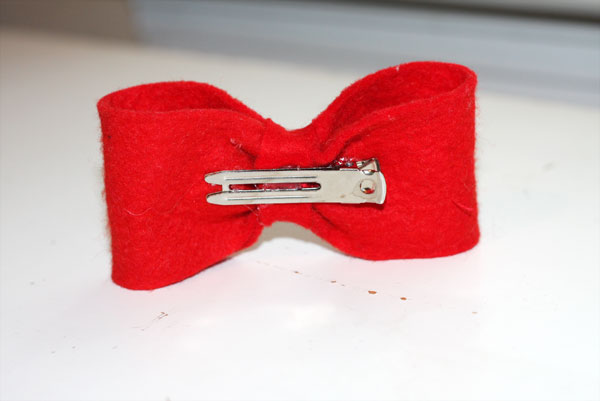
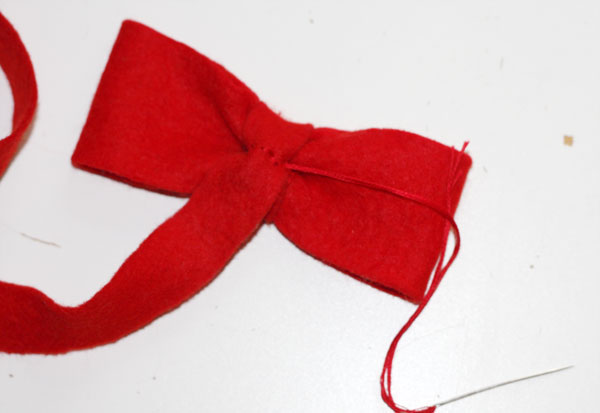
Next, I wrapped the narrow strip around the bow to make the center have a clean look, and stitched it together on the back side (securing it to the bow as well) and then trimming off the excess felt.
-
Finally, I secured the bow to a hair clip with hot glue and called it done!