Andrea's blog
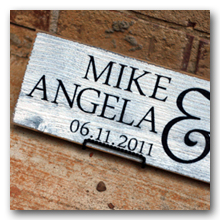
New Website & HUGE Signs by Andrea Sale!
Wow! I've got all kinds of news! A new website, changes on A.Steed's.Life., and a BIG, HUGE, ONCE-A-YEAR SALE.
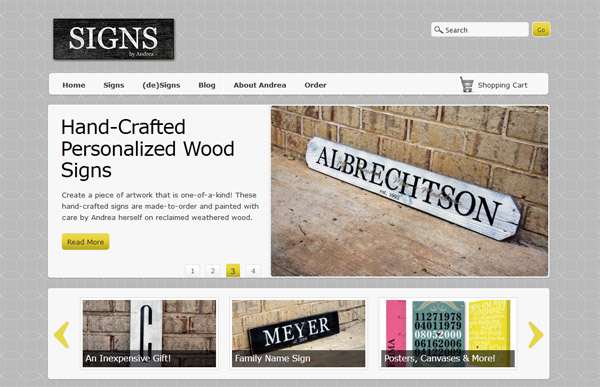
Over the past several weeks, my own personal webmaster (aka Ben) has been hard at work helping me put together a brand new web site for Signs by Andrea. My sign business and Zazzle poster sales have grown so much over the past year, it was time to give them both the attention they deserve. To do this, I'm separating my blog into two separate websites:
- AndreaSteed.com will remain my personal journal and crafty blog.
- SignsByAndrea.com will now be dedicated to news and information about my signs and (de)Signs, as well as a great source of inspiration for all sorts of home decorating tips and ideas.
I think you'll find the new website is easy to navigate and offers a much more pleasant shopping experience. Now you can personalize and add any of my signs to your shopping cart instantly, pay online, and track the status of your orders. It's fabulous. I'm beyond excited. :)
And this new website couldn't have come at a better time (nothing like a deadline to get us going).... Beginning today, I'm offering my HUGEST sign sale of the year. It's time to start getting your shopping underway and get ahead of the holiday rush. This is the one sale you want don't want to miss. It doesn't get any better than this:

So come on over now and check out the newly launched SignsByAndrea.com and tell me what you think!
Oh yes she DID!
Remember back in March, when I made this logo as a birthday/retirement gift for my mom?
![]()
Well, this summer I got to see it in-action on her Spyder:


And now she's taken it a step farther - just like I thought she might! She had her already-there spider tattoo (between her shoulder-blades) turned into a variation of the logo -- amazing.
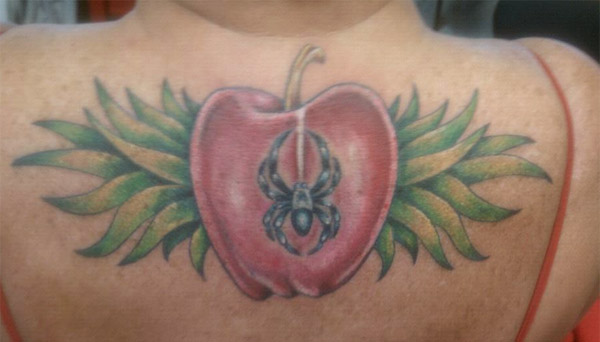
Does this make me a tattoo artist? ;)
Annual Halloween Costume Album
I'm an annual one-page-a-year-scrapbook kind of girl. Just look at my past albums, and you'll know it's true:
And especially now, since I'm no longer making a yearly scrapbook album, it was time for me to get a few more of those one-page-a-year albums up and running -- starting with Halloween, my favorite holiday! I wanted a simple little album that we could pull out each year with our Halloween decor that showed off all the kids' costumes throughout the years.
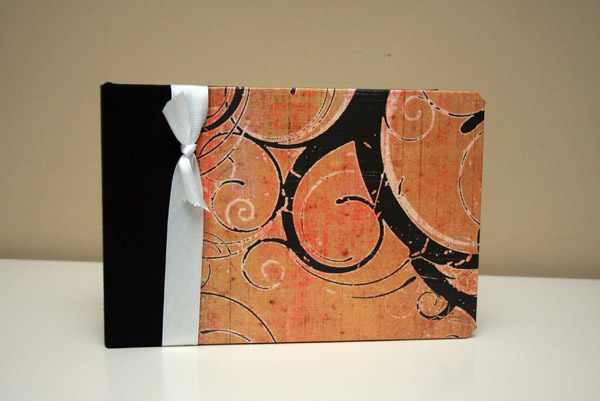
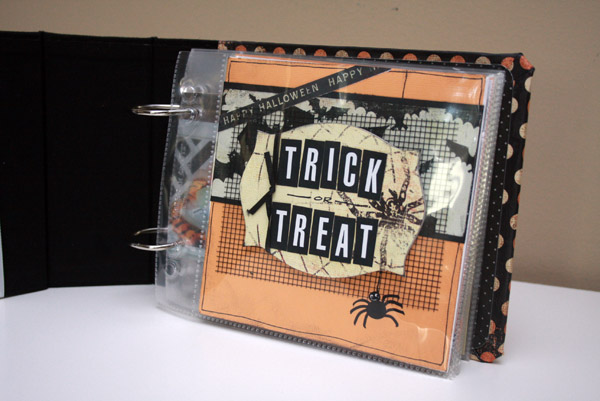
I used a 6" x 6" American Crafts D-ring album that had a plain chipboard cover that I could customize. I decorated it with patterned paper and mod podge to "wrap" and cover both the front and back of the album. I believe the papers I used are by My Mind's Eye, but I know they're from several years ago, so they may no longer be available.
The first page of the album is a themed-out title page, with black mesh and typical iconic Halloween embellishments (spiders, bats, etc.)
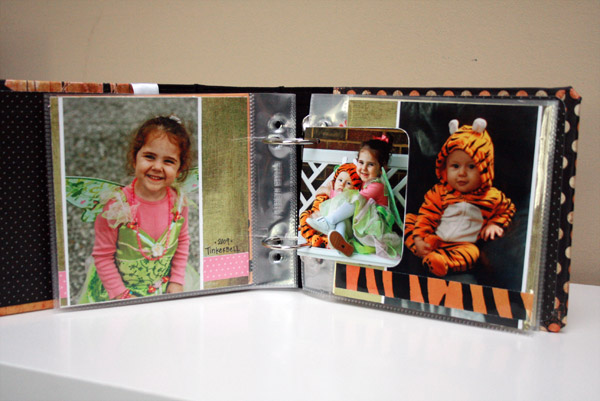
On the rest of the pages, I made sure to include a photo, the year, and a costume description (in case one day we can't tell what they were supposed to be!). For Ayla's baby and toddler years, each page was dedicated to one year...

And when we added Paxton to the family, each child got a page in a facing spread. Plus, I added an insert between the two pages for a photo of the two kids together in their costumes.
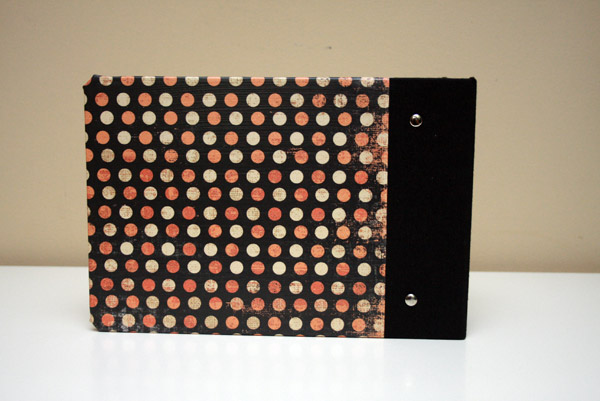
Here's a look at the back cover of the album. Something simple, easy to keep up, and a great little Halloween decor piece to boot. :)
On Marriage...via Alice
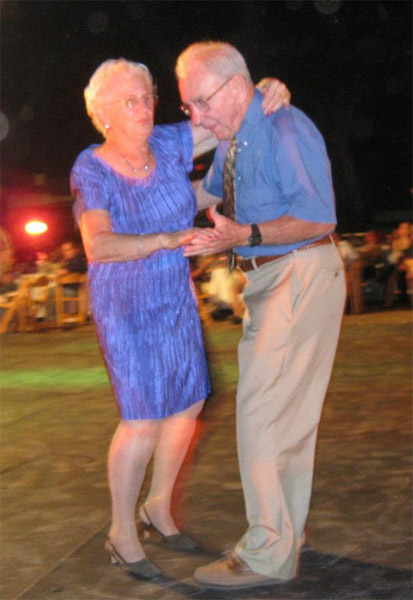
My grandmother sent this to me today - a speech she wrote for my cousin's wedding brunch a few weeks ago. My grandma is a smart cookie. So is my grandpa for that matter. I'd like to read his version sometime too! ;)
HOW ALICE AND ELLIOTT HAVE SURVIVED MORE THAN 62 YEARS OF MARRIAGE (Alice’s version)
 LOVE
LOVE
….not just being in love
…saying “I love you” often, anytime, anywhere
…showing it in the little things you do for each other that aren’t required or expected.
....physically…touching, feeling, hugging, kissing, holding hands, anytime, anywhere.
RESPECT
...for the things that are important to each of you,
…for the differences. Differences are what make life interesting. You all know that I operate at full speed ahead and Elliott is “what’s the hurry?” I always say I make his life interesting and he makes my life comfortable
AGREEMENT
…in spite of differences, you have to agree on some pretty basic things.
…how you spend money and where, how you don’t spend money and where.
…what values you want to instill in your children by your example. What you expect of them. What kind of discipline you agree on.
…how you relate to family and friends….on both sides. You all know that Elliott and I don’t miss anything, especially since we have had the time and the money. As Elliott tells people “If you don’t want me to come, don’t ask me.
COMPROMISE
…there are probably plenty of things about each other that bug you. That’s probably not going to change. Get used to it. Try not to mention it too often. Bite your tongue.
…on the important things. Know when to stand your ground and know when to say “uncle” or to compromise. Some things are not worth fighting over. You can’t always have it your way.
GENES
…fortunately, Elliott and I seem to have been born with good genes. We are two smart, capable, stable people in pretty good health (compared to everyone else we know our age.) We don’t get credit for the good genes. But I think we do deserve credit for taking advantage of them.
Which is my last piece of advice. Take advantage of what you have been blessed with. You only go around once. Live well and healthy.
Love,
Grandma
Black & White Pumpkin Tutorial
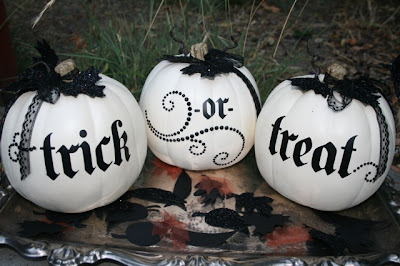
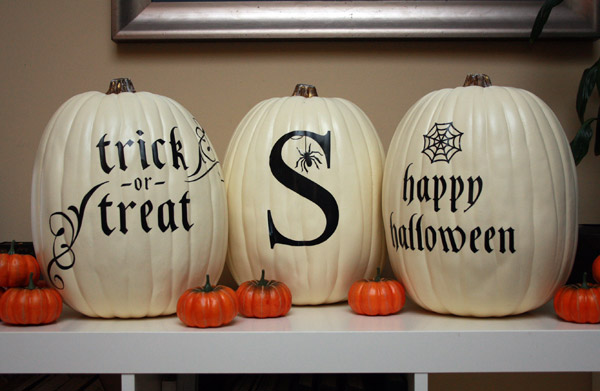 Inspired recently by the really cool white pumpkin w/black lettering trend, my sisters-in-law and I had a girls night and made our own versions.
Here's how we did it:
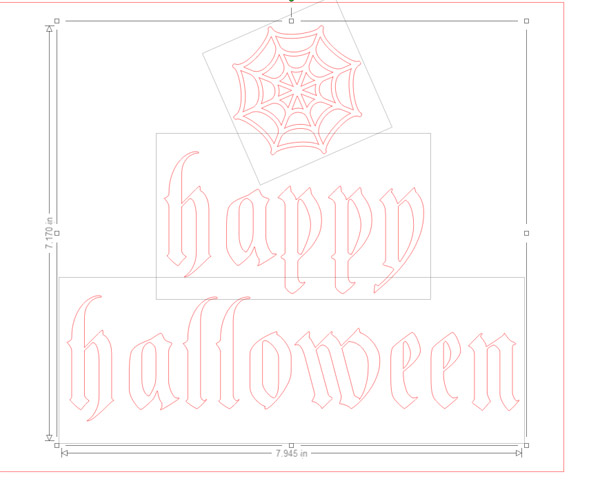
First, design your lettering and graphics to cut out of black vinyl. We used my Silhouette software and the font BlackKnight FLF - which is a fabulously Halloween-y font - to make the designs.
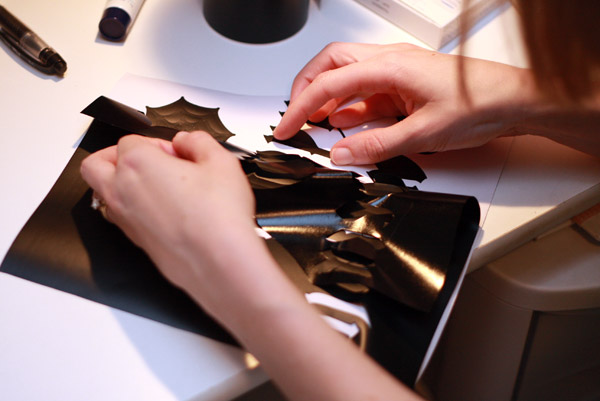
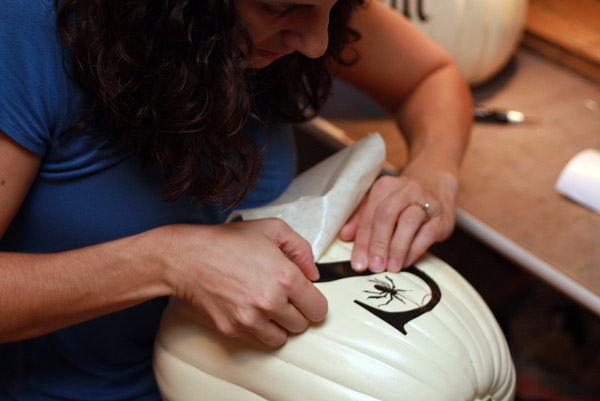
Peel back the excesss vinyl, leaving the lettering and design.
Then press the transfer paper to the design so that you can place it easily on the pumpkin. We used large artificial white pumpkins (purchased at 50% off from Michaels.)
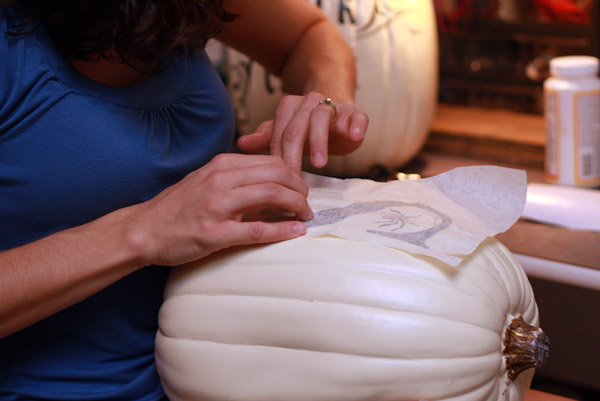
Gently peel back the transfer paper and press the vinyl onto the pumpkin, revealing your design.
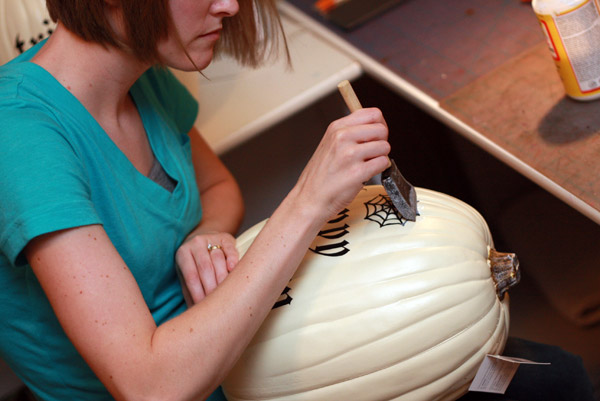
We decided to add a thin coat of matte Mod Podge over the design, to be sure it stayed put (since the adhesive vinyl didn't seem to be well adhered to the pumpkin. Plus, we thought we might display our pumpkins outside and wanted to help keep them from peeling.
I was so happy with how they turned out, and amazed at how easy it was to do! Here's a look at all three of our creations:
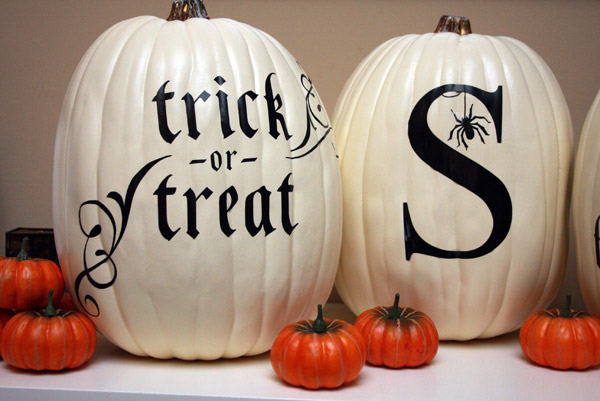

We aren't the only ones with awesome black and white pumpkins. Here are some versions around the web that inspired our evening:


Fall Sign Sale - Trick or Treat - Count Your Blessings
Looking for a fabulous new addition to your fall decor? How about a custom Sign by Andrea? For a limited time only, these seasonal custom-designed hand-painted signs are only $20!*
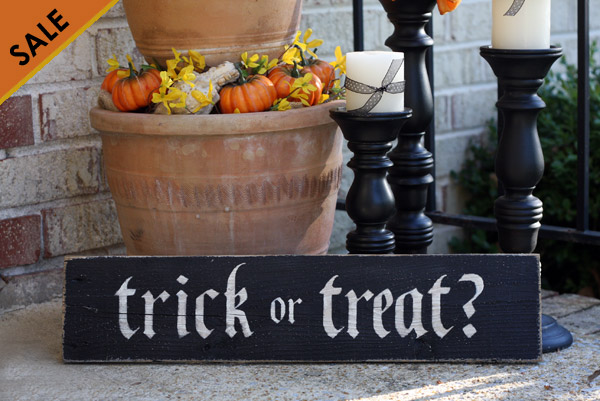
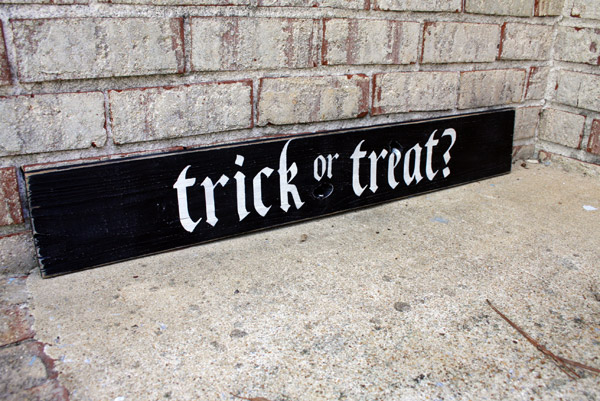
Trick or Treat? - black w/white lettering - 2ft x 6in - $20
- order -

Count Your Blessings - brown (as shown) or black w/white lettering - 2ft x 6in - $20
- order -
*$45 regular price. $20 fall special runs through November 9th, 2011. Both sign designs are also available with optional beveled edges (+$5).
Don't forget to check out my other personalized sign designs when you order so you can combine shipping costs. It's not too early to start thinking about holiday gifts!
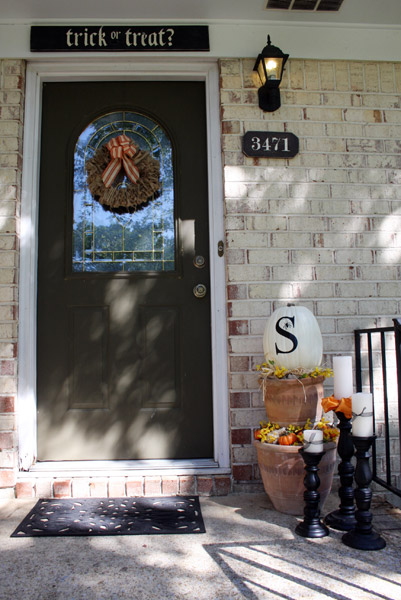
Fall Front Porch
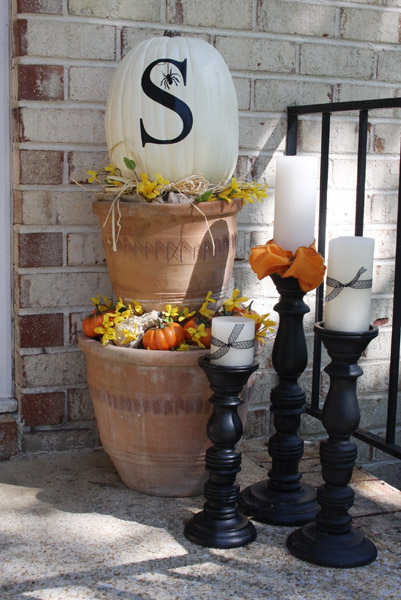
Friday was a gorgeous day, so Paxton and I sat out on the front porch decorating for fall.

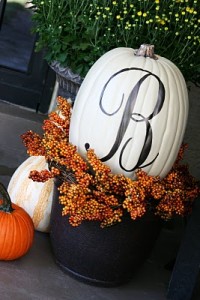
I dug through the garage to find a set of four pots to create this stacked potted design (just put a smaller pot upside down inside each of the two pots you can see in order to have a strong base for teh next pot and the pumpkin to sit on. Then I filled the empty space inside the pots with grocery bags and covered it with a piece of burlap fabric before adding the little pumpkins and flowers.
The pumpkin is decorated with a vinyl "S" & spider decal (tutorial on that coming soon), and I decided that since those candlestick holders had sat in a bucket in the garage for several months, it wouldn't hurt anything to use them in some outside decor. :)
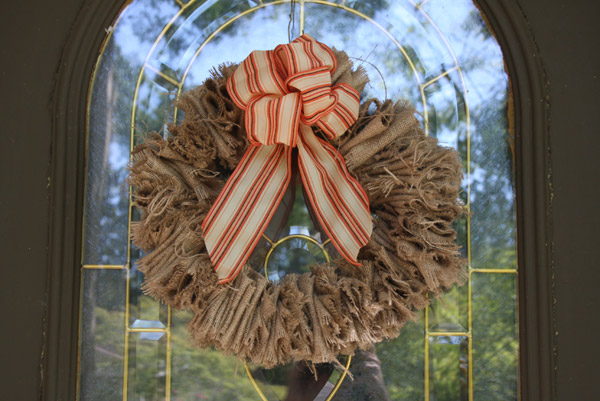
I made the wreath with a metal hanger and strips of frayed burlap, following this great tutorial.
And then I added a seasonal 3ft custom "Trick or Treat?" sign over the door. I think I'll replace it with a Thanksgiving-themed sign in November and then a Christmas-themed sign in December and continue to change it out as the year progresses.
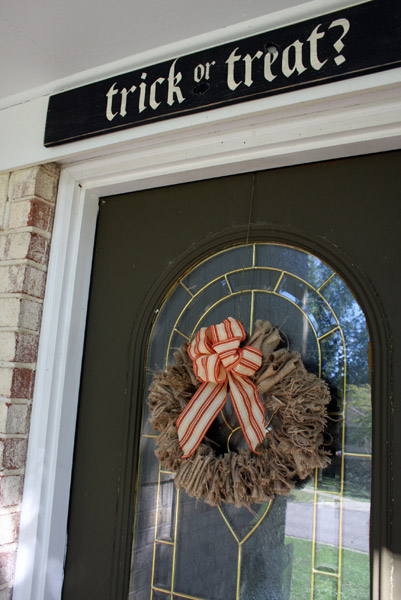
For a Friday morning sitting on the front porch enjoying the weather and using all stuff we already had on-hand, I think we did okay. :) Ayla was excited to see it when she got home from school and now likes to walk in through the front door whenever we get home from being out. :)
Halloween Decor - Around the House 2011
I don't do much seasonal decorating around the house, but when Halloween and Christmas roll around, I am willing to pull out my bucket of decorations. The kids have a blast seeing all the little goodies that have been boxed away for a year, and it's a nice transition into the holiday season. So, even though our little plastic pumpkins and homemade decor are pretty basic...we do make an effort. :) And I say "we" because Ayla and Paxton were VERY involved in the process...they even helped me clean the house so that we could bring in the decorations.
Here's what we ended up with for our fireplace mantle in the playroom this year for Halloween:
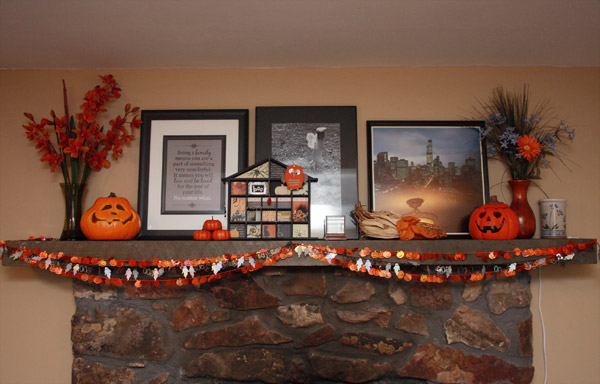
My altered halloween house is my favorite decoration for this season, and the glittery pumpkin and "boo" garland is definitely a kid-favorite - especially since Paxon's favorite color is orange right now (he points it out everywhere).
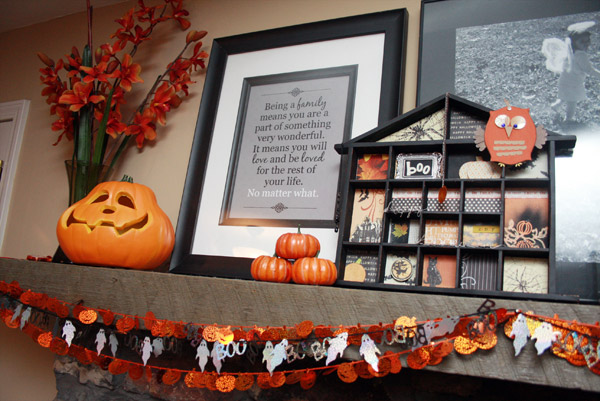
I framed my "Being a Family" poster and included it on the mantel too (it & the other photos sit there all year).
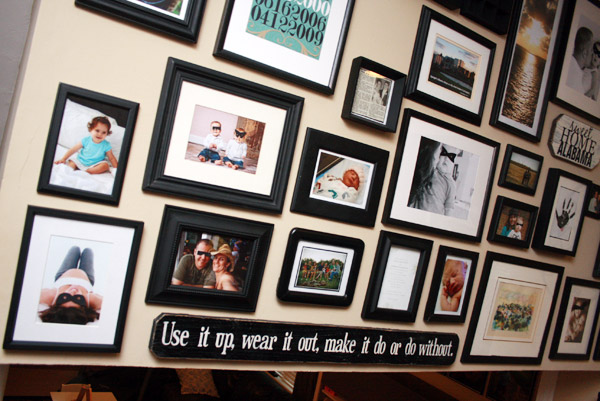
In the kitchen, we went for a more subtle decorating technique -- but I LOVE the element of surprise. Check out our gallery wall and all the little masked friends! I saved the black cardstock masks I used from last year so that all I had to do was find a photo that fit and stick 'em to the glass.
Plus, I made this trick or treat sign and have a special place in mind for it on our front porch (pictures coming soon!):
Since the weather finally cooling off this week, it's definitely starting to feel a little more like fall around here! Might as well look like it too. :)
Except now Ayla and Paxton think Halloween is MUCH closer than it is. They don't really understand that it's still a whole month away...They've been walking around the house carrying little pumpkin bags, knocking on each door and saying "trick or treat" and handing each other toy cars and pretend candy. Silly kids.
Curly Girl Method - Before and After
NOTE: Over the years, I've learned that many of the products I have listed here are NOT curly girl friendly. My most recent routine has cut all those sulfates and silicones out and DEFINITELY gets me better results -- which you can see down at the very bottom of this post. And I'm still learning and figuring out what works best for my hair.
Thank you for those who have commented and shared their experiences to help me along the journey! Here's how I began and where I've ended up --


Several weeks ago, I borrowed this book from the library - The Curly Girl Handbook by Lorraine Massey. I was in desperate need of a haircut, was wearing a lot of ponytails, the weather was humid and atrocious, and I had read about this "Curly Girl Method" and figured I'd see what it was all about.
The handbook convinced me to give it a try - for at least 6 weeks. I mean, look how pretty those curls are! I was wearing my hair curly most days anyhow with all the insane Alabama humidity, so why not try to make it look better when I did wear it that way? Plus, it looked like the process would be pretty easy...just a little odd, since you have to quit using shampoo.
Okay, let me explain...
The Curly Girl Method
Here are the basics of what I did:
- Get a haircut. I needed a trim, badly. It had been about a year since my last haircut.
- Quit using shampoo - cold turkey. Evidently sulfates are a big no-no for curly girls.
- Use a light conditioner - I used Suave Naturals Conditioner - just on my fingertips, and vigorously massage my scalp with it. This is supposed to remove all the oils, dirt, hair product, dead skin, etc.
- Rinse hair thoroughly, starting to detangle with my fingers.
- Apply a deeper moisturizing conditioner - I used Giovanni Conditioner - from the bottom up covering the ends first and moving upward in a scrunching motion.
- Comb through with a wide-toothed comb to remove tangles and loose hairs.
- Scrunch again and let conditioner sit on your hair for a couple of minutes.
- Rinse hair gently, but not completely, leaving much of the conditioner in it.
- Squeeze hair dry in the shower as much as possible, still using that scrunching motion.
- Use a t-shirt to scrunch the curls dry, squeezing out more water. According to the book, terry cloth towels can cause a lot of breakage, but cotton doesn't.
- Apply gel (lots of gel) from the bottom up in a scrunching motion (curly girls REALLY like the scrunching) - I started off using Suave Naturals Gel, but later switched to LA Looks (about week 4) and liked it much better.
- Let hair finish air drying.
- About an hour later, I would turn my head upside down and shake my hair out, scrunching the curls to "release the gel cast" from the gel.
So that's the method I used...and here's what I thought of it and how it worked:
Week By Week Results
First...this is the hair I was aiming for. Realistic? Maybe not (especially since she has about a foot of length on me and is some sort of model). But we all start with a wish, right?

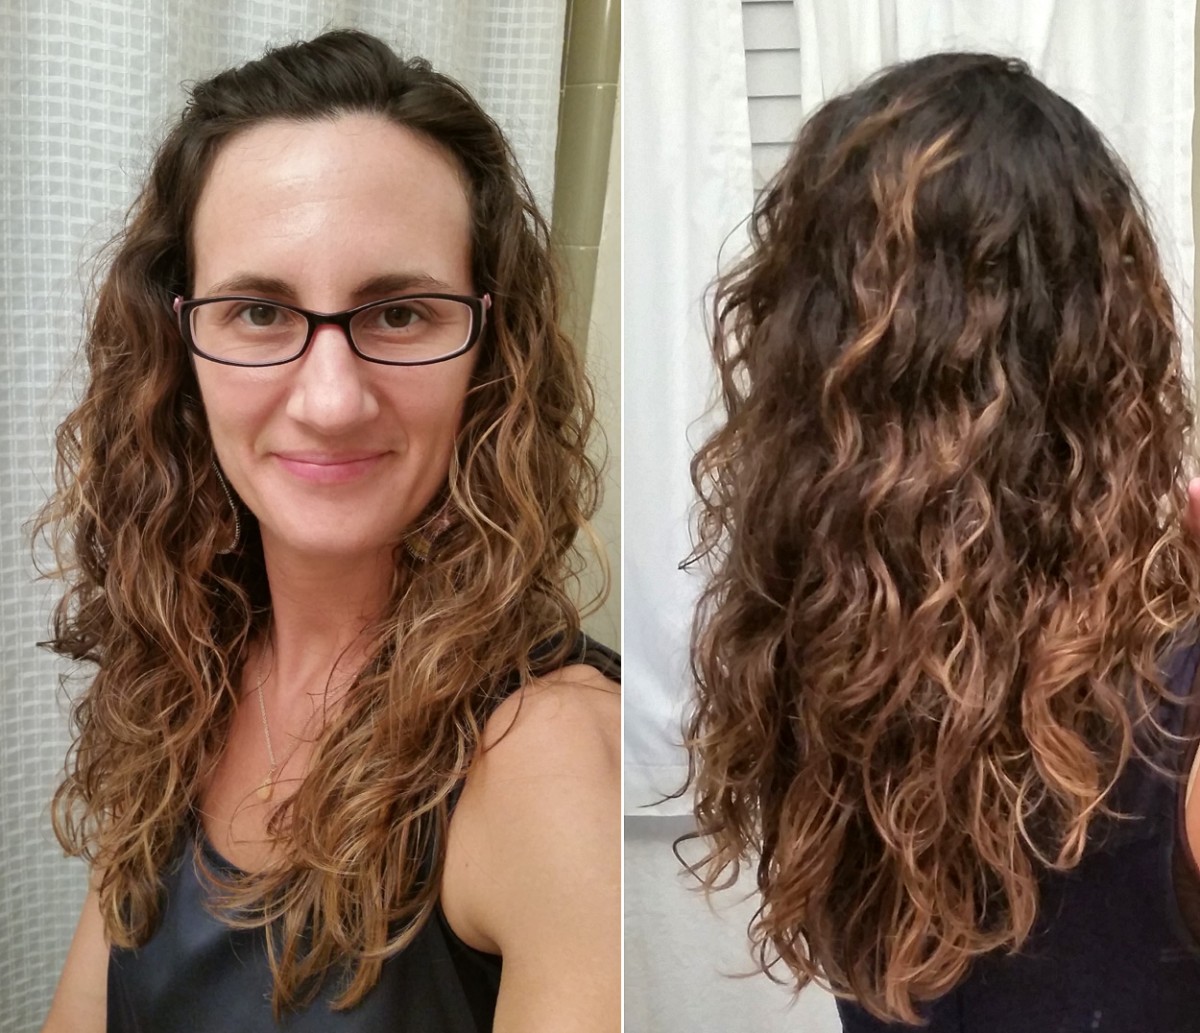
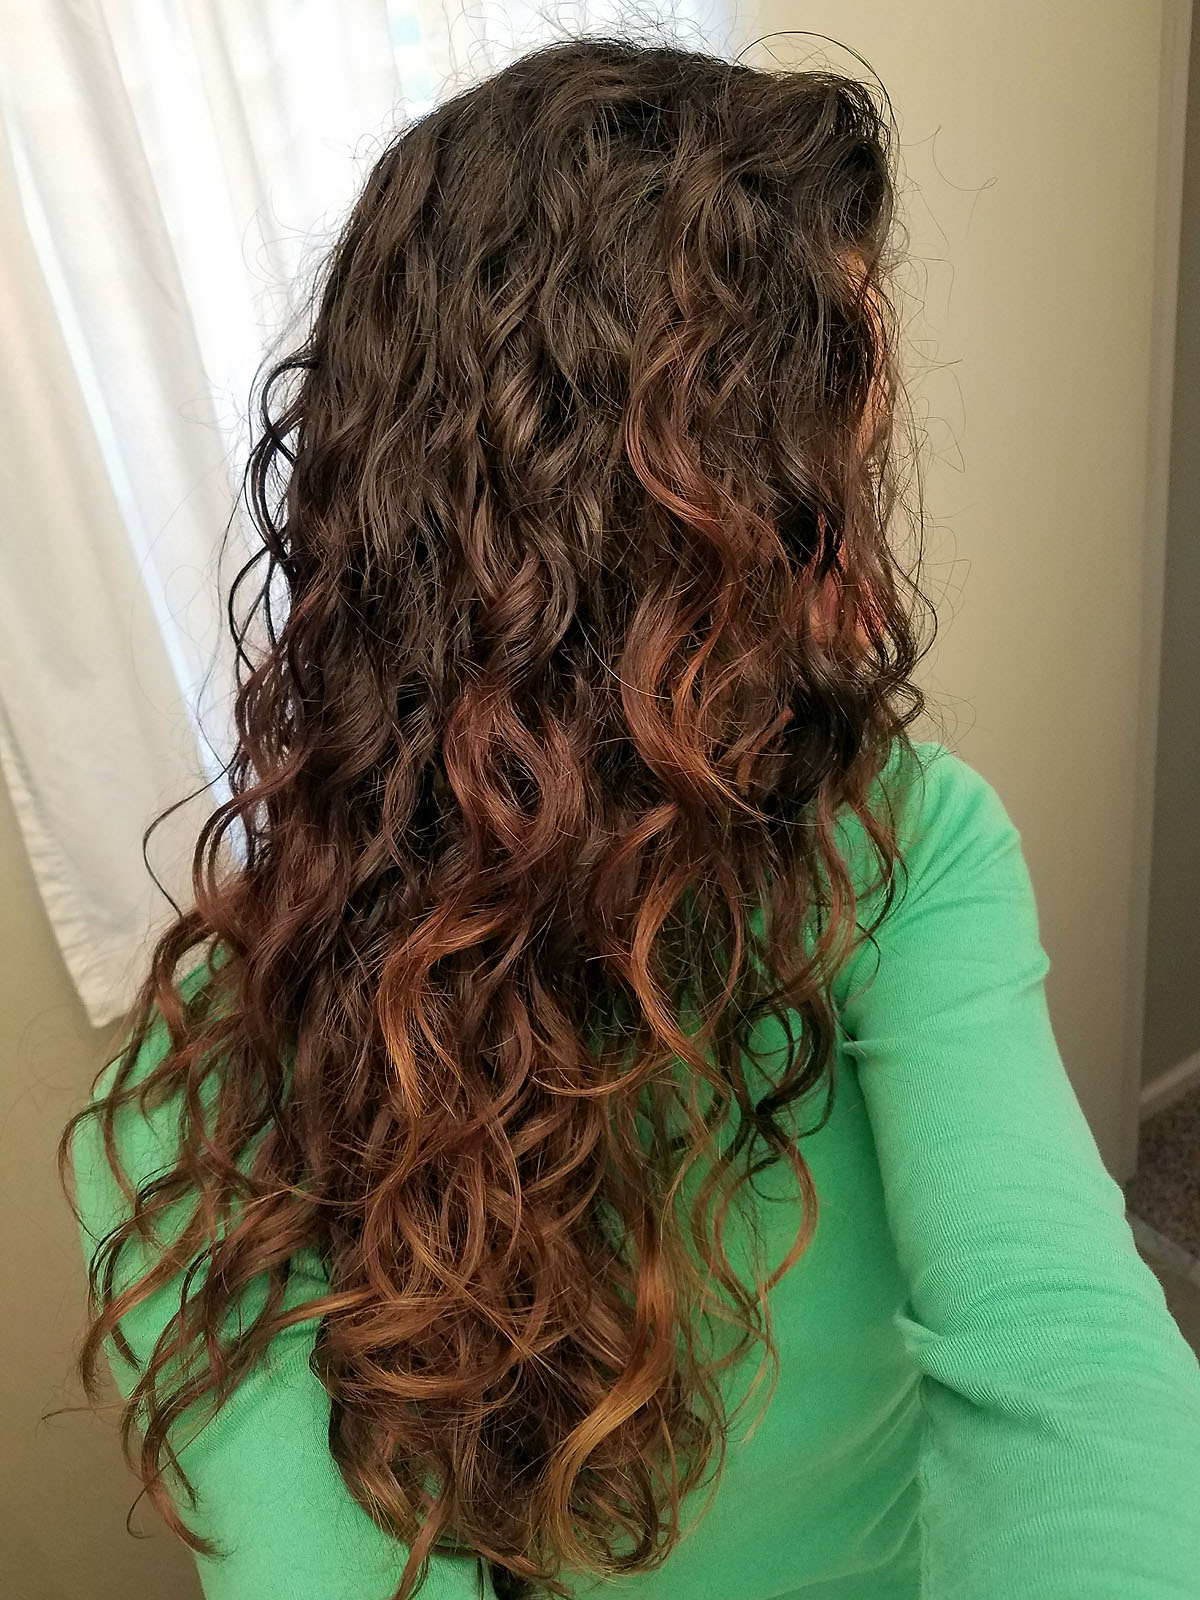
Before: These photos were taken just after my haircut and my last shampooing, with just some mousse scrunched in my hair. I let it air dry. As you can see, it's kind of wavy, a little bit frizzy, but not so awful, the curl is just a little uneven.

1 Week: Not liking this. My hair feels a little greasy, my scalp itches, and I haven't figured out how to squeeze the water out of it very well after I wash it. Curlier? Yeah, I guess...but it feels kind of icky. And I felt like I was getting some odd looks from people who see me often. My guess is, since they didn't say they liked it, they thought my hair looked crazy. :)

2 Weeks: I (and my hair) are more used to the process now - not using shampoo and using lots of conditioner and lots gel. I can see that my hair looks a little bit bouncier and the curl is more even. I'm having a hard time not running my hands through it though, and feel like it's ALWAYS tangled. Since I used to straighten my hair about once or twice a week, I'm really missing that smooth feeling - at least once in a while. This week I did get a couple of compliments though on my curls, which helped me press on.

3 Weeks: This week I started noticing a little bit of dandruff and what looked like product buildup at my roots Nothing major, but I switched up my conditioning routine to apply less of the deeper moisturizing conditioner to the top of my head, and concentrated mostly on the middle and ends. That way the roots just got cleansed and massaged, but not overly conditioned. That appeared to help.

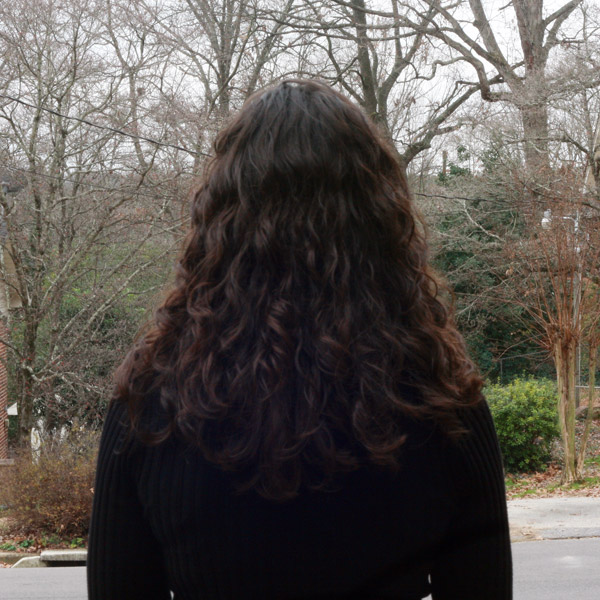
This photo (below) was taken at about 3 weeks into my experiment. Seeing the photo was the first time I thought - Wow! My curls actually look pretty!

4 Weeks: I would REALLY like to shampoo my hair this week (about this time I probably should have tried a warm water and baking soda rinse to remove some product buildup), and I'm dying to just brush it and wear it straight for a few days. But, I don't. A six week experiment is a six week experiement. So, instead, I start shopping for a different gel since it still gets pretty frizzy by the end of the day.

5 Weeks: I switched to LA Looks hair gel this week, and although it makes my curls a little crispier, I think it makes them much more definined, less frizzy, and a little "lighter" looking. I did a one-day trial with some Suave Mousse (and no gel) - and it was Frizz City! Back to the gel I went...

6 weeks: I spent most of this week dreaming of straightening my hair and being able to run my fingers through it without them getting stuck. No joke. I actually had a dream about using my flat-iron. That said, I DO like the way my hair looks when it's curly now and I think experimenting with this haircare method has helped me cultivate my curls a little better.

Additional Notes:
While doing this exeriment, I always liked the way my hair looked better when I showered in the morning and let it air dry, rather than when I let it air dry at night and then slept on it. On those days I would use a spray bottle with water to wet my hair and re-scrunch it, which worked fairly well, but since I couldn't really comb or brush through it first, it always felt more tangled on those days.
I still have a lot to learn, and there are lots of great recipes that I'd like to try - such as a lavender mist spray to revitalize your curl, or a brown sugar scrub to exfoliate your scalp, and a baking soda rinse to remove product buildup. Maybe I'll try those sometime soon. Here are some great recipes if you want to try them - Curly Concoctions.
VERDICT: Is it possible to be a partial curly girl? I'm going to continue working on finding a formula that works for me. Right now, I'm thinking it will include an occasional sulfate-free shampoo and occasional flat-ironing too -- even if the true curly girls think that's from the Devil! However , I do have a renewed love for LA Looks hair gel - which is a major throwback to my junior high perm days. :)
But tomorrow - I'm straightening my hair and I can't WAIT to run my fingers through it again!
Curly Girl Products:
Update: Here are links to some curly girl products that have been mentioned and recommended in the comments below from fellow curly girls:
- WEN products
- Aveda Be Curly Products
- DevaCurl Products
- Mixed Chicks Products
- Sebastian Potion 9 Wearable Treatment
- Kinky Curly...Knot Today
- Redken Contour Shaping Lotion
- Moroccan Oil Curl Control Cream
- Trader Joe's Nourish Spa Balance Moisturizing Conditioner
- Loreal Sulfate Free Products
- Organix Brazilian Keratin Treatment
- Nature's Gate - Tea Tree Calming Shampoo
Update:
This post has gotten WAY more attention than I ever would have imagined, so I think it deserves an update. :) After this experiment, I tried a few of the suggestions people have mentioned here. Some things I liked:
-
I loved how a white distilled vinegar rinse & water solution made my scalp feel and how well it removed all the buildup from the conditioner and gel.
-
In the same fashion, a sulfate free shampoo works really well too. I've recently started washing with Nature's Gate - Tea Tree Calming Shampoo. That seems to help with removing the product buildup and significanly reducing dandruff and itchiness I had started to notice when I began this experiment.
-
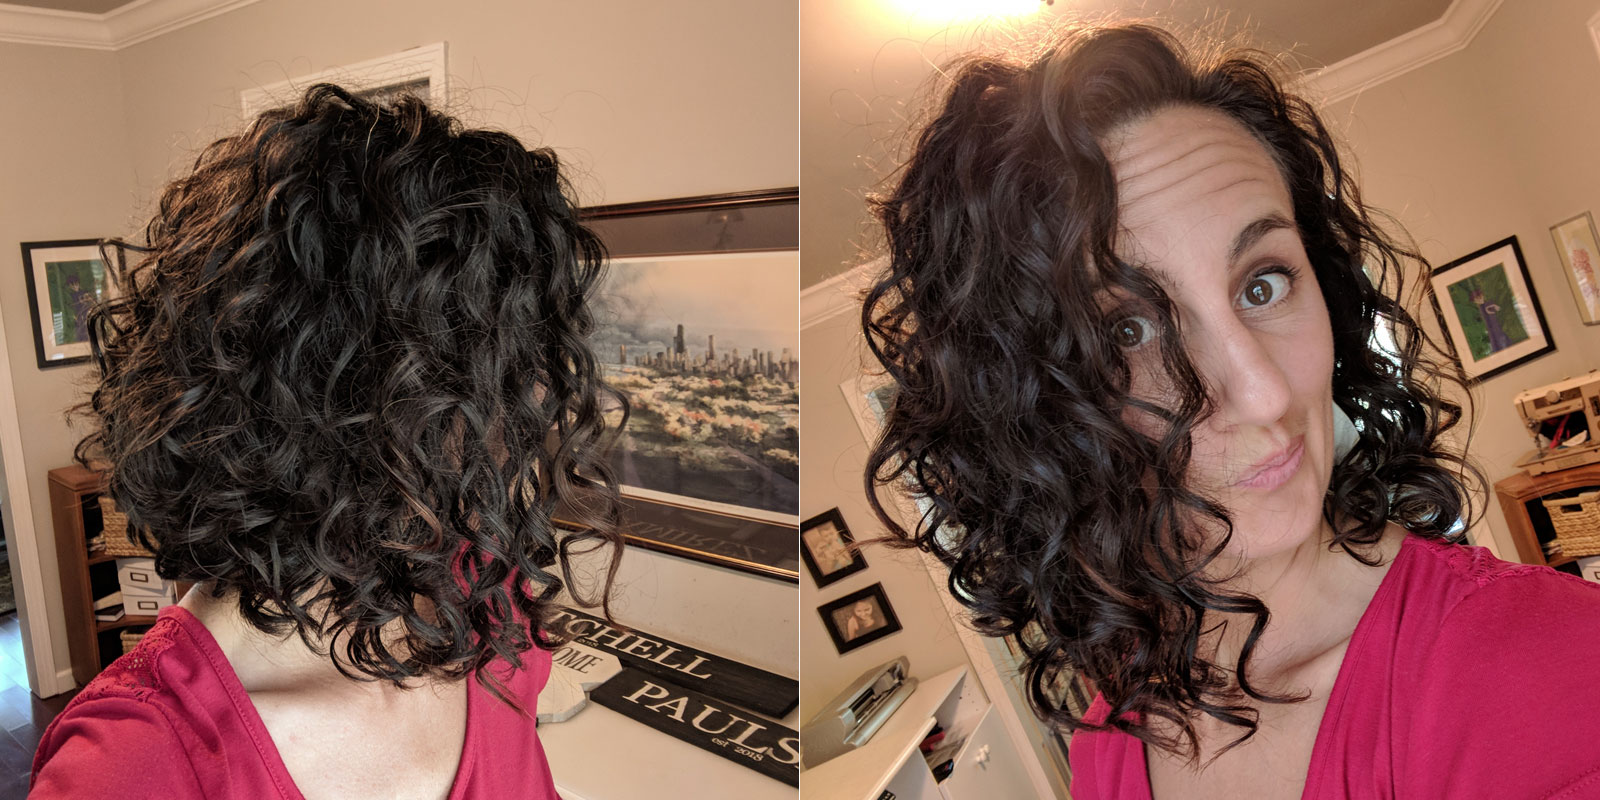
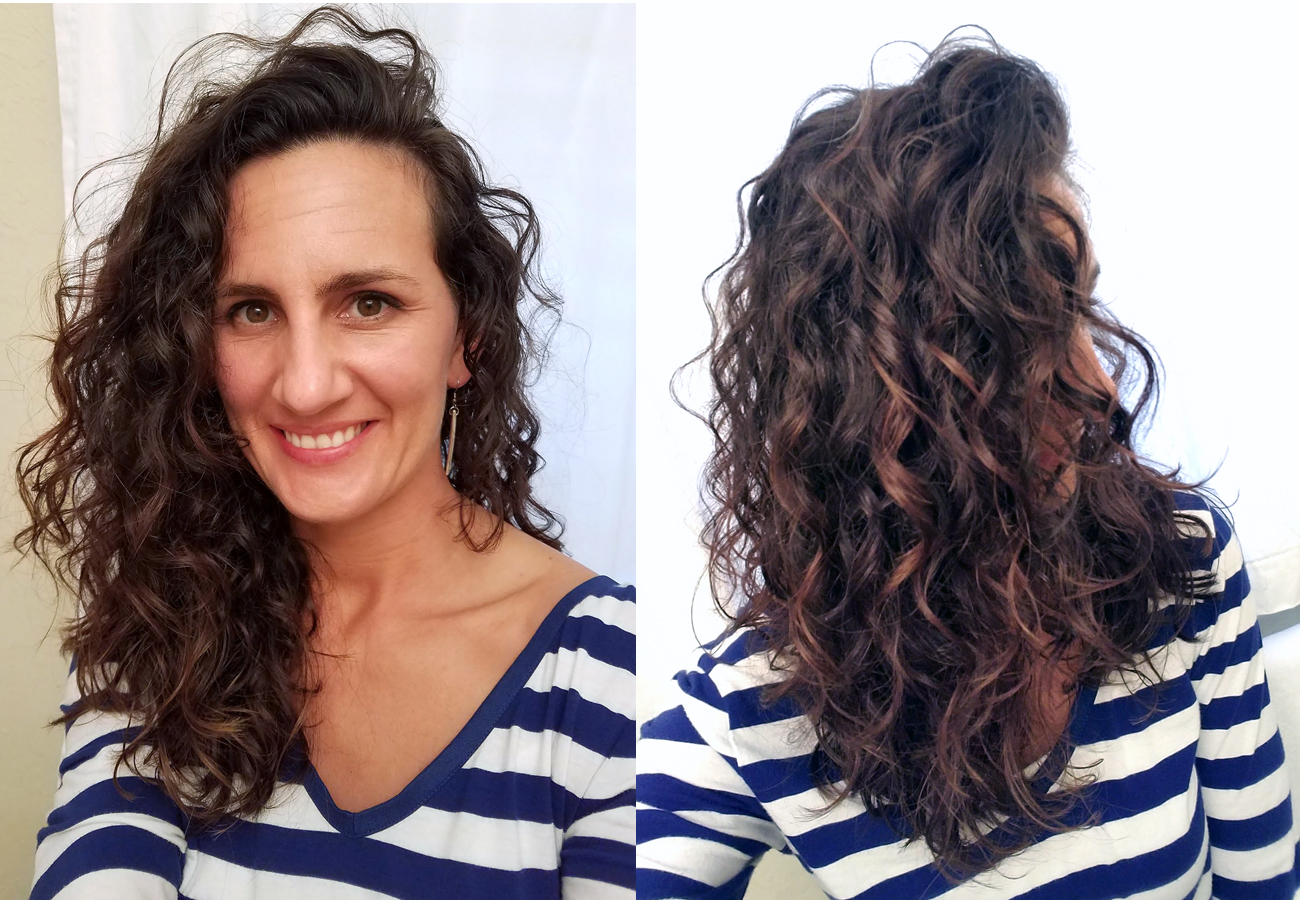
One commenter recommended the Ouidad.com web site for great curly girl products and tutorials. I checked it out and tried the "rake & shake" method they recommend as a way of detangling and applying gel while it's wet, and then "setting" the curls with a shaking method. I tried that today and I've been SO pleased with the results of that very easy-to-do technique! Here's a look at my hair today after trying it out for the first time (click images for larger pictures):


Rake & Shake Method -
Section your wet hair (I did the bottom section, then middle section & finally the top section) and secure it with a clip.Then put a dollop of gel in your hands and apply it to your hair in 2-3 inch sections using a raking motion to detangle the hair.
Rake to the ends of each section and then gently shake the hair. This lets it set into it's own natural curl pattern. Continue throughout the rest of your hair by section.
When finished, scrunch the curls gently with your towel (or cotton t-shirt) to enhance the curl and remove excess moisture. You can then diffuse dry or air dry. It left my hair with un-frizzy ringlet curls all day long!
Update #2:
Summer 2014
Being a curly girl is a constant trial-and-error process for me. Here's what I'm liking currently:

- L'Oreal Paris EverPure Sulfate-Free Color Care System Moisture Shampoo - I use shampoo about every 3rd shower. Otherwise, I just co-wash with my conditioner.
-
Suave Professionals Keratin Infusion Shine Conditioner
- Love this thick creamy conditioner! It coats very well.
- Scrunch hair dry with a towel.
- John Frieda Frizz-Ease Extra Strength 6 Effects Serum - I use about 2 pumps of this serum and rake it through all of my hair, paying closer attention to the ends.
- Curly Sexy Hair Curling Creme Unisex by Sexy Hair - I use about a half-dollar size amount, and spread it all over my hair to coat it all. I love that this is a creme, not a mousse or a gel. It keeps my curls soft and touchable all day without getting frizzy.
- Scrunch curls and let air dry without touching it. When it's mostly dry, I will turn my head over and shake my hair to loosen up the cast.
Update #3:
Fall 2015
The current routine:
- L'Oreal Paris EverPure Sulfate-Free Color Care System Moisture Shampoo - I use shampoo about every 3rd shower. Otherwise, I just co-wash with my conditioner.
-
Suave Professionals Keratin Infusion Shine Conditioner
- Scrunch hair dry with a towel.
- Use a wide-tooth comb to untangle hair.
- Add Infusium 23 Leave in Conditioner and finger-comb through.
- John Frieda Frizz-Ease Extra Strength 6 Effects Serum - I use about 3-4 pumps of this serum in the palm of my hand, then I add a pump of TiGi Curlesque Curls Rock Amplifier creme and mix the two together before hand-combing it through my damp hair.
- I "plop" my hair by wrapping it up in an old long-sleeved t-shirt. This really does make a difference in the end result, giving me much more defined curls -- especially since my hair is so long. It looks silly, but I only do it for about 10 minutes while I'm getting dressed and putting on makeup.
- Scrunch curls and let air dry without touching it. When it's mostly dry, I will turn my head over and shake my hair to loosen up the cast. OR - I'll use a diffuser to dry it 90% of the way (which gives it a little extra volume).
Update #4
February 2018
Current Routine:
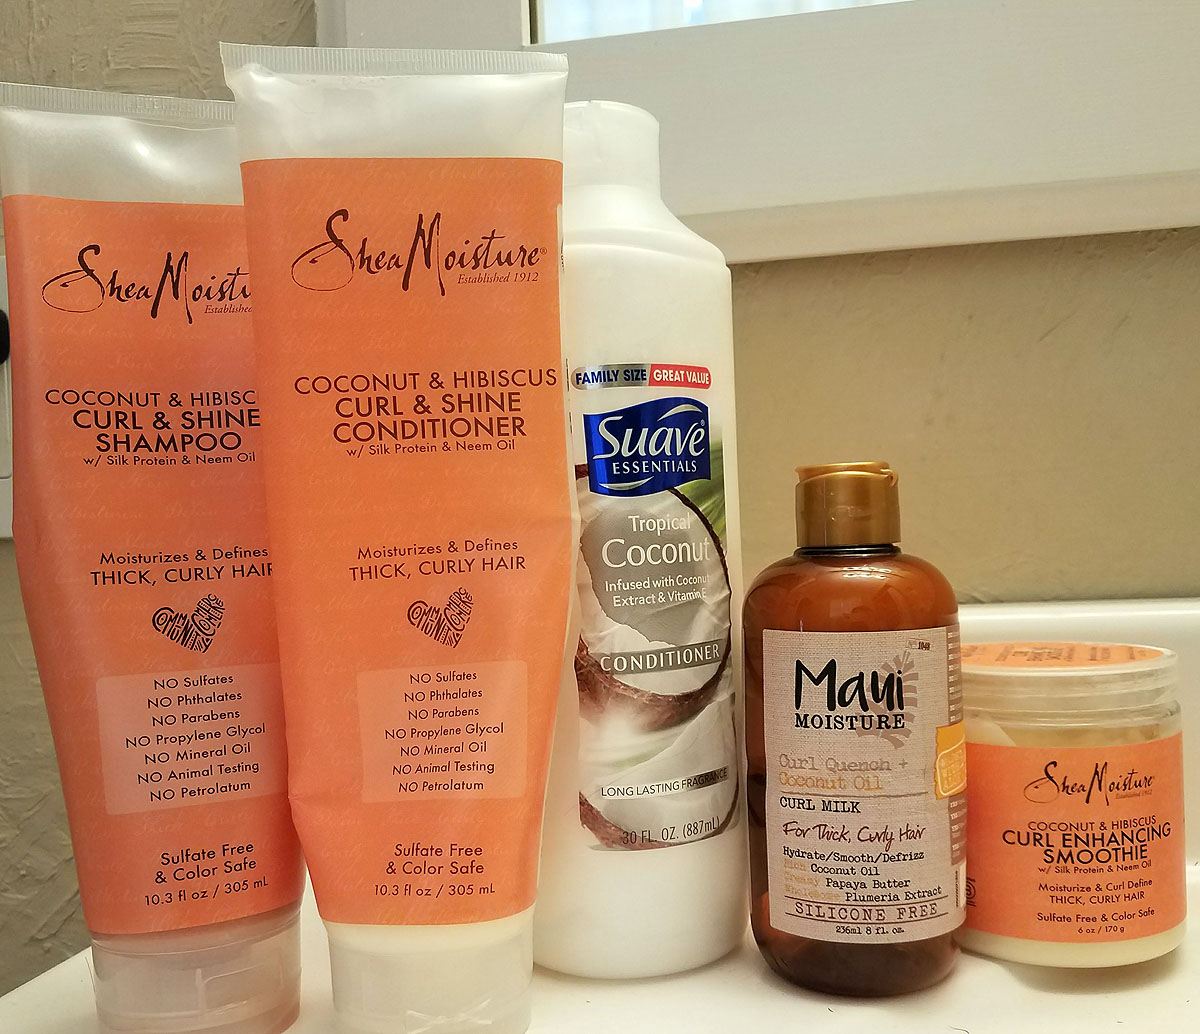
- Wash scalp with Shea Moisture Curl & Shine shampoo.
- Rinse.
- Add Shea Moisture Curl & Shine Conditioner to the bottom 1/3 of my hair (it's a thicker conditioner and is good for the ends of my hair).
- On top of that, add Suave Essentials Coconut Conditioner to the middle of my hair and spread through all of it, raking out tangles with my fingers.
- Rinse hair and squeeze out as much excess water as I can with my hands.
- Gently squeeze out extra water with a t-shirt.
- Shake hair to create individual curls and rake in Maui Moisture Leave In Curl Milk.
- Then slide Shea Moisture Curl Enhancing Smoothie over all my hair, starting in the middle, working down, then back up with leftover product.
- Scrunch all the product in. It'll squish!
- With head upside down, scrunch with a t-shirt until most of the drippy moisture is soaked up.
- Air dry!
- About 2 hours later, flip my head over, scrunch and shake the curls out.
I sleep with my hair in a high bun on top of my head, which if I'm lucky, I can take down in the morning and shake out and it looks okay, although I often end up with it in a low ponytail because there's so much of it and it gets tangled so easily. I have not figured out how to successfully "refresh" after a shampoo day (particularly if I work out and it gets sweaty), so I usually just re-wash it each time I shower. Some days, I'll skip the shampoo step and go straight to a co-wash, but it never looks as good. But spraying my hair wet and adding product from dry *never* goes well. Still figuring that part out...
Update #5
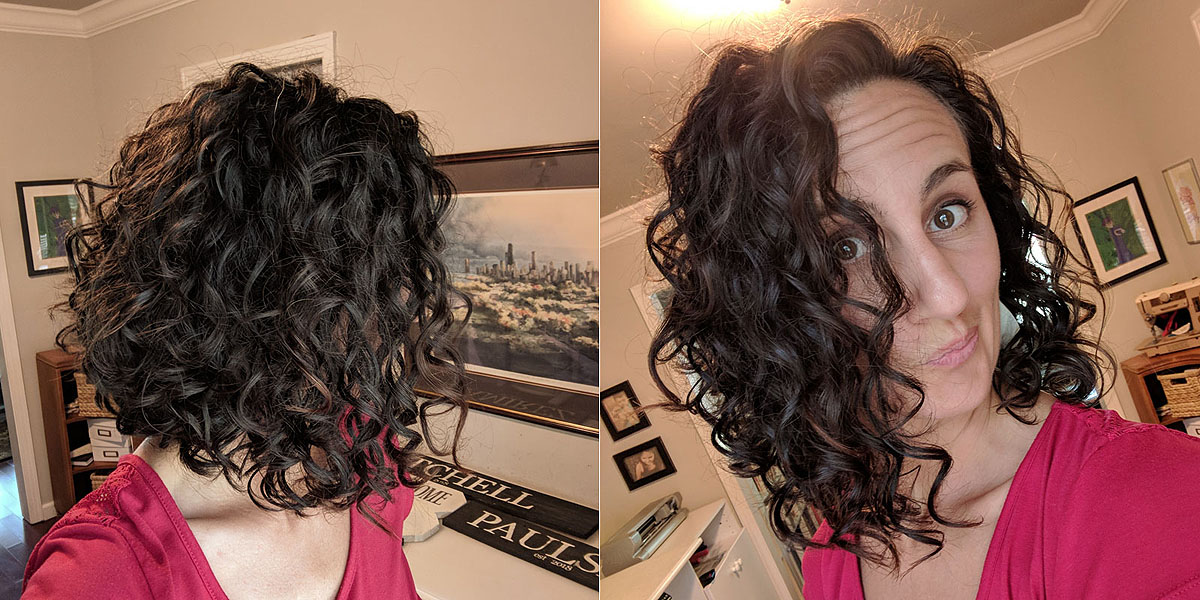
September 2018
After 9 years of long hair, I decided it was time for something new. With shorter hair, I had to change my process just a little bit, as "plopping" and sleeping in a bun were no longer as easy. Also, since I cut it looking for more volume, I've started trying to use some lighter weight products to keep from weighing my hair down (which the Shea Moisture Curl Enhancer tends to do). It's not perfect, and is a little frizzier sometimes, but I like the volume I get...so...I embrace the fuzz.

Current Routine:
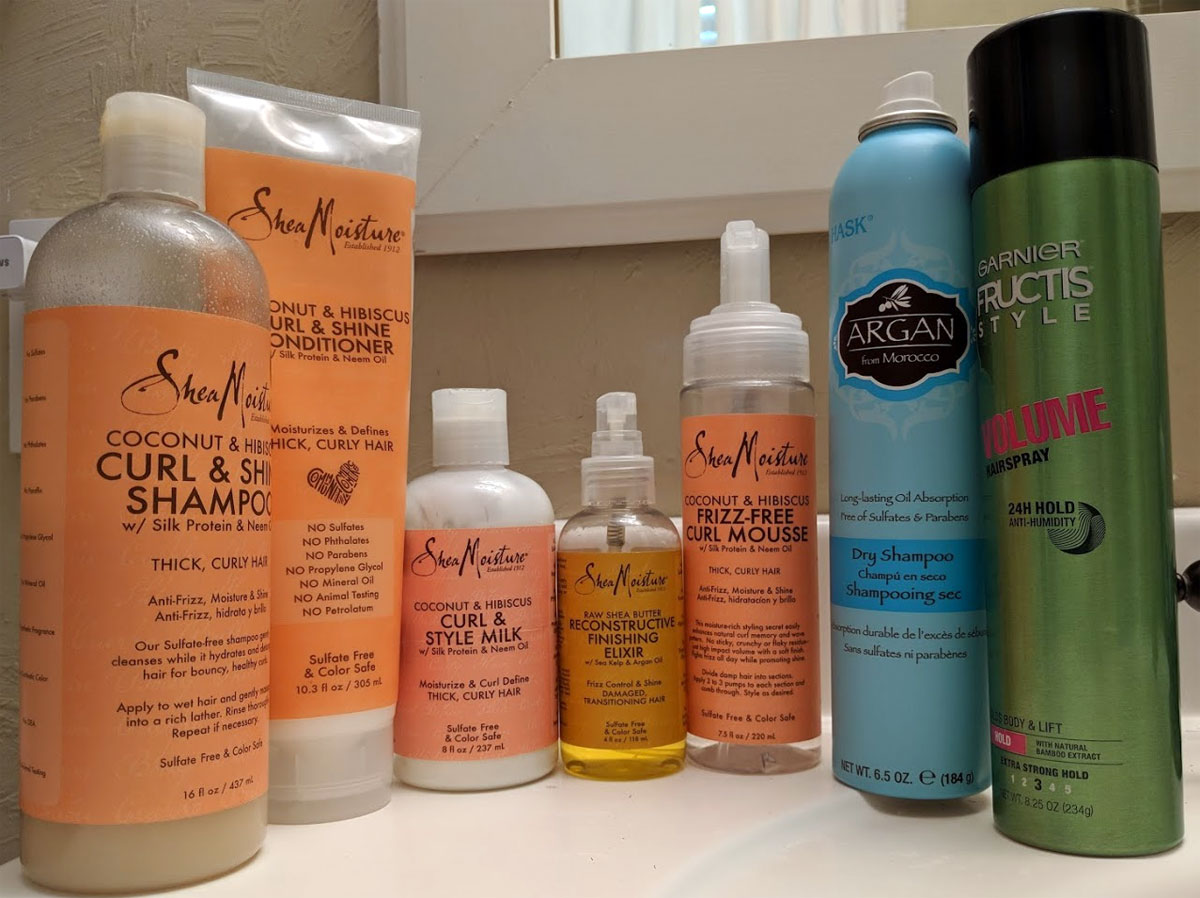
- Wash scalp with Shea Moisture Curl & Shine shampoo. (about 1-2 times a week)
- Rinse.
- Add Shea Moisture Curl & Shine Conditioner to the bottom ends and middle of my hair in a scrunching motion with my head upside down in the shower.
- Rinse hair (upside down) by scrunching it underneath the running water. Then continue to scrunch to squeeze out as much excess water as I can with my hands.
- Gently scrunch out extra water with a t-shirt.
- Shake hair to create individual curls and use a praying hands and scrunching technique with the Shea Moisture Curl Milk Leave In Conditioner.
- Spray 3-4 sprays of Shea Moisture Reconstructive Finishing Elixer oil over all of my hair. Something about the order of a leave in conditioner, then oil, then your "gel" or hold agent locks the moisture into your hair. Or so I've read -- and I like the way it's worked for me.
- Then (with head still upside down) scrunch in Shea Moisture Frizz Free Curl Mousse over all my hair, using 2-3 pumps per scrunch in sections, starting on one side and working my way around my head, making sure to get the front and back well.
- With head upside down, scrunch with a t-shirt until most of the drippy moisture is soaked up.
- For extra volume, I'll add 3-4 metal clips to the roots of the top section of my hair, so it doesn't lay flat on my head. I leave them in for about 10-20 minutes while I get dressed and do my makeup.
- About an hour or so later, I flip my head over, scrunch and shake the curls out.
- Often later in the day, to fluff it all up a little, I'll use a dry shampoo on the roots and even flip my head over and give it a good spray of Garnier Fructis Anti-Humidity Hair Spray for some extra hold and volume.
- Also, since I can't put my hair in a bun anymore, I've gotten a satin pillowcase, that seems to reduce the amount of frizz in the morning after sleeping on it. Often I can wear it as-is (though a little frizzy) when I wake up after just fluffing it a little bit.
- Tip: If all the curls aren't perfect, I use a curling iron to fix the top layer of curls. There's no shame in it! ;)
Parenting Tips - From Voices of Experience
Last night I had the opportunity to visit with several of the women from our church in an inter-generational discussion about parenting. As a woman with small children myself - I was ALL ears to hear what these women, who were at all different stages of the parenting journey, would say in answers to these questions:
- What was one of your biggest challenges or regrets in your parenting journey?
- What would you do differently? Or exactly the same?
Their responses were genuine, from-the-heart, and 100% from the voice of experience. I am so thankful they were willing to share their personal experiences with me and each other. What a huge blessing to have such a wealth of knowledge, love, and experience to draw from. Here's a brief summary of what they shared as the most important lessons they've learned through the years:
-
Put your husband and your marriage first.
-
You are in charge. It's okay to say "I told you so."
-
Treat children as individuals and avoid comparing them to each other.
-
Let them know that if they make mistakes, no matter how big, they can always come home.
-
Know their friends. And their friends' parents. Be involved at school. Be the carpool driver. Hear the gossip.
-
Remember how you felt at their age.
-
Accept that they will be who they will be. You can't change their personalities.
-
Put the word of God in their hearts. Talk about God. Recite bible verses, have family devotionals, pray with them.
-
Be present. When you're with them, BE WITH THEM (not working on your mental to-do lists).
-
Learn their love language - and communicate with it.
-
Make them open to people of all cultures, races, and disabilities.
-
Have patience and be persistent.
I'll do my best. I might need a few reminders along the way though.