Andrea's blog
Create Something Special
I finally learned how to use vinyl and transfer paper in my Silhouette die-cutting machine this weekend. Though I use my machine all the time to cut stencils for my signs, it took me 6 months to try what most people BUY the thing for - vinyl!
For my first practice cut, I made this little phrase for a clipboard that hangs in my office.
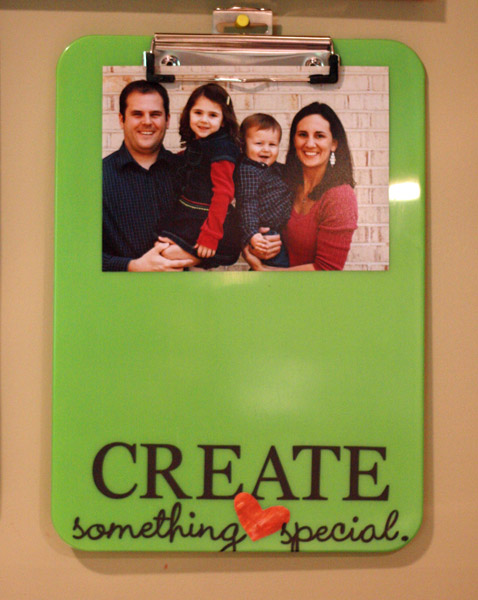
And now, I'm sure I'm hooked. :) No surface is safe.
A Narrow Miss
We woke up this morning to power flickering and major winds, saw branches and leaves down all over the roads on our drive to Ayla's school this morning, and heard about trees and power lines down all over the city. Evidently that was just a preview of the massive destruction caused by tornadoes in Alabama today and this evening. Check out some of these pictures:


VIDEO: MASSIVE Tornado in Tuscaloosa
VIDEO: Mile Wide Tornado Hits Birmingham, AL
Thankfully (for us), the storms missed us by only about 10 miles north & south of us, hitting Tuscaloosa to the west, Cullman & Fultondale north of us and Alabaster to the south. Hoover somehow managed to be a storm-proof area -- today at least. We even managed to keep power all day long.
This afternoon Ben and I made a mad dash to move all our stuff in the garage around so that we could fit our new car inside it (c'mon...it's only 2 days old and we'd heard about falling trees and golf-ball sized hail) and then spent most of the evening down in our den and even set up temporary beds for Ayla & Paxton. However...other than some ominous skies and a little bit of wind, we were spared all of the storms as we watched several areas around us being torn to shreds.
We're thankful today for our blessings and safety and praying for those who were in the eye of the storm. The damage leaves you speechless.
Not Eggs-actly as Planned
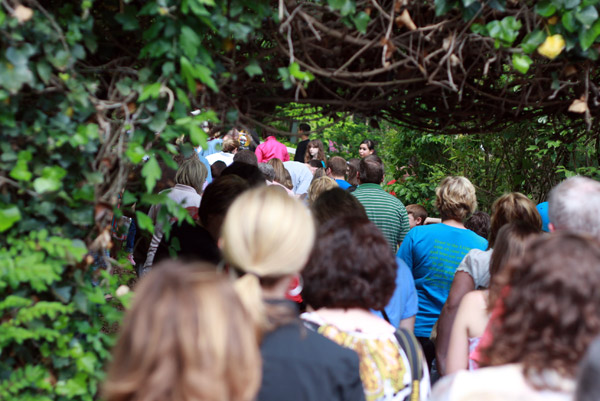
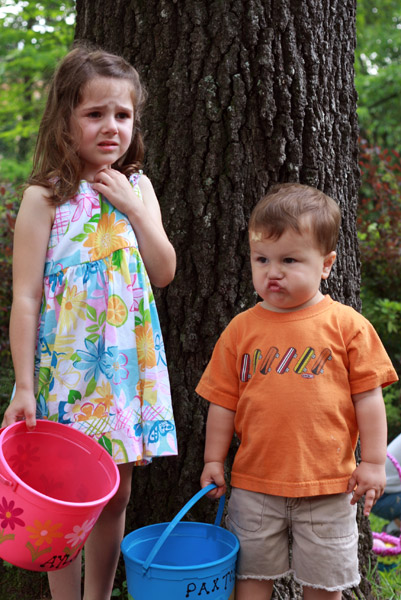
Ayla, Paxton and I headed out to the Green Valley Baptist Easter Egg Hunt this morning in the hopes of having a good time, seeing some friends, and maybe coming home with some candy-filled eggs.
It began with high excitement and anticipation:

Followed by us...as we followed a BIG crowd to the front lawn where the "under 5" kids would hunt:
I could peek over everyone's heads and see the lawn was completely covered by eggs. But despite my encouraging, prodding and pushing...my kids stuck to my legs which means this is what the lawn looked like by the time THEY got to it:
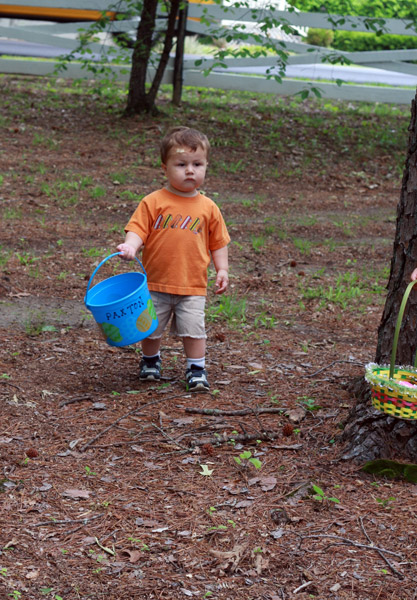
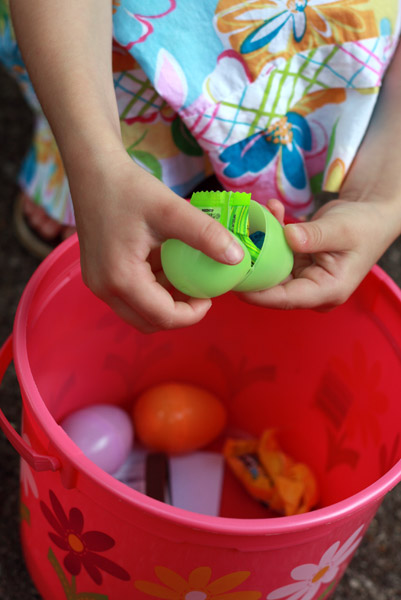
They each managed to pick up about 3 eggs (which I pretty much got for them). Other kids had baskets overflowing with candy-filled eggs. I think Ayla & Paxton both need some assistance in the "competitive edge" area of their lives.
I now present you with the most pitiful Easter egg hunt picture ever:
But then they realized that the eggs they DID get had candy in them, and they could eat it ALL right now (a benefit of collecting just a few):
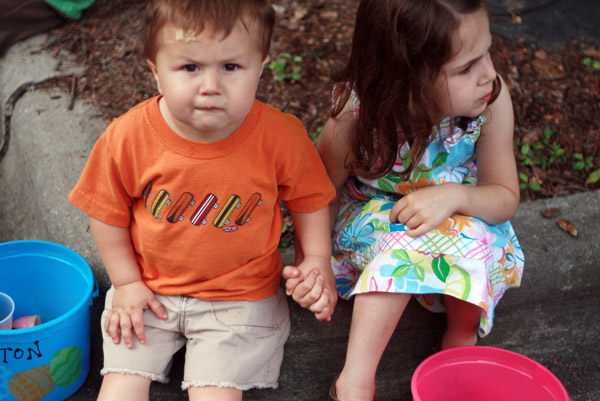
As we walked back to the church building, I saw this really cool blue barn in the yard that is just begging for portraits to be taken by it. Too bad Paxton has a big ol' bandaid on his head and Ayla was so pouty:

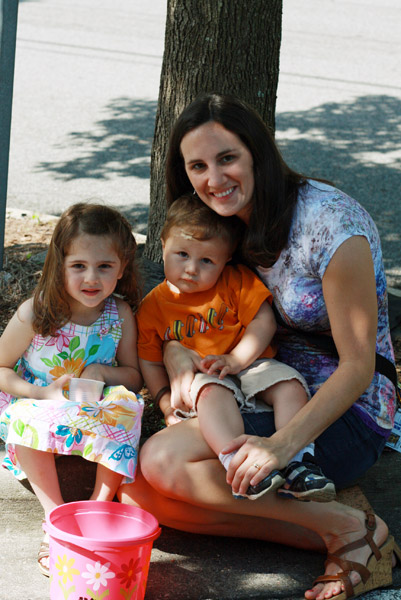
We did manage to get to the snack table before the masses, and picked up some goldfish & pretzels with kool-aid. My kids think that's just as good as candy. As we sat on the curb enjoying our snacks, I realized Ayla and Paxton were bonding:
Guess the morning wasn't a bust after all. :)
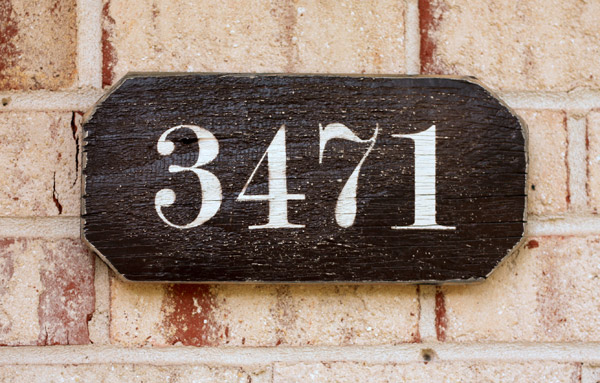
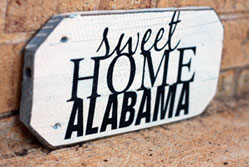
At the Front Door - Street Number Sign
Our front porch is sorely lacking in style. Mostly because I like to spend my crafty time inside, not outside (like my green thumb neighbors) and ALWAYS forget to water plants, which means the nice flower-filled pots my mom added a couple of years ago have sat there very lonely filled with dirt, not flowers for the past two years. Yes, I know that's sad.
However, after Ben spent last weekend power washing our all-brick front porch (and removing the empty flower pots completely), I was so impressed by it's "sparkle" I decided to contribute one tiny little addition -- our street numbers:
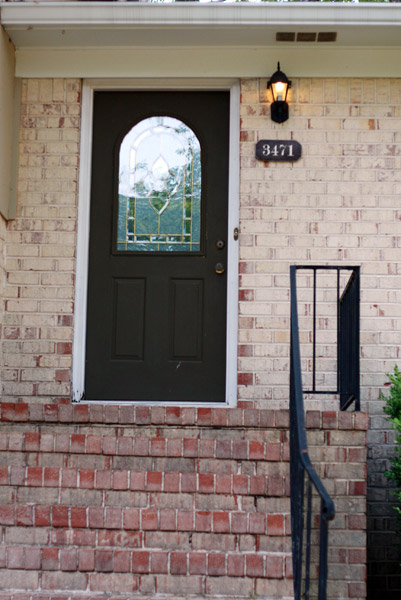
Yes, the porch would be much prettier with pots and flowers and a cute little painted wooden chair or a bucket or something...but I'm not sure I have "outdoor decorating" in my talents.
Anyone want to come and makeover my front steps? I need low-maintenance, weather-able decor. Help me out, would you? :)
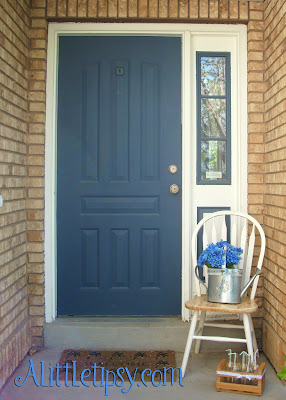
Here's some inspiration (each picture links to some great tips):


What does your front porch look like?
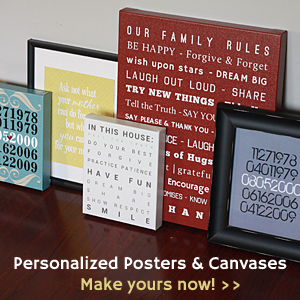
Signs By Andrea Spring Gift Buying Guide
Spring brings all kinds of celebrations and parties. In our family, from Easter through Father's Day in brings a long string of birthday parties, family celebrations, school milestones and wedding events. And each celebration is a great opportunity to show your appreciation for the people you love -- and if you're like me, you're never *quite* sure what to buy!
Let me offer to help you shop with a few personalized and hand-made gift-giving ideas that are sure to leave a lasting impression:
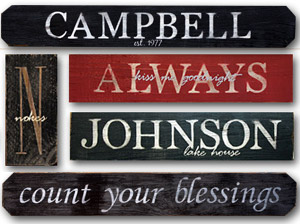
Custom Painted Personalized Signs - $20 & up
My personalized signs are great ideas for Mother's Day gifts, Father's Day presents, wedding gifts, bridal showers, and housewarming gifts. Customize them with family names, favorite quotes or special phrases.
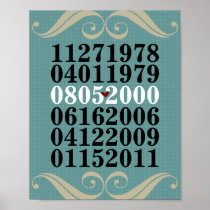
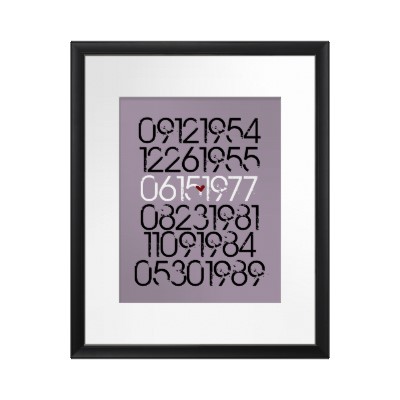
Dated Wall Art
Use your family members' birthdates & wedding date to make this one-of-a-kind frameable print. Perfect for mom or dad! They would also make a great housewarming gift or anniversary gift.

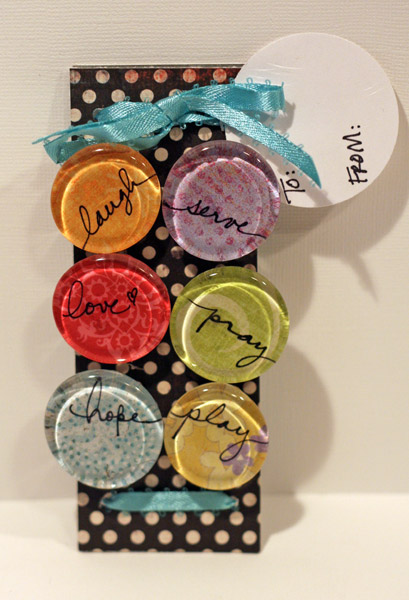
Inspirational Pebble Magnets
These 6-set magnet collections make an adorable (and useful) teacher gift, Mother's Day or even birthday gift for a girlfriend. Colors & words can be customized! To order, just email me at mrs(at)bensteed(dot)com. - no longer available
You Are My Sunshine Canvas, Poster or Wood Print
Go small with a poster print, or big with a wrapped canvas. Either way, these You Are My Sunshine posters & canvases are so cute for a baby shower gift or dear friend.

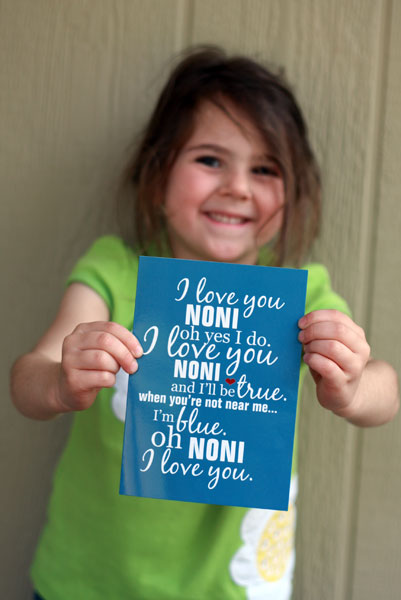
Personalized "I Love You Song" Greeting Card - $5 & up
This makes a great one-of-a-kind birthday card, Mother's Day card or Father's Day card. Just customize it to add their name! It can be made as a poster too! We made a card for my mom's birthday from the kids:
And, you can visit some of my very talented friends' web sites for even more great gift-giving ideas:
- Oh Suzy Q Designs - Personalized labels, enclosure cards, stickers, and kid's room prints.
- E.Bailey Photography - Birmingham, AL area photographer
- My Fine Art - custom photo canvases
- Custom-Made Jewelry by Shelley Burkett
- The Younique Boutique - amazing personalized artwork
Semi-Homemade "Puppy Cake"
For Paxton's 2nd birthday, I was all about keeping it simple. Even so, I wanted the "theme" to be special and represent something he loves. There's NO better choice than his prized possesion: PUPPY. Puppy has been around since before he was born, and Paxton attached himself to Puppy sometime around a year old (I think). Puppy sleeps with him, plays with him, and calms him down when he's upset.

So, I thought it was fitting to try and put his beloved Puppy on Paxton's 2nd birthday cake. Initially I had NO interest in making the cake and decorating it myself. I thought it ought to be easy to just bring in a photo to any old bakery and they'd whip up a great design for me. So I took this photo and went cake shopping:

Bust. Most places wouldn't do it at all and suggested alternatives like other dogs or bears (NOT the same), some would scan it and print the photograph onto the cake (eh, not really right), and one bakery would do it and charge me an arm and a leg for a teeny-tiny cake (which if I had lots of money, probably would have been a perfect choice), and finally I said, forget it. I'll do it myself -- he's only two, he won't care if I screw it up.
So, I stopped at a sandwich shop and I sat down and drew this picture (lucky for me, they even had crayons at the counter for me!):
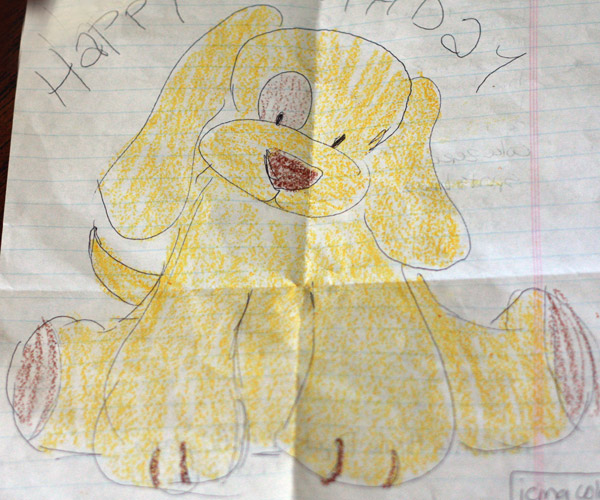
I figured, if I could draw Puppy, surely I could ice him on a cake...right? (Keep in mind I'm SO not a food display or preparation kind of girl. I much prefer paper, glue & paint!)
So, next, determined to give Paxton a Puppy cake he would love, I trudged around WalMart looking for icing, cake mix and inspiration. As I got to the front of the store, my cart full with cake mix, frosting, yellow cupcake icing, I make a last-ditch stop at the bakery to see if perhaps the Walmart Bakery could help me out. Once again, they said, nope, we don't do freehand.
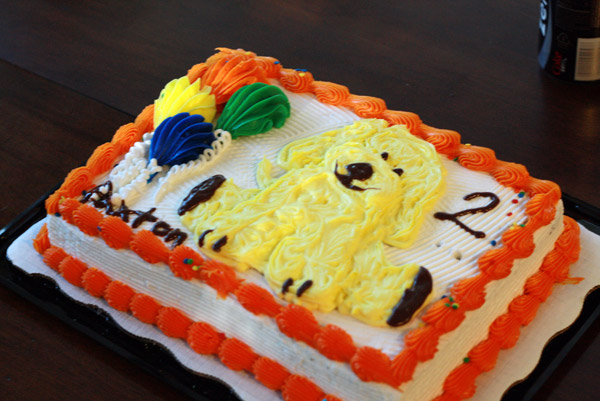
"But...." she said..."I could scan your drawing for you and give you an edible template that you could pipe icing over the top of". Why didn't anyone else give me that option? Awesome! So while she was scanning the turning Puppy into an edible template for me, I took a quick look at the pre-made cakes in the display case and noticed this adorable cake that was perfectly iced with multi-colored balloons and orange outline. As I imagined a crumbly, probably burned, not-very-pretty iced cake that I made myself I thought "Oh, how much easier it would be to just add Puppy to THAT cake." And so, that's exactly what I did!
(Unfortunately I was so excited to ice the cake, I forgot to take step-by-step photos of this part, but you get the idea)
Add a little bit of cupcake & cookie icing, the template went onto the top of the cake, and I iced and iced and iced and iced...

And we ended up with exactly the cake I dreamed of (okay, not exactly, but close enough) when I decided I wanted a Puppy cake for Paxton. I'll call it "semi-homemade". :) And believe me...everyone who eats the cake is glad it was!
Craft Room Tour

I'm pleased to be guest posting over at Craftaholic's Anonymous today, showing off my crafty office space.
Perhaps you've seen it here before.
Now you can read a more detailed description of how I organize my supplies and keep everything under control in my center-of-the-house office space.
Welcome to any new visitors & thanks for stopping by!

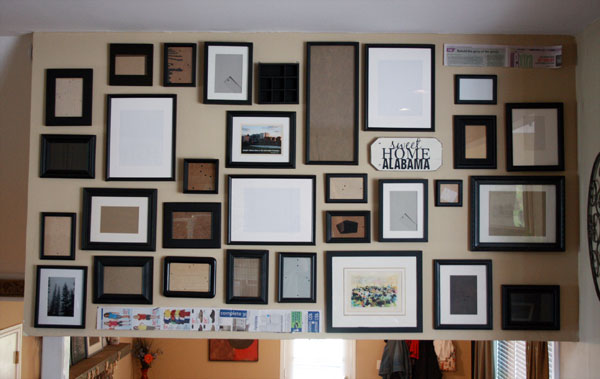
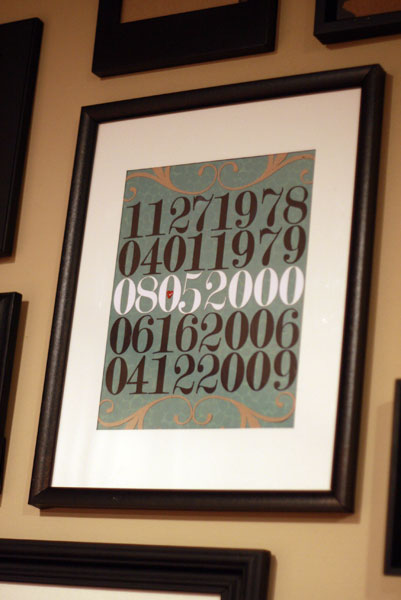
Kitchen Gallery Wall (Tutorial)
Feast your eyes upon my new gallery wall:

Remember this wall in our kitchen? About a year after we moved into this house, I added these four frames and "temporarily" filled them to look like this:
I liked it. It worked. And it stayed. Until one of those frames fell down and broke. Then it didn't work anymore, for obvious reasons.
A couple of weeks ago, I was beyond inspired by this post at a really cool home decor blog called YoungHouseLove.com.
"I can DO that!!!" (and it didn't hurt that there are about 100 frames floating around my house, so I didn't have to buy a single thing!
So, for the past several weeks, I've been semi-obsessed with getting this project done. Here's the process I took step-by-step:
First, I collected a ton of frames from around the house. Some were displayed, some were in the garage, but no frame was safe!

Next, I arranged them into a design on the floor in our kitchen, to get a general idea of how I wanted them to be layed out:

Since I couldn't pick up this whole grouping and eye-ball it against the wall, I decided to make a to-scale digital mockup of the whole collage so I could see how it would fit on the wall. I ended up with this:
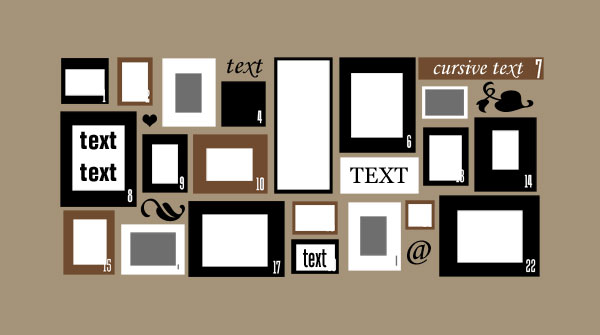
And decided it needed SO much more!!! So I scooted this grouping up to the top right corner and went searching for even more frames around the house, until I came up with this design, which I was much happier with:
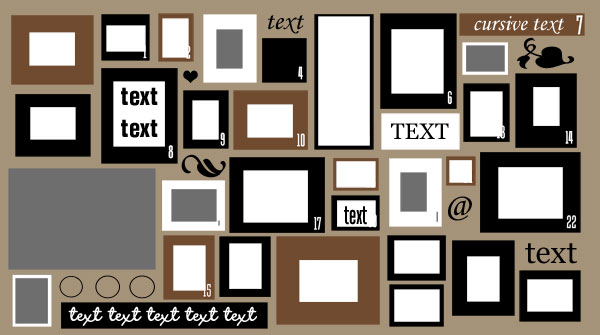
Next, I cut newspapers to size to match up with each frame and taped it to the wall where I wanted the frame to hang. I even numbered them (and the frames themselves) to be sure I didn't confuse myself. Once those were up, I did a little more tweaking (especially in that lower left corner, which you can see is quite different than my digital mockup) until I was left with this:

I left that up a few days to try and decide whether I was going to like this new design in actuality or not. Until Ben said "Oh,just hang them up already. Commit." So I did.
HUGE tip -- With a paper template for each frame, I pulled each template down (one at a time), layed it across the back of the frame, marked where the hole in the wall should go, taped the paper back to the wall, and hammered in the nail. WORKS PERFECTLY every time! Then we had this lovely mis-match of frames on the wall:
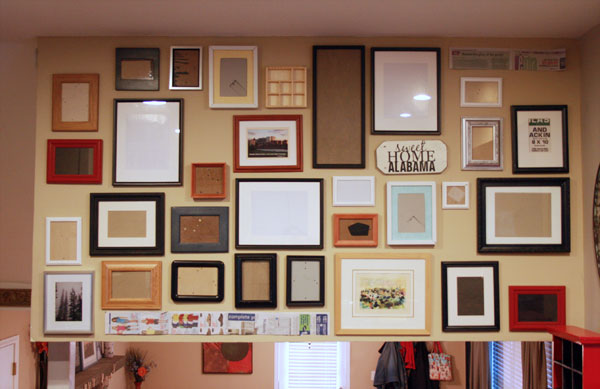
The night we left this up, it caught me off-guard every time I rounded the corner into the kitchen. I think maybe I was having some gallery-wall remorse. It reminded me a little more of a crowded old lady's house than the sleek and modern gallery wall I had envisioned.
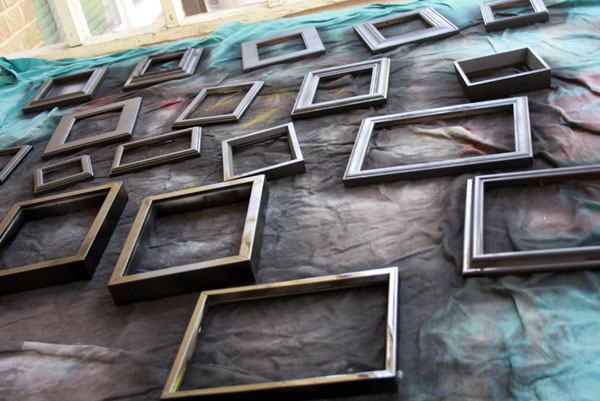
During this whole process I flip-flopped back and forth trying to decide whether to paint all the frames black, keep them their natural color, or do a combination of silver, wood, black and white. After seeing them on the wall...we quickly decided all-black was a must! Good thing I have lots of black spray paint on hand at all times!
Ahh...much better, eh?
Then it was time to fill the frames with pictures & memorabilia and fill in the gaps with a few handmade projects. I started with these fun projects:

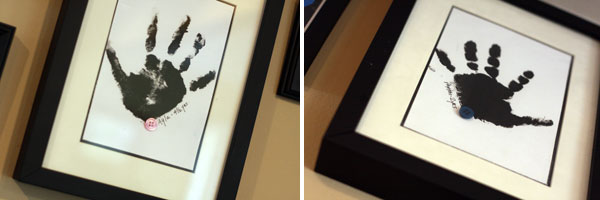
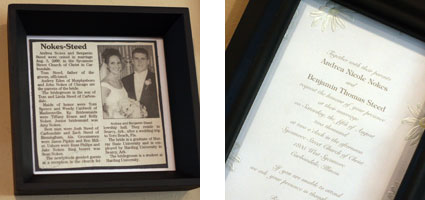
Then searched the house for a few meaningful memorabilia items:
- wedding announcement newspaper article
- decorative wedding certificate
- our wedding invitation (perhaps I should replace some of these with NON-wedding things..hmm)
And finally, I filled in with photos. Some of the kids, some of us, some of family and friends. I tried to pick photos that have special memories attached to them, rather than just picking my favorite portraits or photographs that I love (though a few of those creeped in too). Some of the special pictures included are:
- a picture of Ben & I at our high school graduation
- a photo of our sponsored Compassion International child from Ecuador
- newborn hospital photos of each of our kids
- Ben & I in our "Scrapjazz" shirts on a business trip (pre-children!)
- our home in Rochester, MN which was the first house we owned
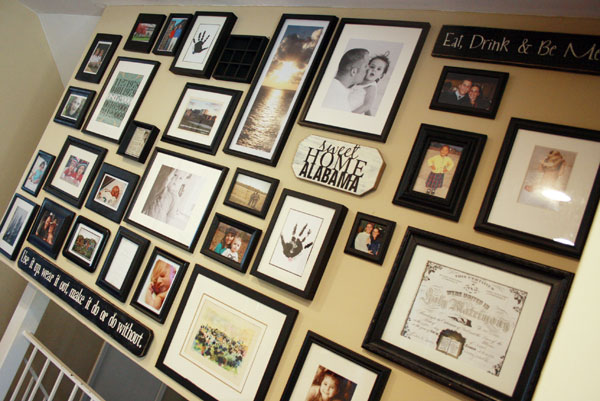
I may change a few of these out occasionally, but I tried hard to pick timeless and sentimental pieces to tell the story of our family.
So here's the finished product (for now...I just can't call anything complete...I'm sure I'll find some fun knick-nacks to add to those empty spaces!):
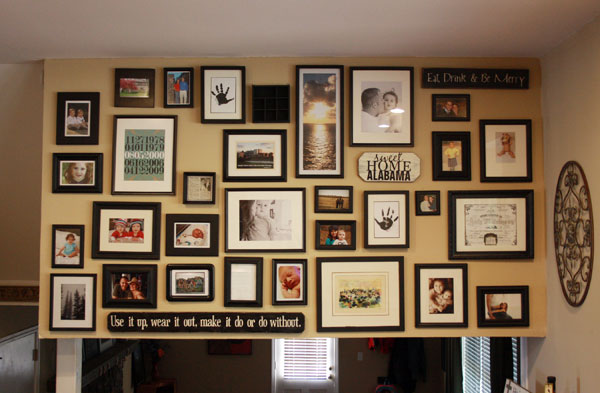
And here you can see some context with the rest of the kitchen/dining room:
Ahh...I love a finished project.
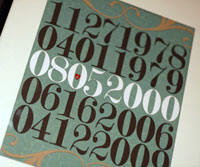
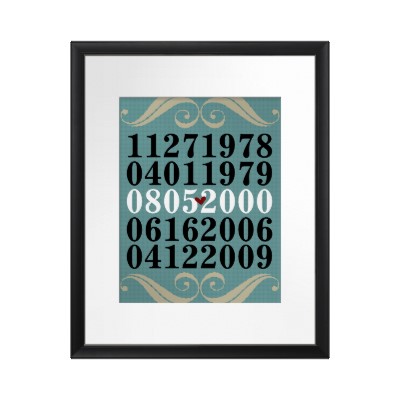
Personalized Dated Printable
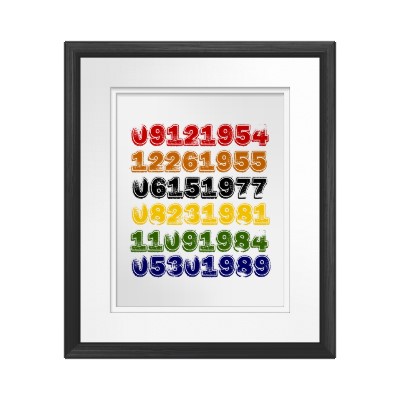
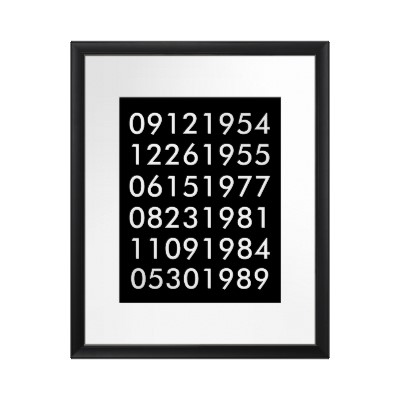
Why, yes! As a matter of fact, a customized printable version is available of the Dated Wall Art I posted yesterday! Thank you for asking.
A fully customizeable version of my Dated Wall Art is available through Zazzle.com if you'd like to order your very own! Customize it to choose your own colors, dates, print-size and font!
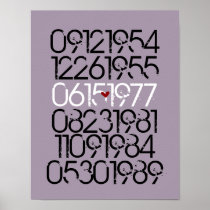


Now available for families with 1 child, 2 children, 3 children, 4 children & 6 children as well as in several style variations!
See all of my Dated Art options.
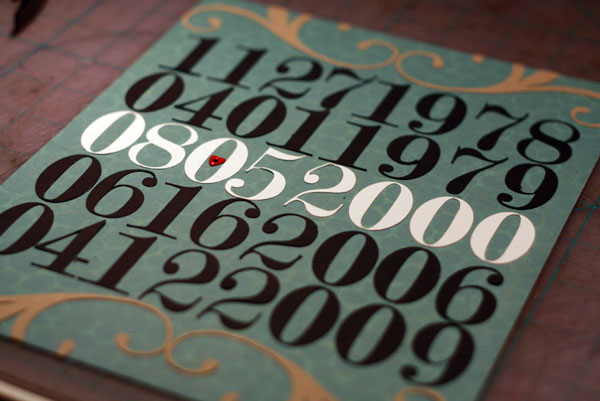
Dated Design Wall Art
 I've been working on a gallery of framed photos and art for a wall in my kitchen and really want it to include meaningful pieces - not just any old photo or picture. In my quest to make it meaningful, I decided to create a subway art style piece using important dates in our family, specifically each of our birthdays and our wedding anniversary.


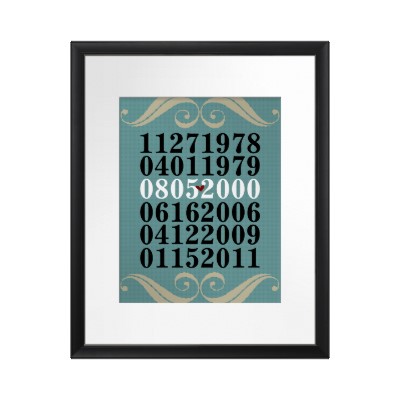
Available for families with 1 child, 2 children, 3 children, 4 children & 6 children!