Andrea's blog
Girl Scouts Badge Work: Digital Photography
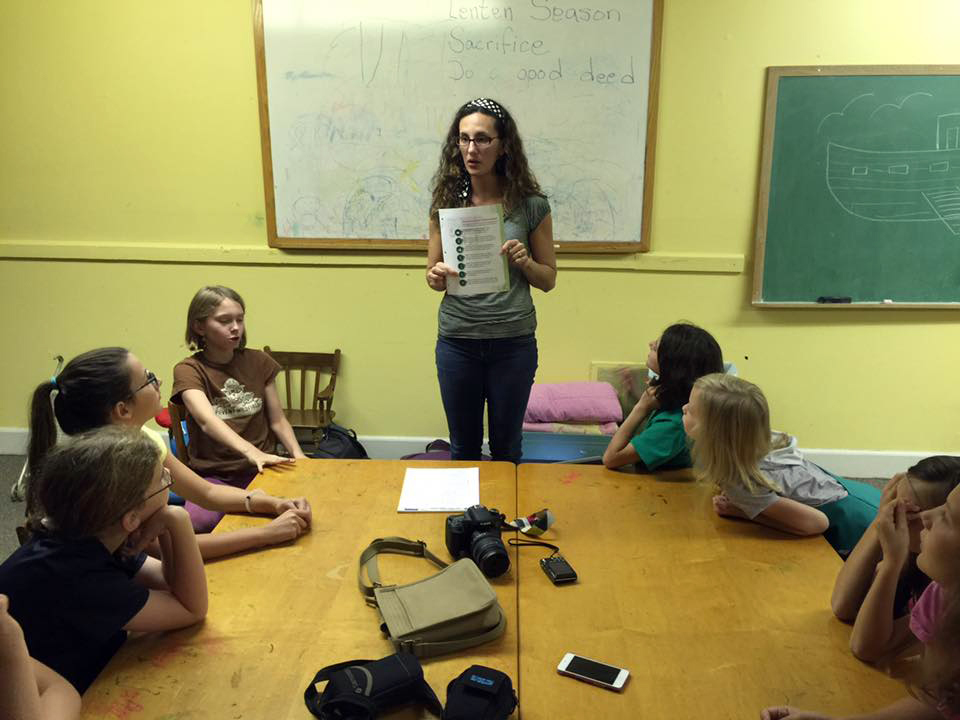
Each of the moms in Ayla's girl scout troop take turns heading up a badge and running a meeting during the year. Monday night was my night! We tackled the Digital Photography Badge.
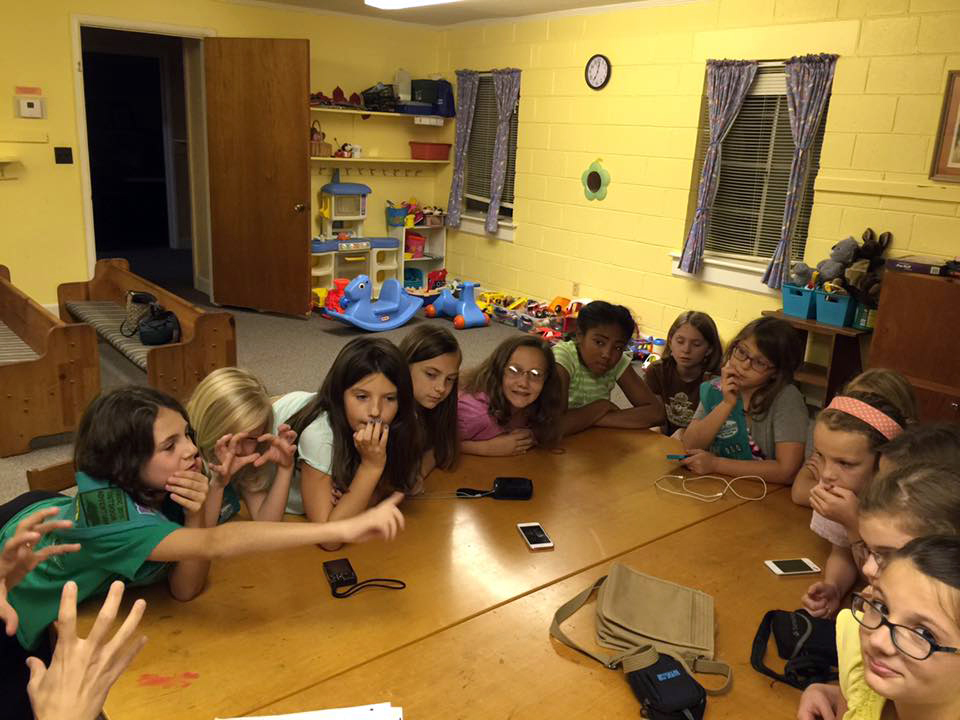
First we talked about the different kind of cameras: Point & Shoot, SLR & Mobile Devices
We talked about the diffferent settings: Automatic, Portrait, Sport, Landscape, Macro, Night, & Video
We discussed what makes a good photo and I gave them my 10 Tips for Taking Better Photos:
- Take LOTS of photos
- Change your perspective.
- Zoom In AND Out
- Turn off your flash.
- Check your background.
- Use the Rule of Thirds.
- Position your subjects.
- Read your camera's manual.
- Tell the story.
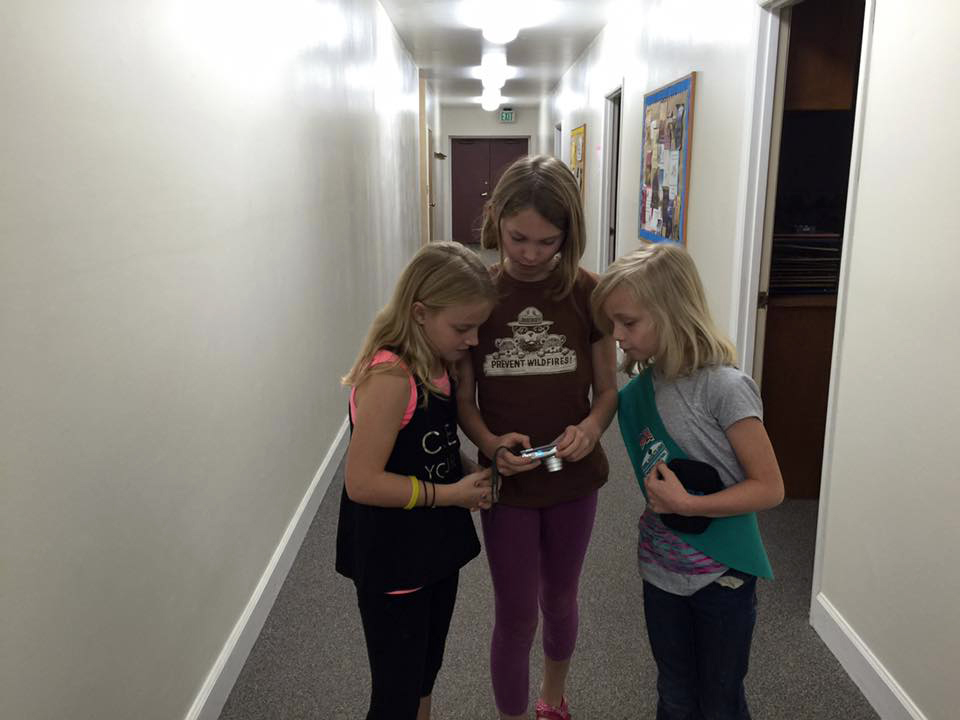
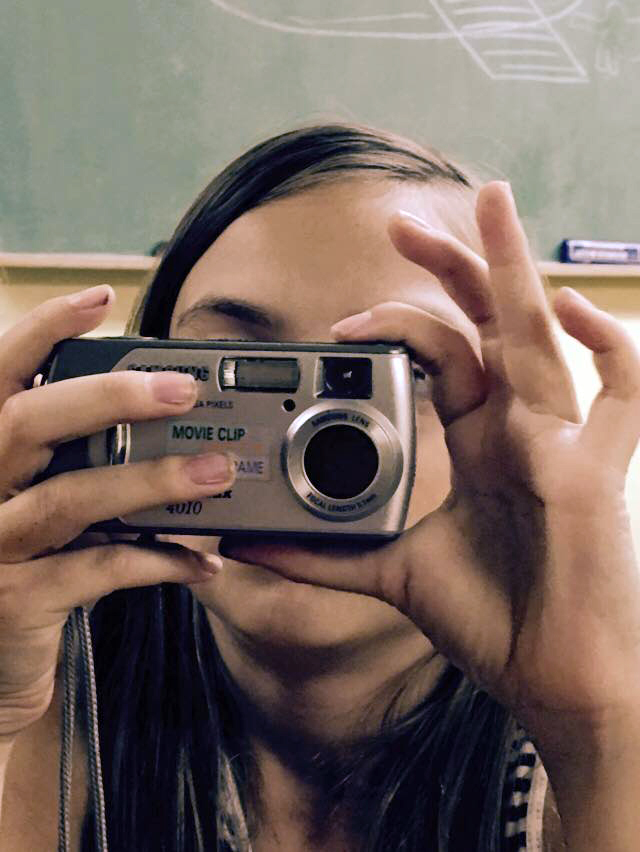
Then they headed out on assignment. Each group was supposed to take 5 photos:
- Portrait
- Group of People
- Detail
- Landscape
- Action
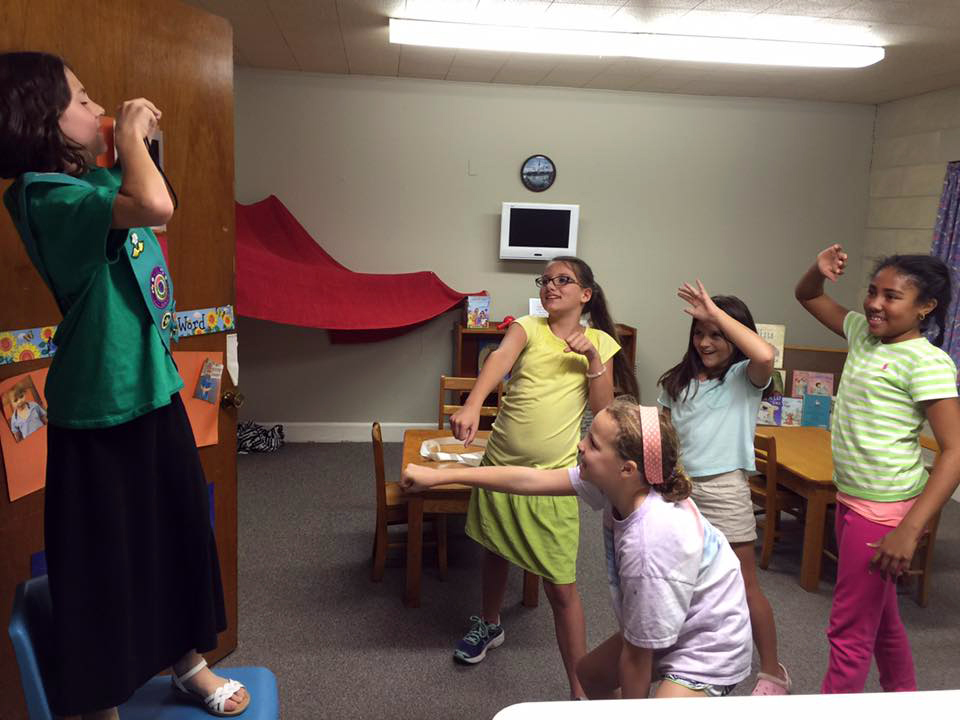
They seemed to have a lot of fun and we managed to cram a lot into one short meeting. If we'd had more time, we would have spent some time editing and creating a project with our pictures, but we DID talk about all the cool things you can do with digital photography.
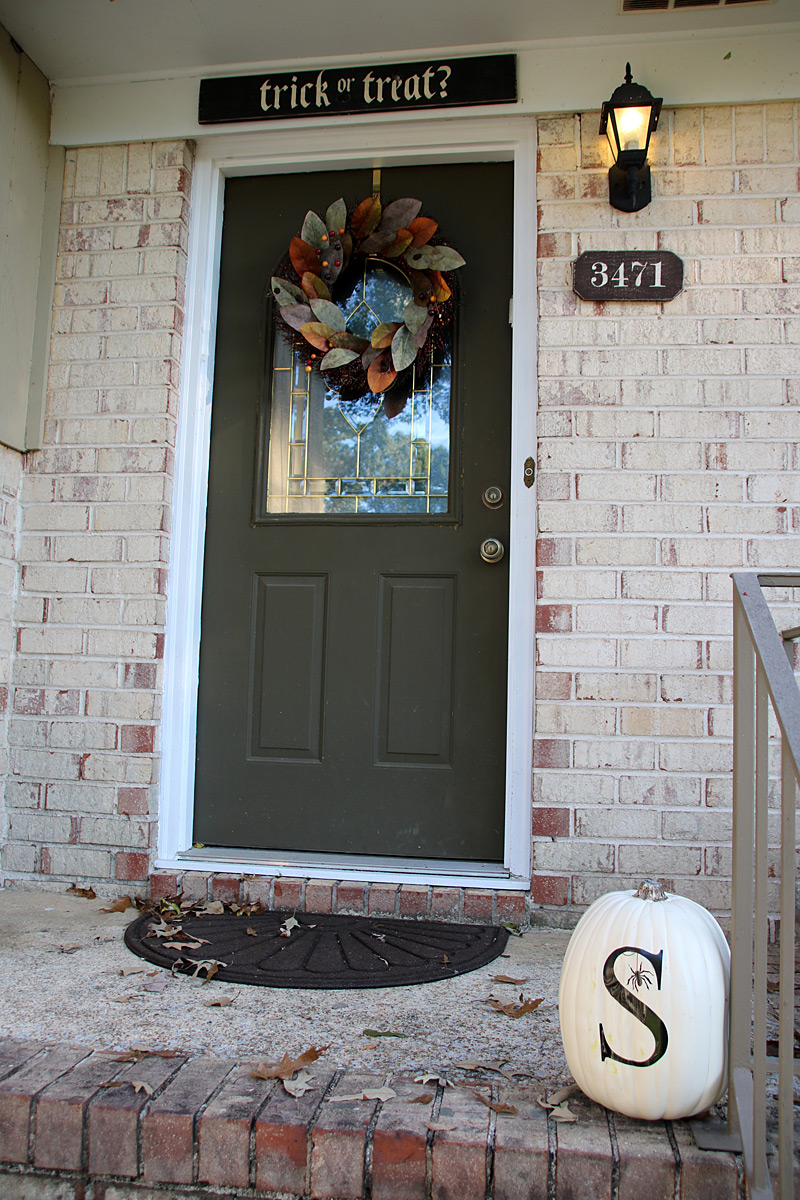
Ghostly
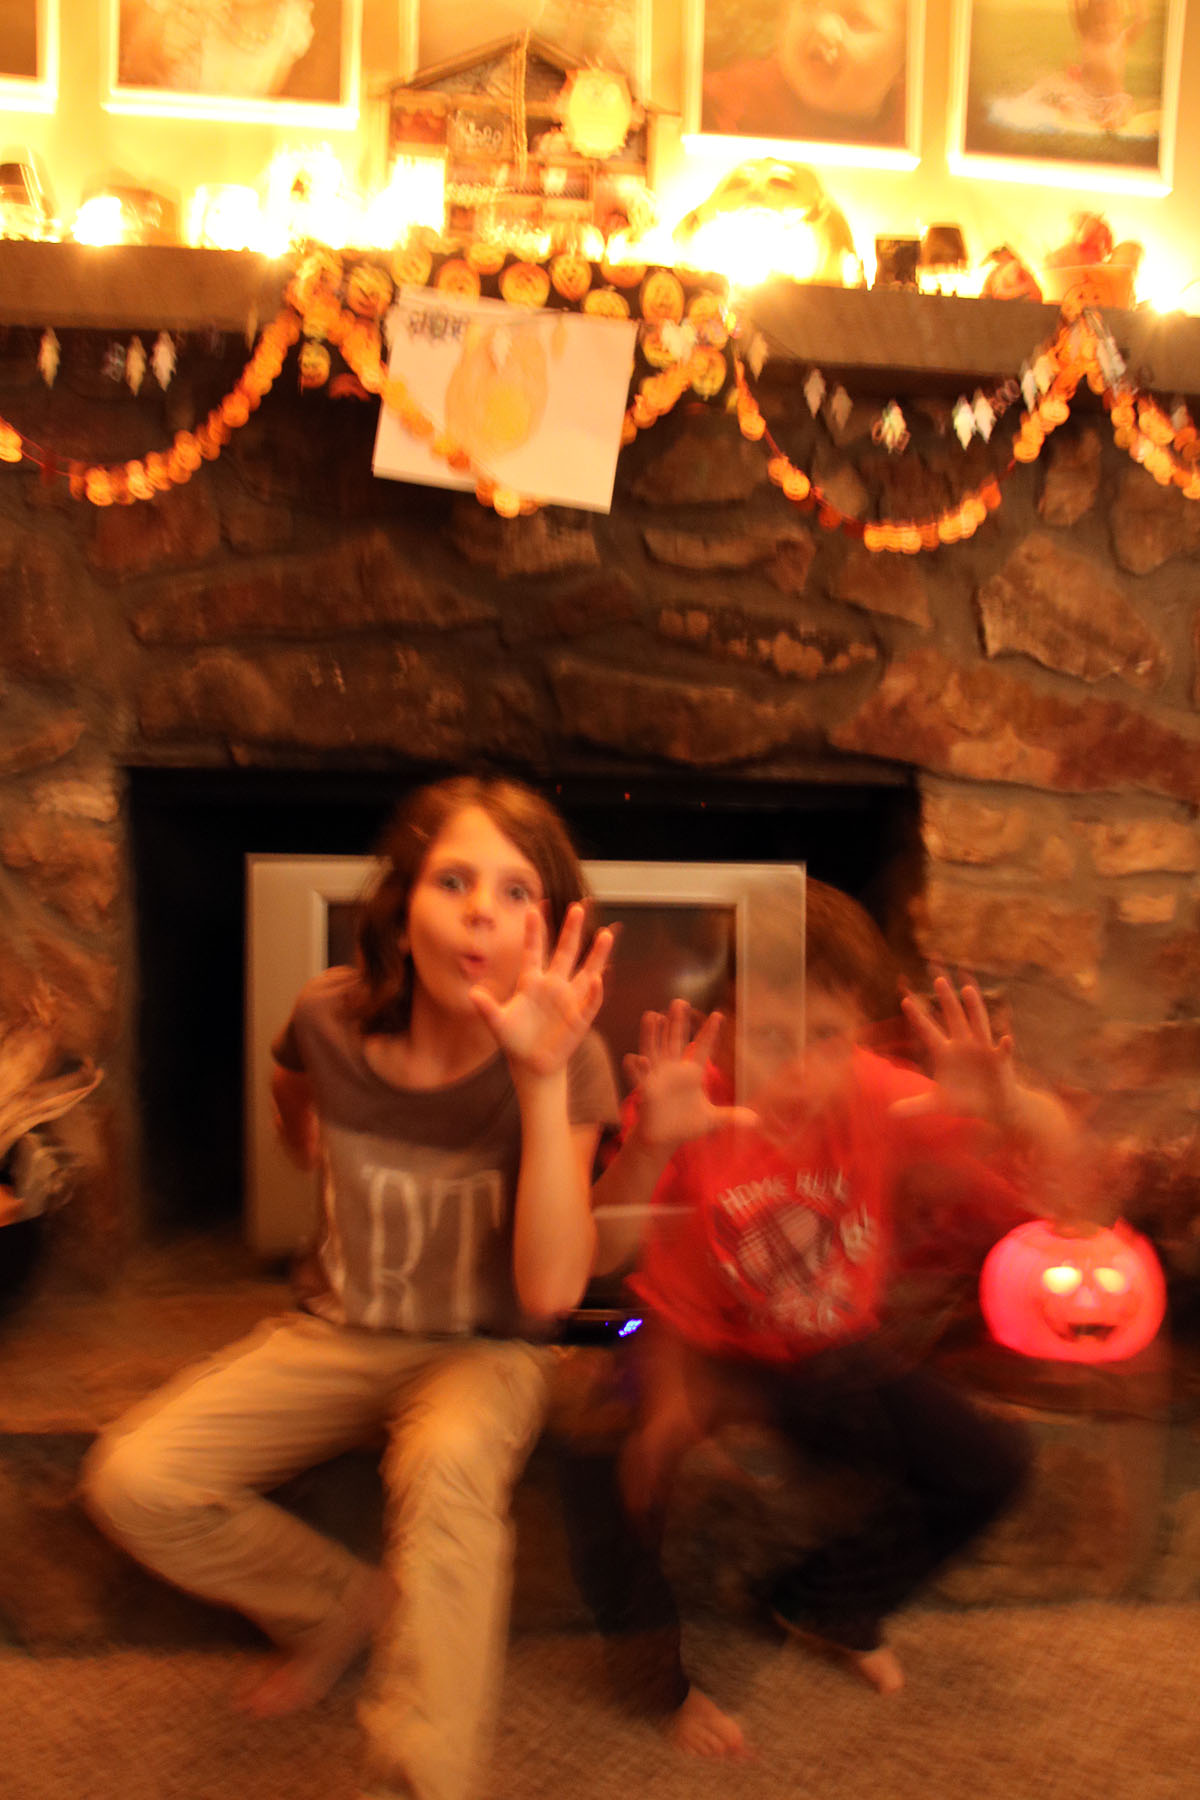
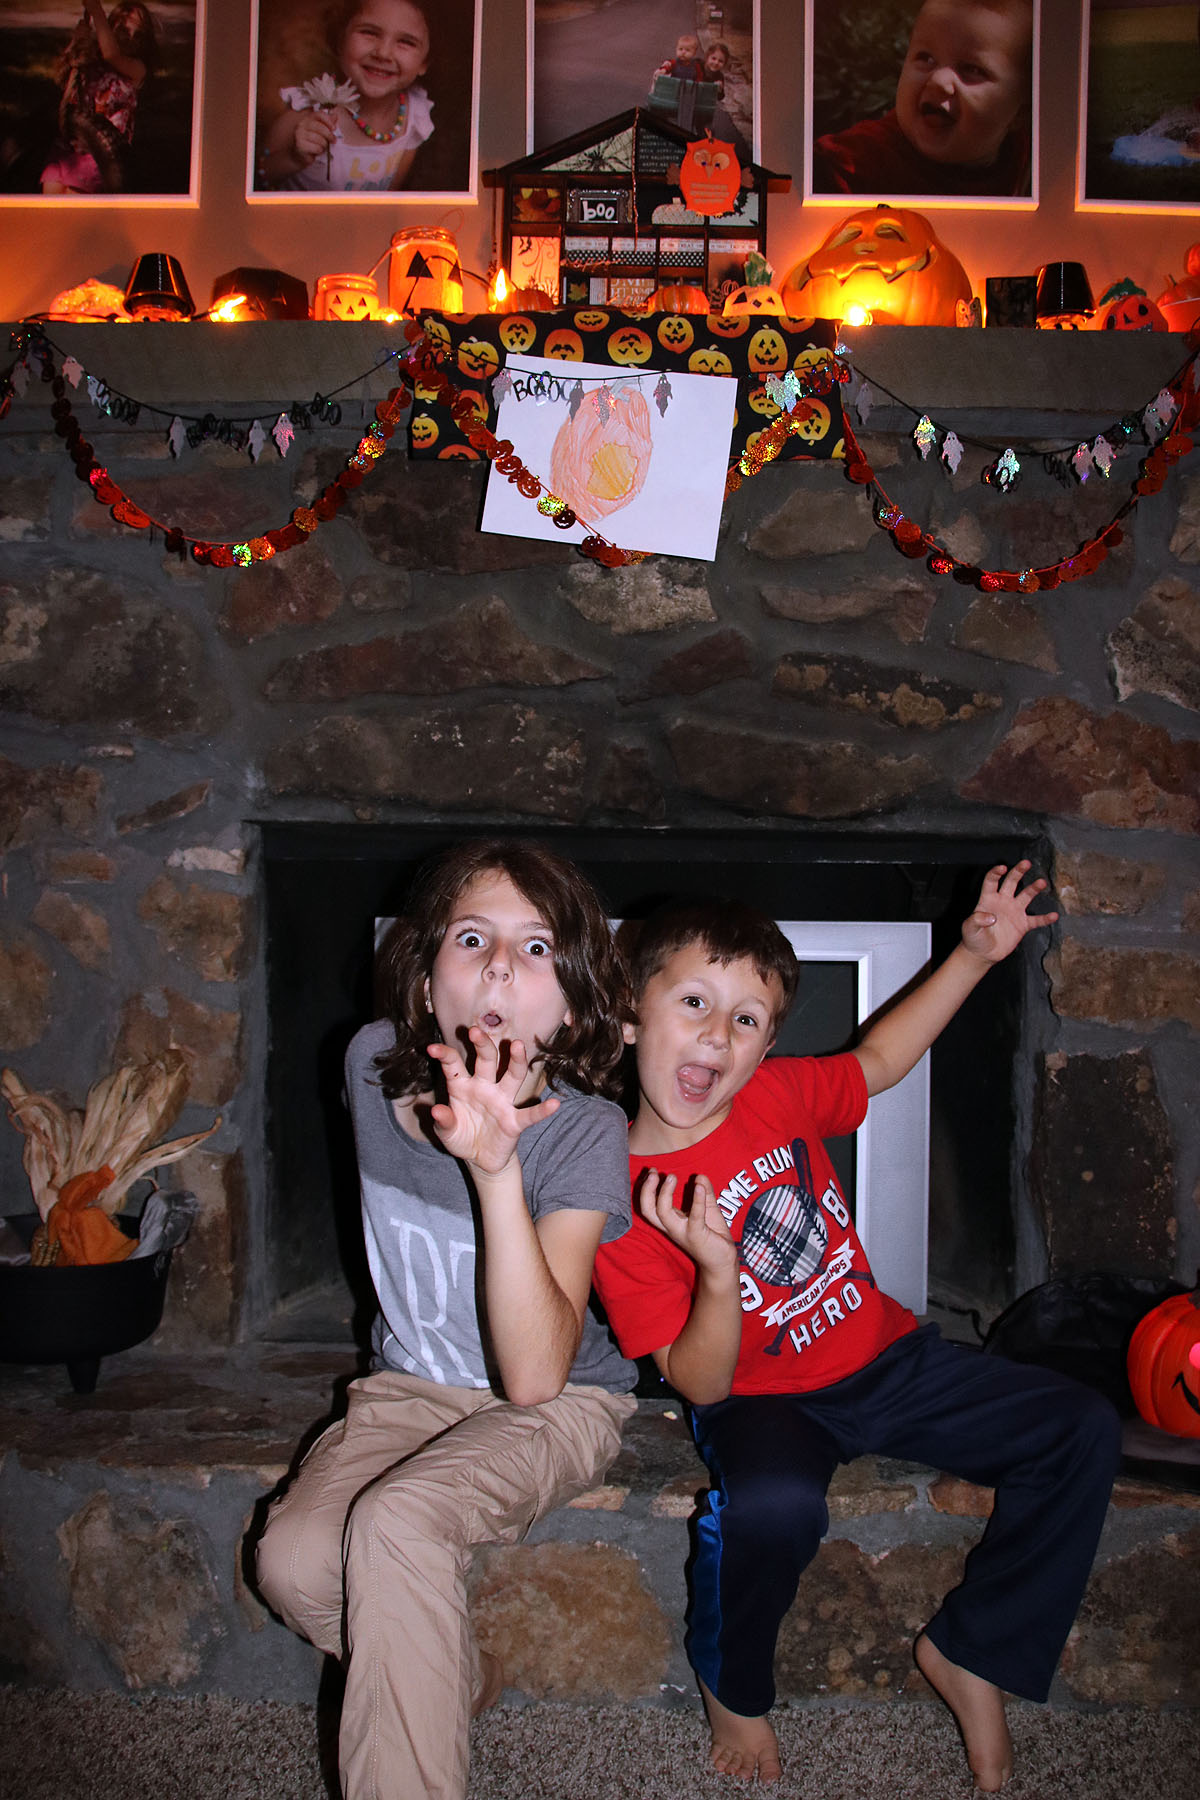
Our neighborhood is starting to get their Halloween decorations out, so Ayla and Paxton have been asking again and again if we could decorate too. Last night, we made it happen. We limit our Halloween decorating to the playroom and the front porch, though I'm sure they wish we had a huge and elaborate yard setup like many of our neighbors do. I don't have quite that kind of commitment when we only get about 5 trick-or-treaters at our house. :)
So, for a few weeks, we have a pumpkin mantle...

And happy kids...(this accidental photo turned out to be nice and spooky!)
We've had a couple of crisp fall-like days this year...but today we're back up in the 80's and wearing shorts with the air conditioning on. :( We'll just be thankful the air conditioning is working though! The motor died out a couple of weeks ago, and Ben was able to replace a couple of parts and get it working again. He's awfully handy...
Super Blood Moon
I didn't realize what a phenomenon it was, but when Ben told the kids about the Super Blood Moon lunar eclipse that was going to happen last night, I picked up my camera and went outside with them to check it out.
It was a fairly cloudy night here in Hoover, Alabama, so unfortunately, a good portion of the time, the eclipse was covered by clouds, but the clouds parted just long enough for us to get a peek of the process and the red hue.
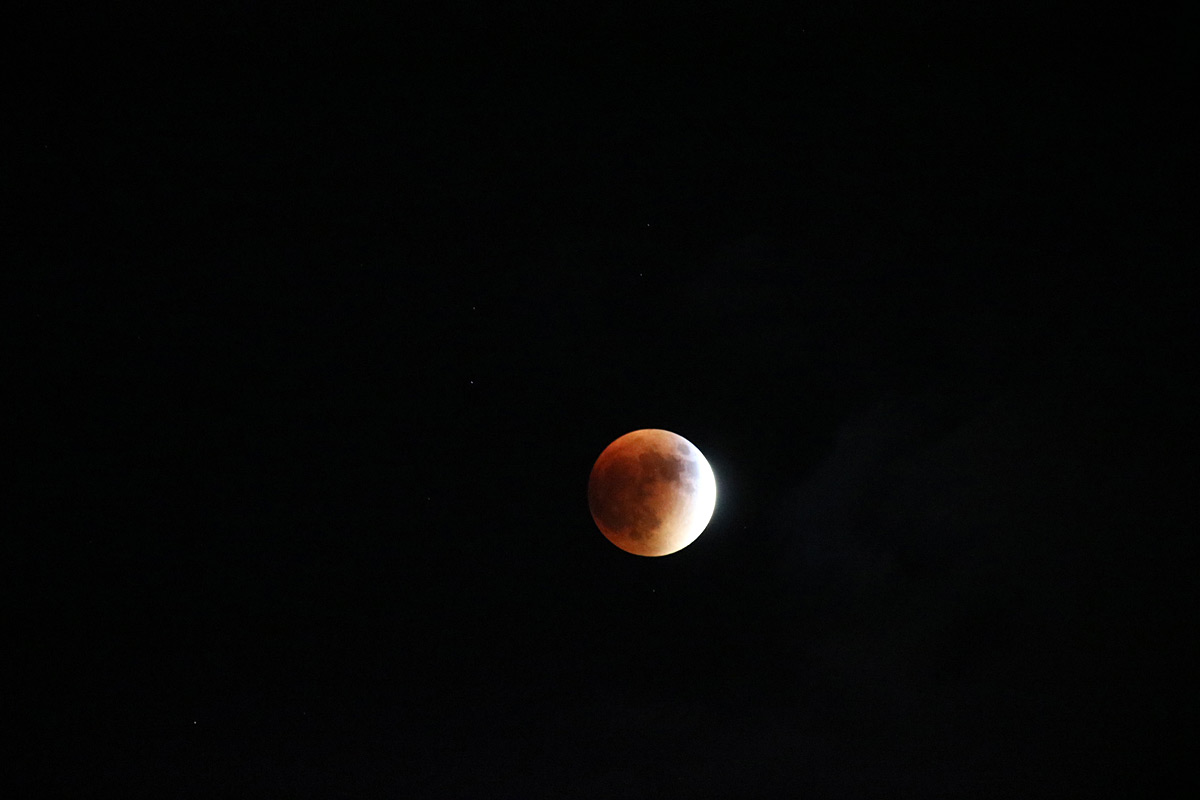
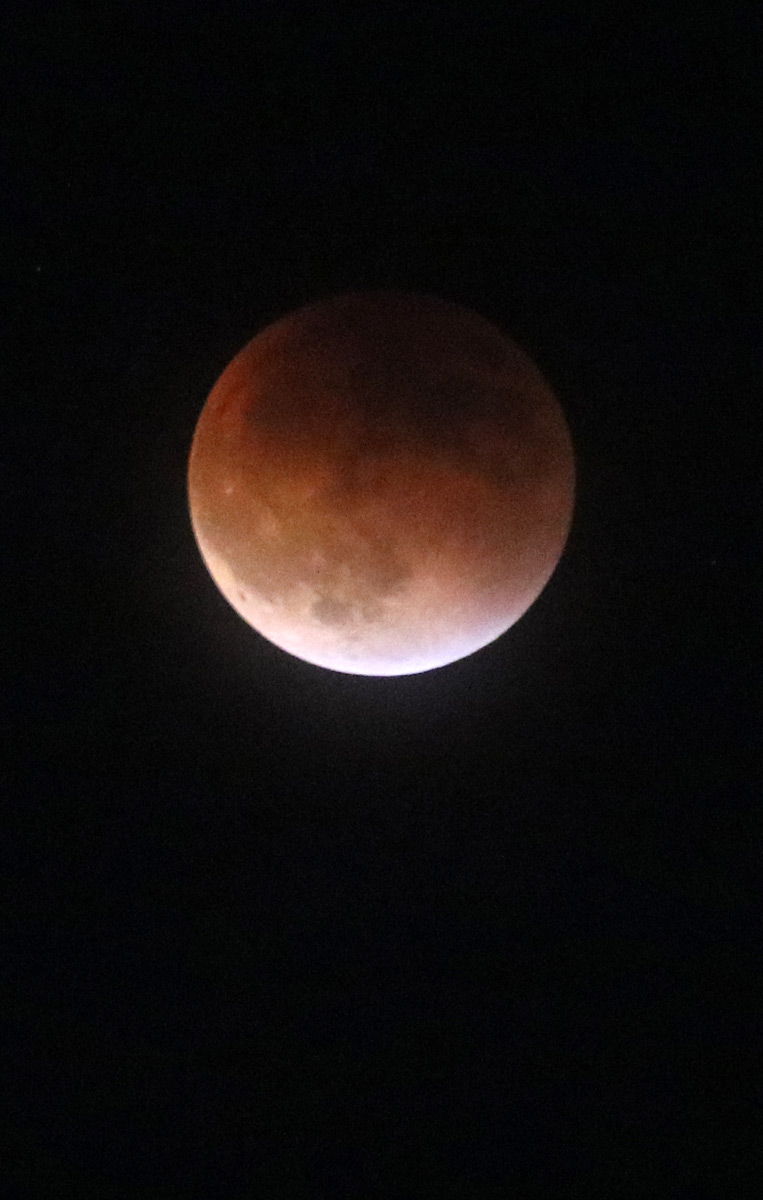
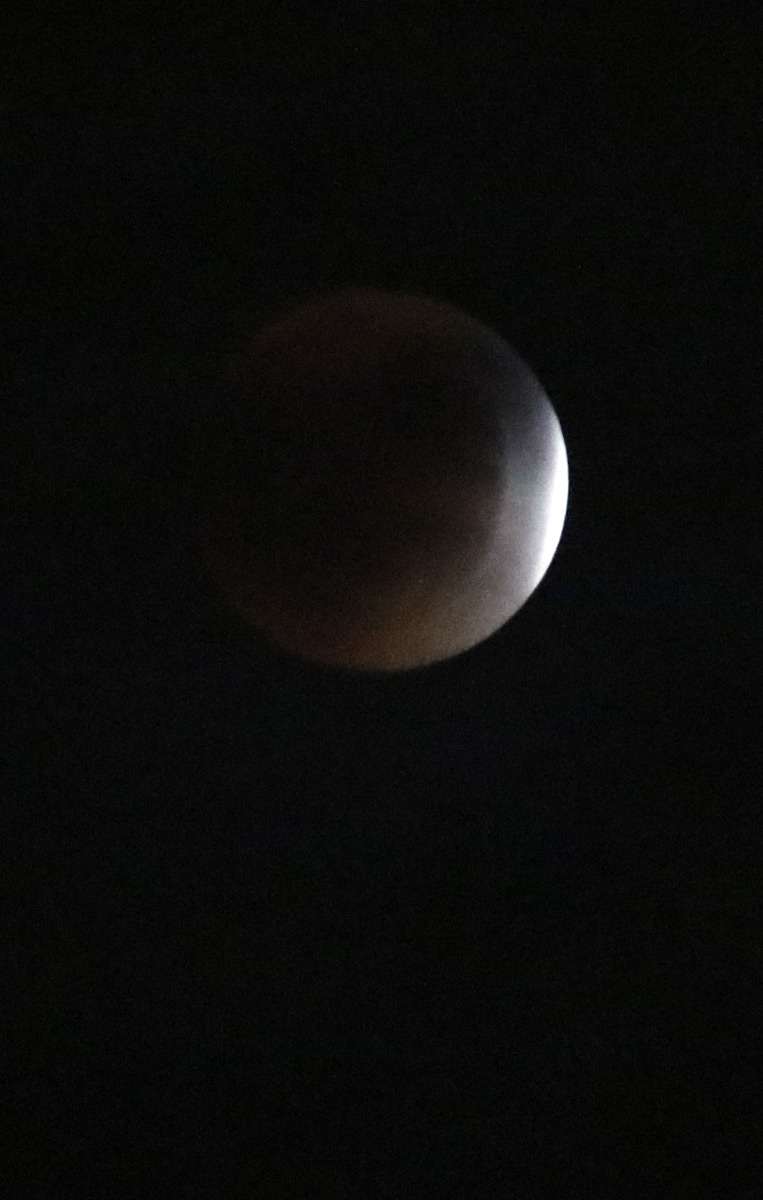
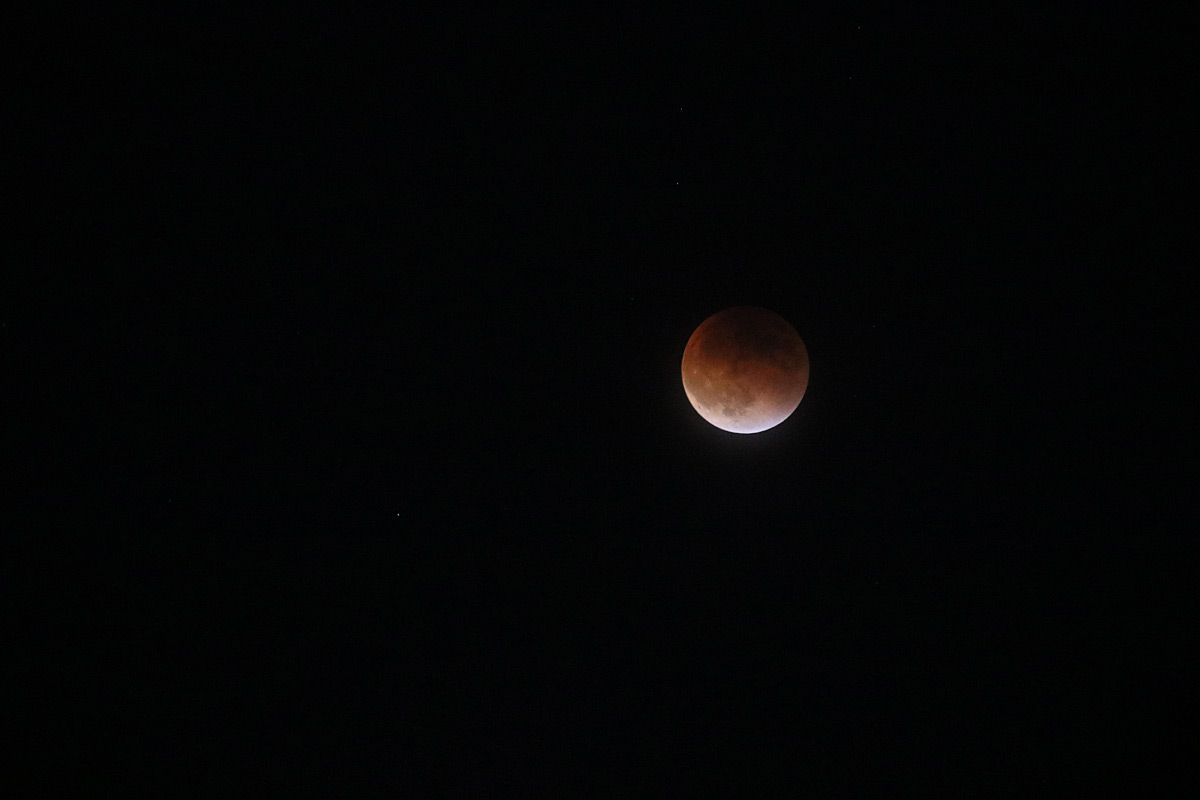
It was a pretty cool thing to see--and I was impressed with how well my camera worked -- I can't take much credit for the photos other than pressing the shutter button. My equipment did all the work. My new Canon T6s camera and Sigma 18-250mm lens did all this in automatic settings with the flash turned off. I did take out my tripod after I got such a great shot without one (the top photo in this post), to get the photo above when the clouds parted again a little later in the evening.
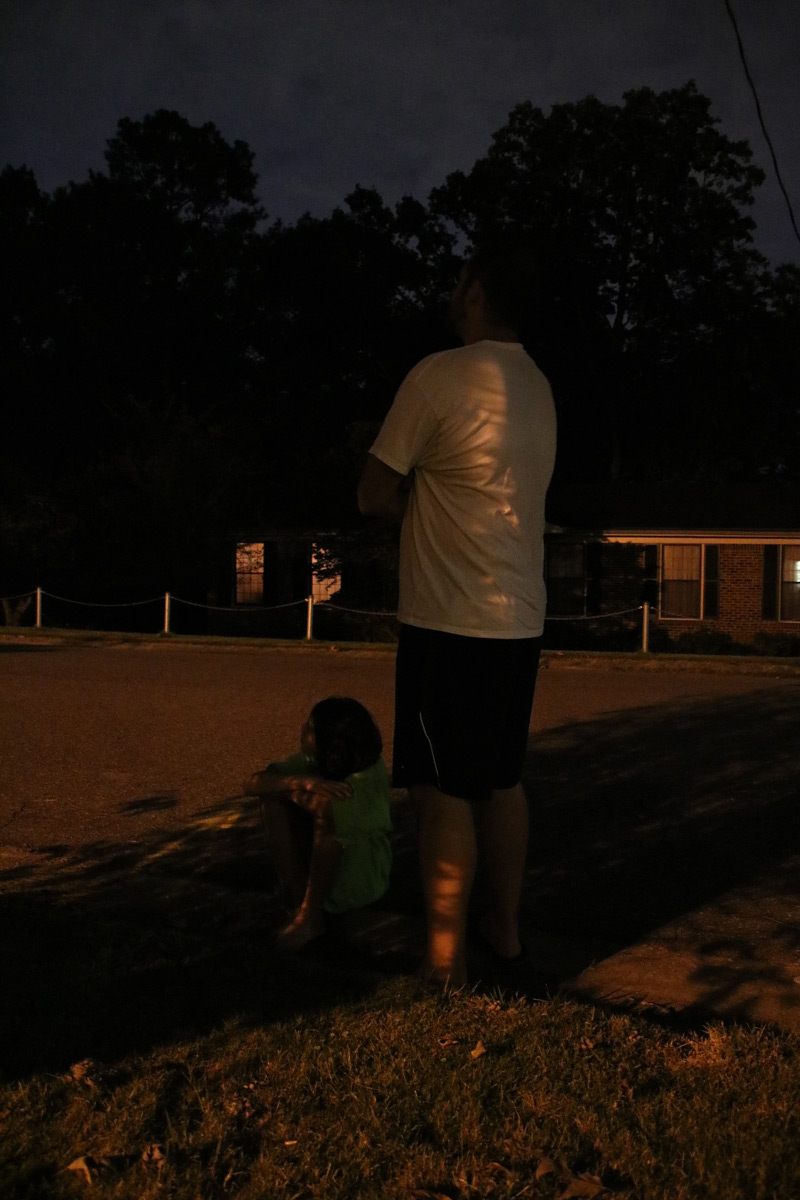
And though it's grainy, I was even able to take a photo of Ayla and Ben watching the eclipse without having to use a flash. Yay for a high ISO! :) Now I'm looking forward to taking some fun campfire pictures in a couple of weeks!
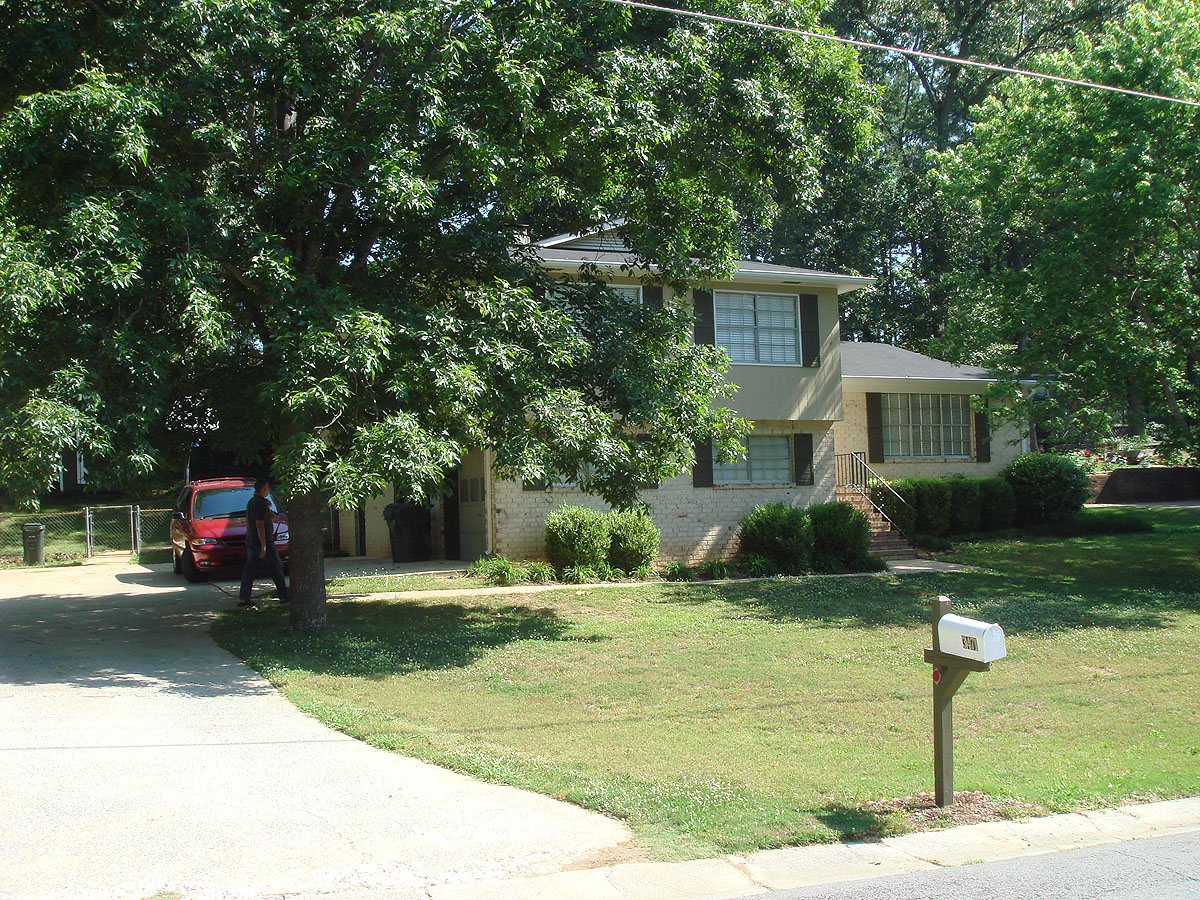
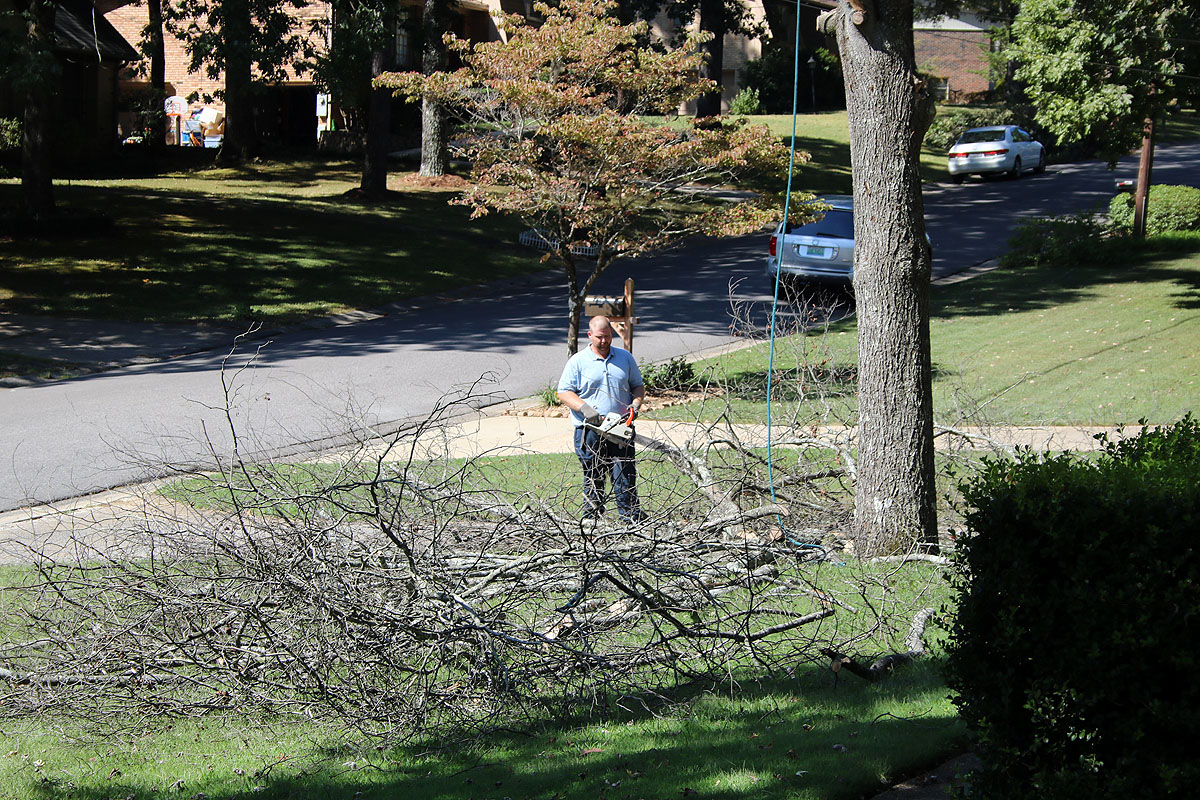
So Long Big Tree...
Isn't it funny how something you rarely think about can actually hold so many memories? This big tree next to our driveway has been a part of our daily life for over 8 years.
We trimmed it back the first day we arrived so that our moving truck would fit in the driveway.
I took the kids' photos against the trunk of the tree more times than I can count.
We used it as a guide for where to back out of the driveway every single day that we've lived in this house.
And Janel accidentally backed into it once--since then, I've called it Janel's tree. :)
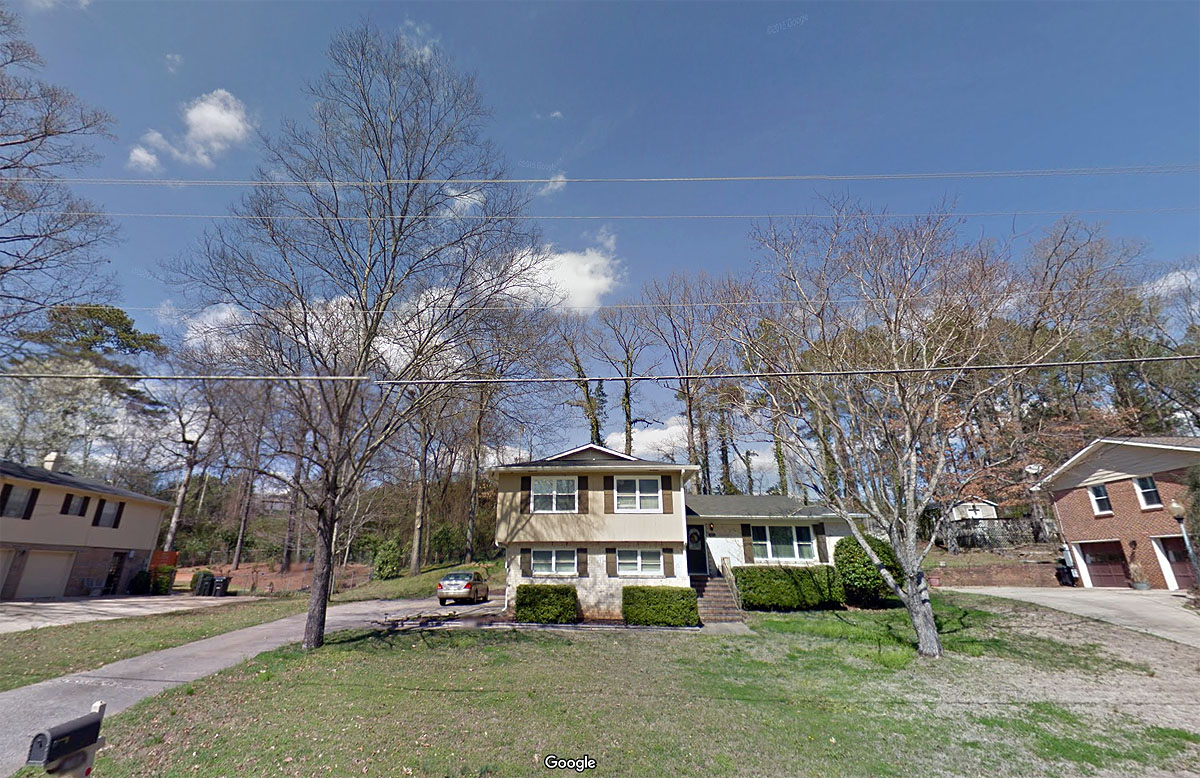
How is it that a tree that was such a big part of our daily life rarely showed up in my photos? I went digging and was finally able to find these photos (above) from the day we looked at this house when we were thinking about buying it, back in 2007. And Google Maps street view can show us what it looked like this past winter:
Unfortunately though, something must have happened to this big old tree this year, because the leaves never grew back this spring and it was totally dead. :(
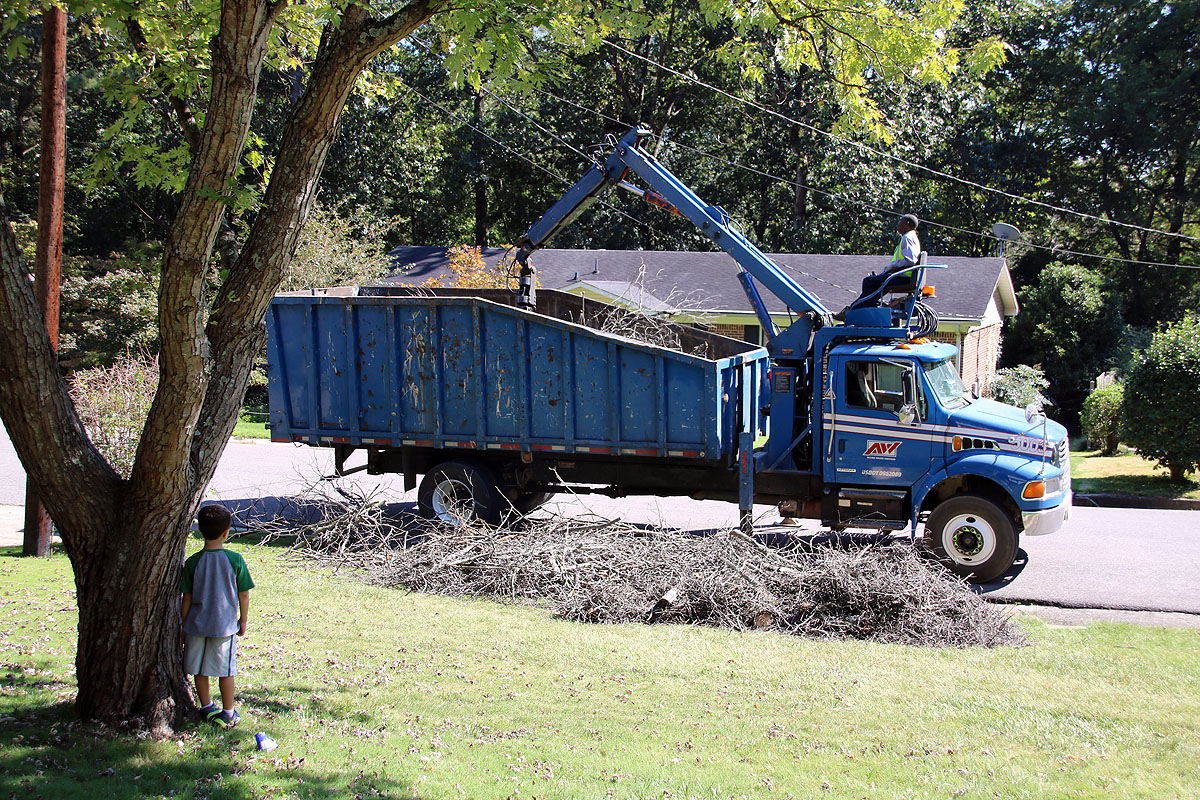
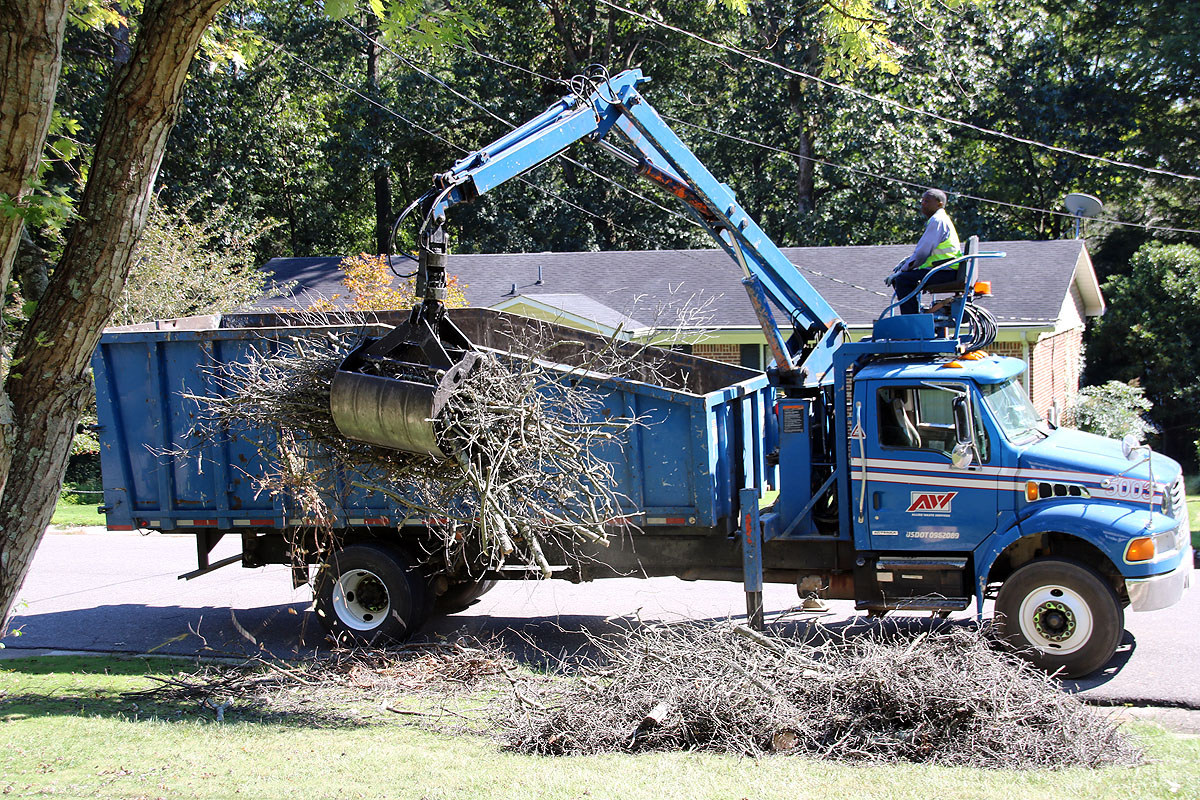
We are in the middle of having a whole bunch of landscaping work done in our backyard (more on that soon!), so last Friday when the tree-guys that work with our landscaper offered to chop it down for us for a good price, we jumped at the chance--and it came down within hours!
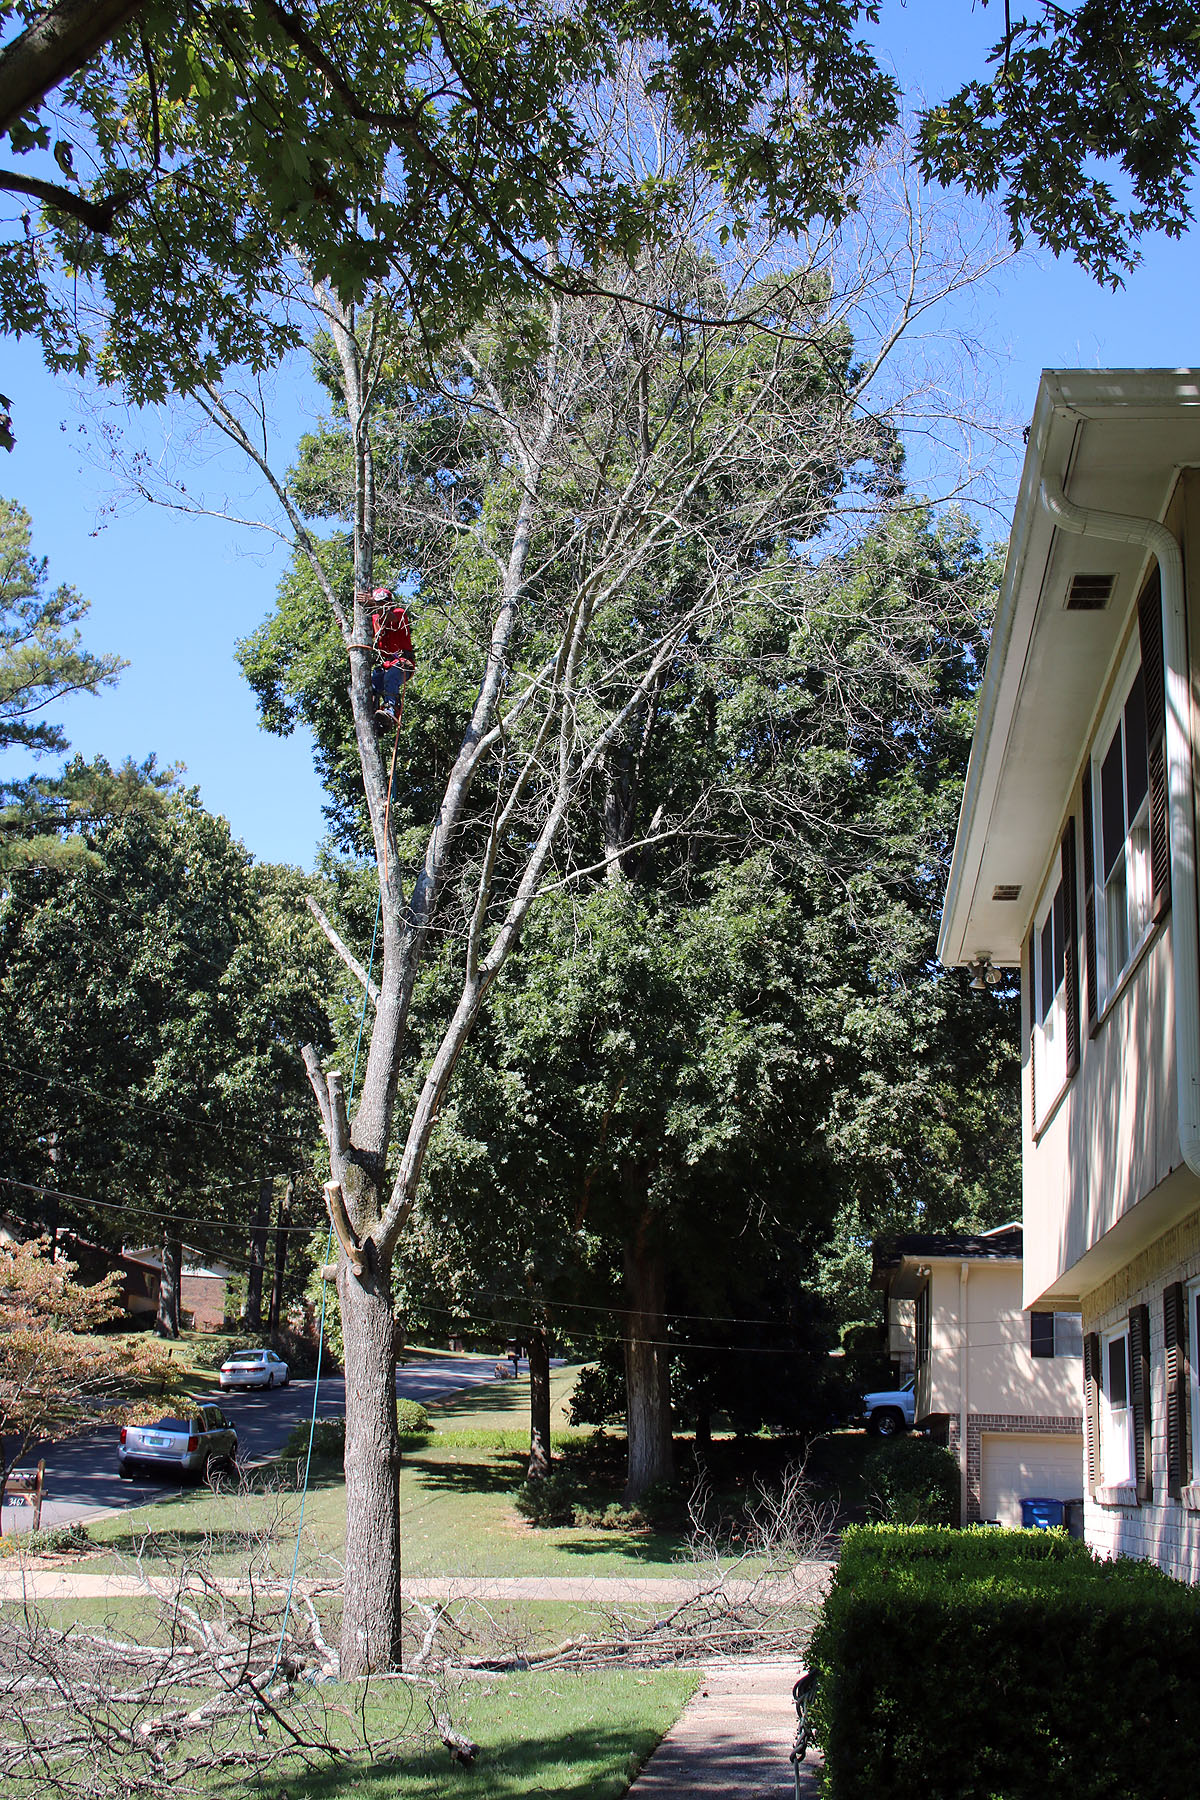
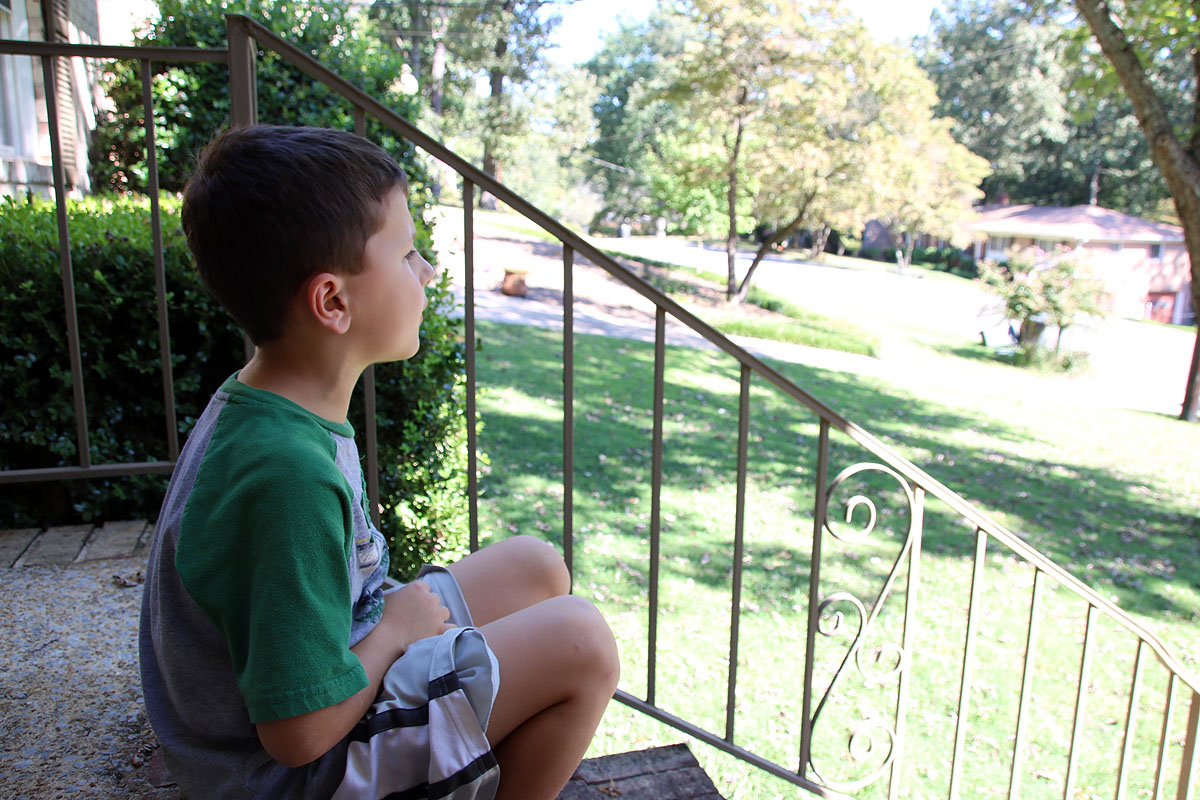
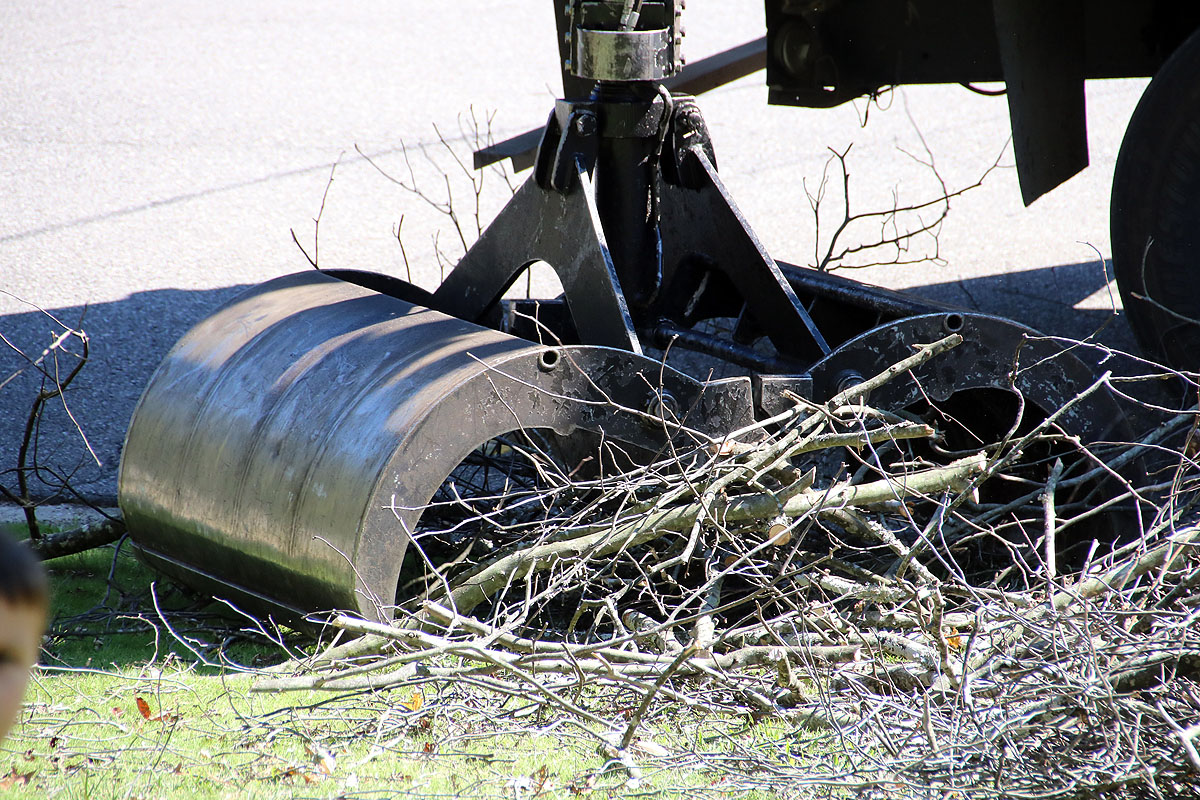
And by another great stroke of luck, the limb truck that we've all been waiting on for WEEKS to pick up piles of sticks and tree limbs all over the neighborhood showed up just an hour after the tree was down and all the workers had disappeared. Paxton was entertained as he watched the man work on grabbing all those sticks and dropping them into his truck.
It was actually kind of sad to say goodbye to this tree, and we really hope whatever happened to it doesn't happen to the other great big tree in our front yard.
For now, it's a whole lot sunnier in the front yard, and I've got to find a new way to know where the driveway ends and grass begins when I back the car out of the driveway!
So long big tree! We will miss you...
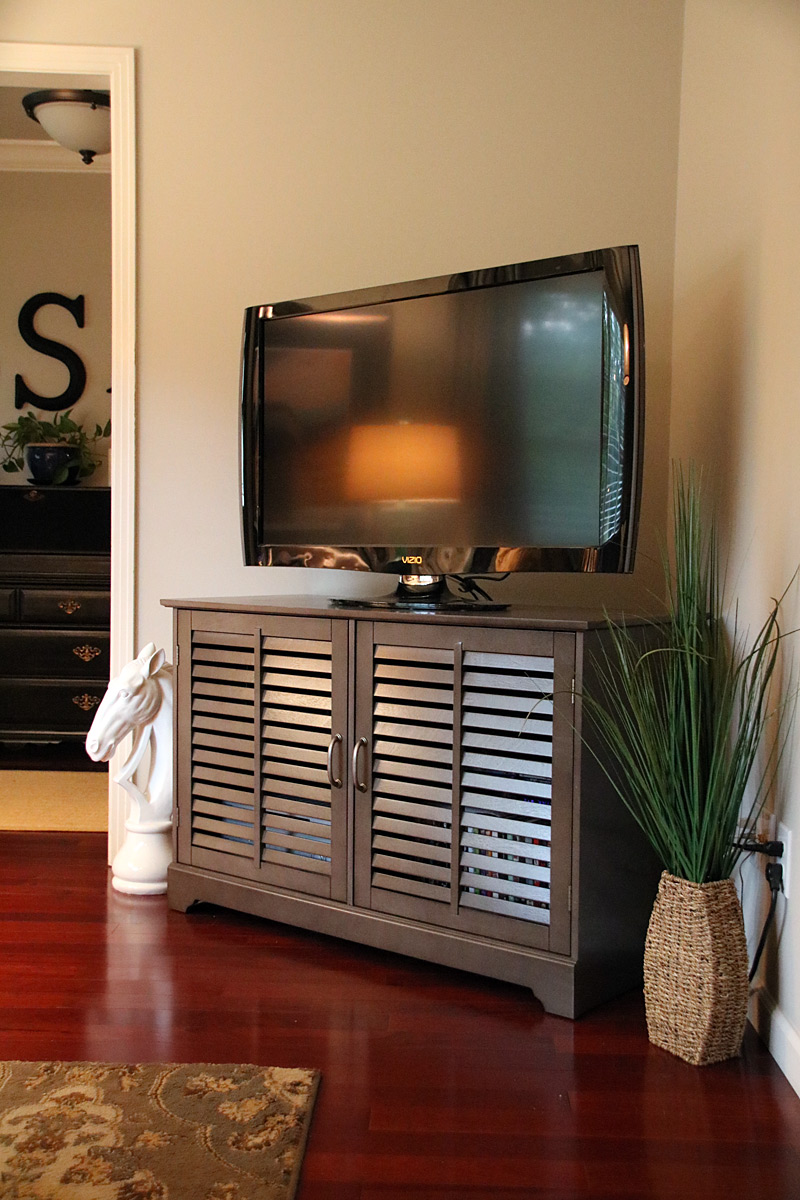
Living Room Updates
Two years. That's how long I've been searching for a TV stand for the living room. It took up entirely too much of my brain-power and it's been a thorn in my side.
It's official. I like "decorated". I do not like "decorating."
But, today, I'm happy to cross it off my list (along with several other new additions to the living room over the past several months) - new end table, new lamps, and new coffee table.
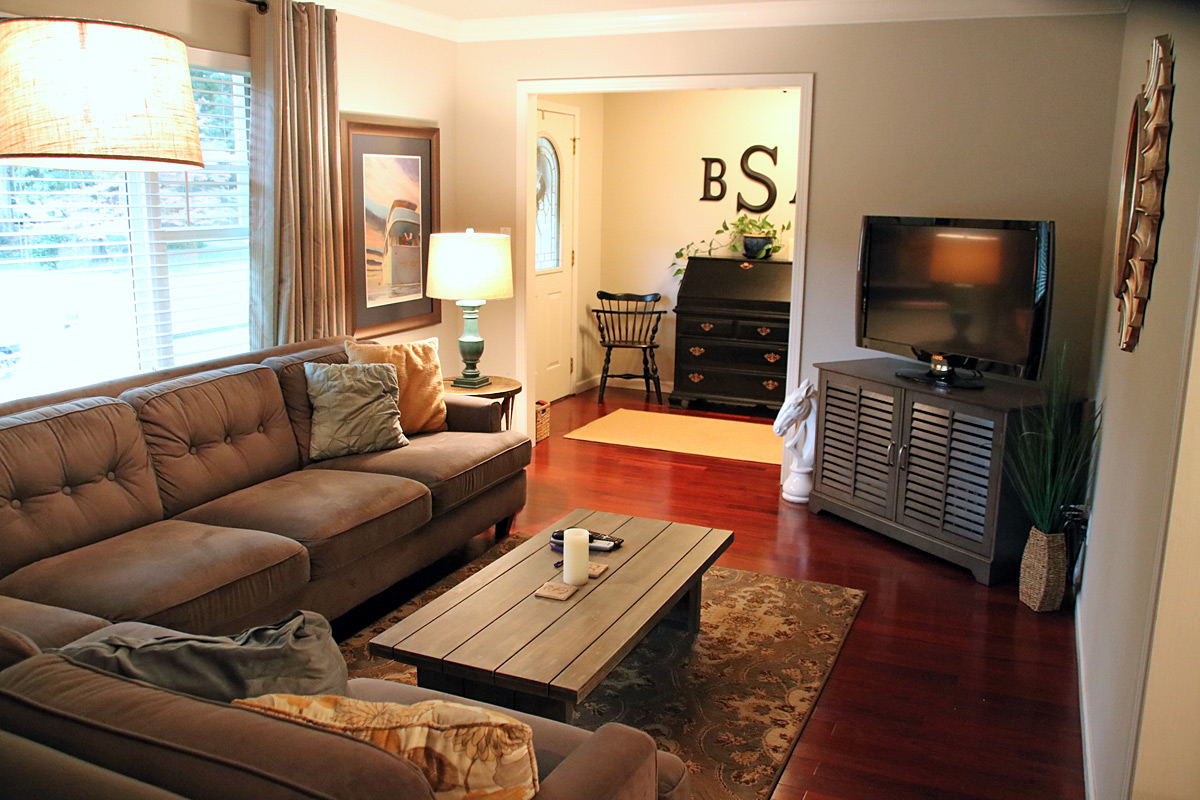
Can I call this room finished yet?

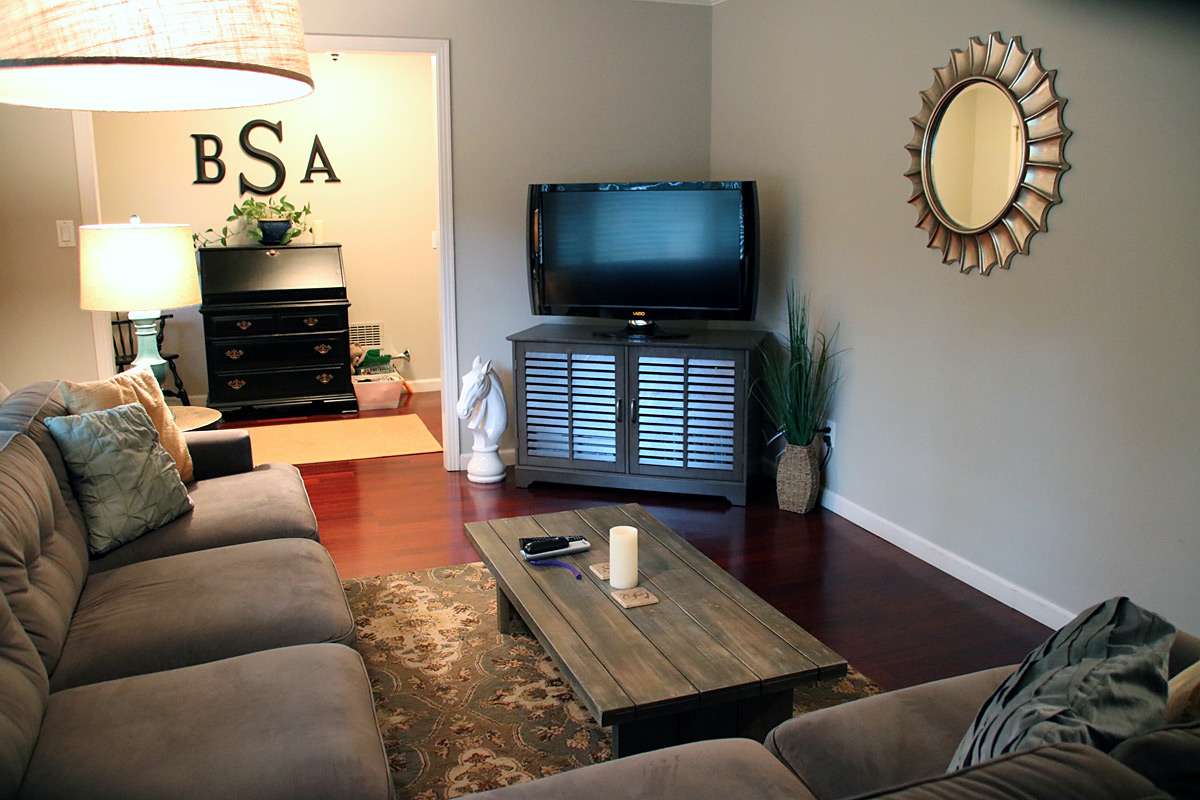
- Threshold Shuttered Door TV Stand - Target
- Loden Arc Floor Lamp - World Market
- Natural Burlap Drum Floor Lamp Shade - World Market
- Metal Compass end table (copper) - At Home
- Bree Corner Section in Bela Pewter - I.O. Metro
- Teal Lamp & Shade - HomeGoods
- San Paolo Outdoor Coffee Table - World Market
- SW Worldly Gray 7043 - Sherwin Williams Paint
- Emma Throw Pillow - World Market
- Expedit Bookshelves - Ikea
- Imperial Blue/Taupe Striped Grommet curtains - World Market
Six Inches = Worlds of Difference
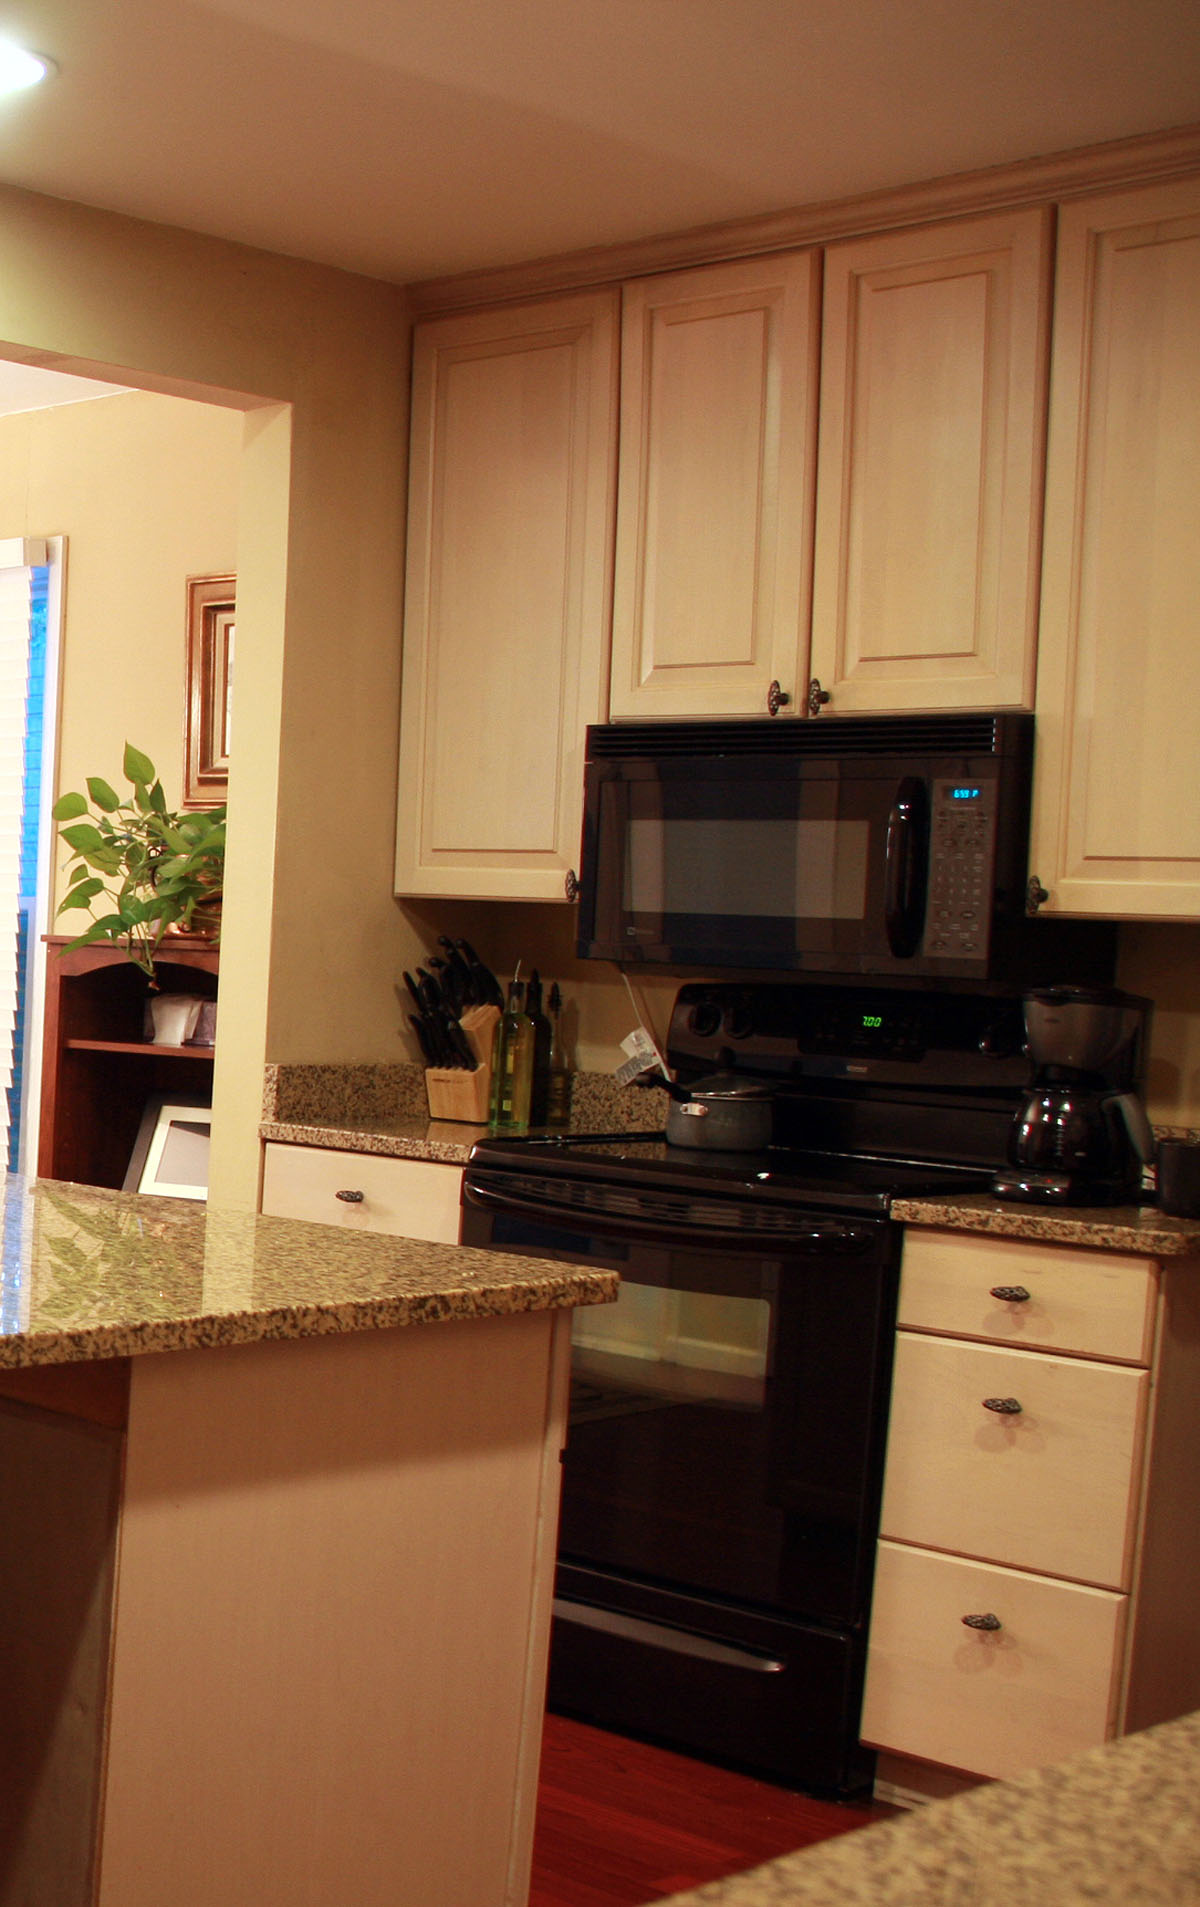
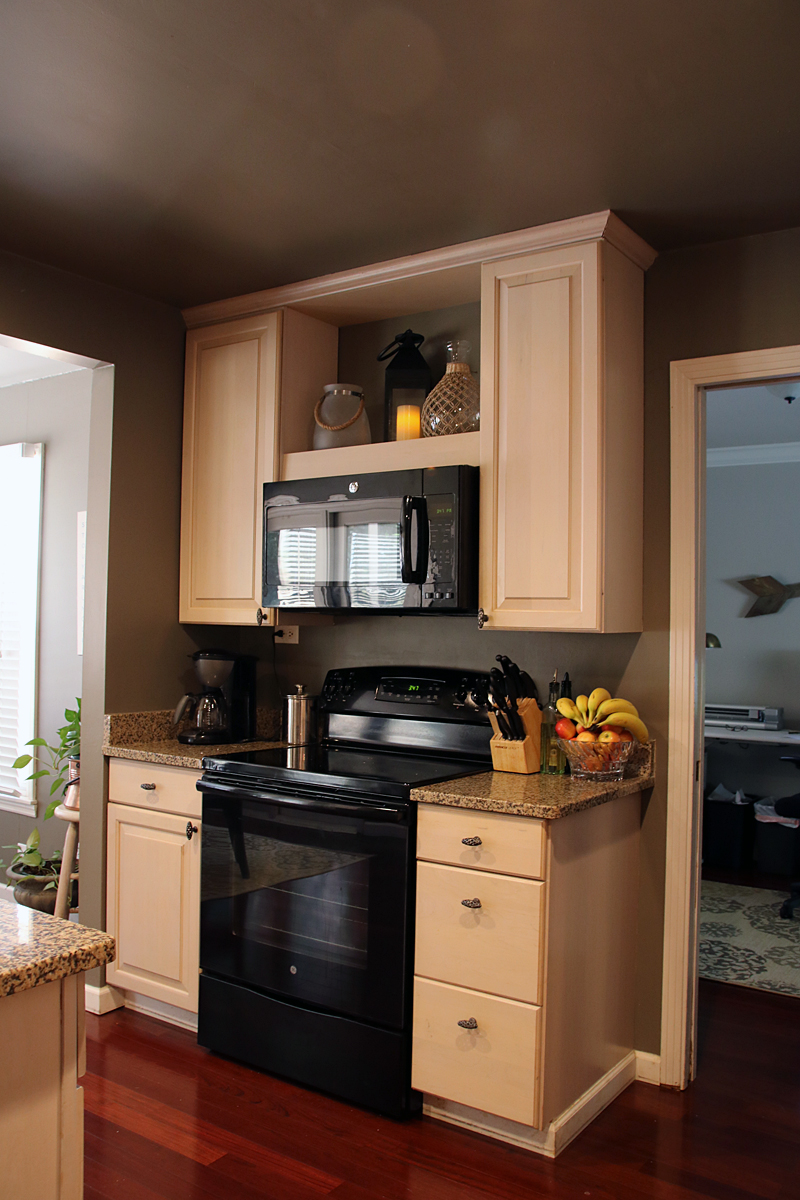
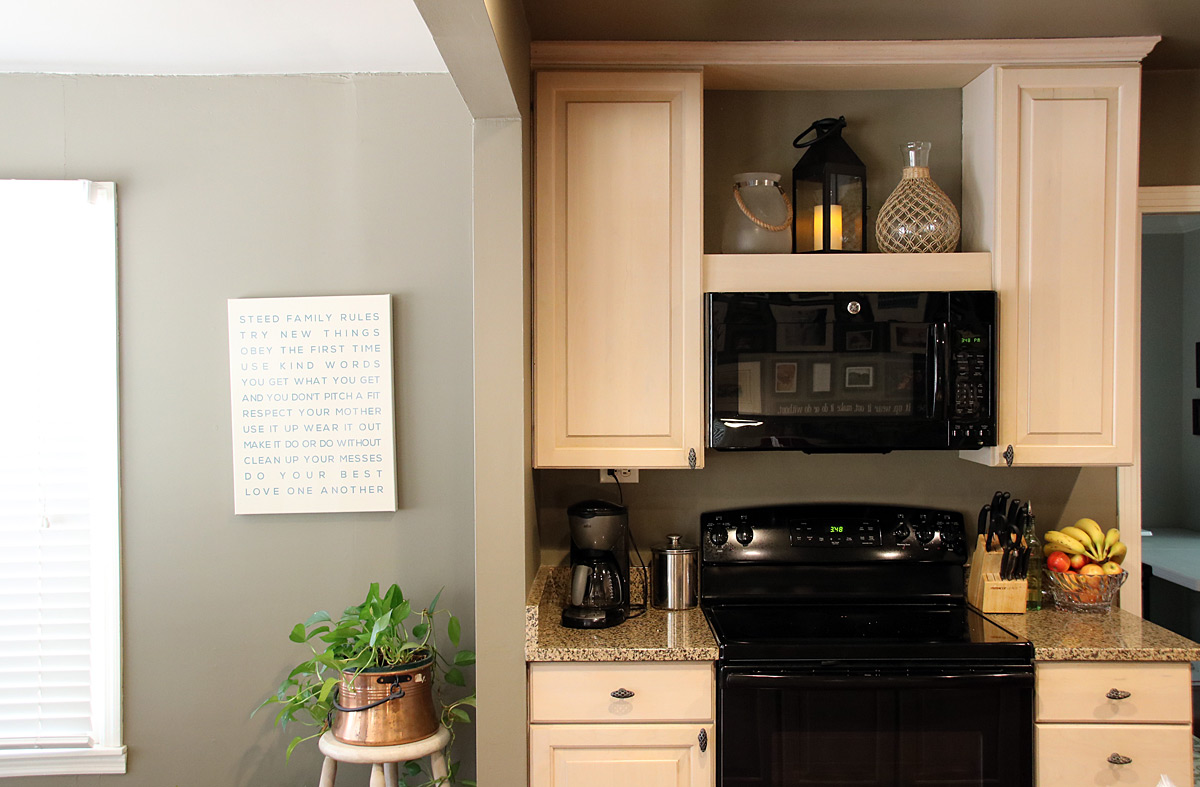
Ever since we moved into this house 8 years ago, the microwave and oven situation has annoyed us. The microwave was mounted WAY too low, and we couldn't get to the knobs for the stove and oven without bending over and reaching past the pots to access them. Not to mention the fact that the oven was a hideous black with white trim (that we painted black a couple of times over the years, but the paint kept chipping). Plus, the microwave door has broken and been patched together a couple of times on our watch. It was a pretty sub-par situation for an otherwise, pretty-nice kitchen.
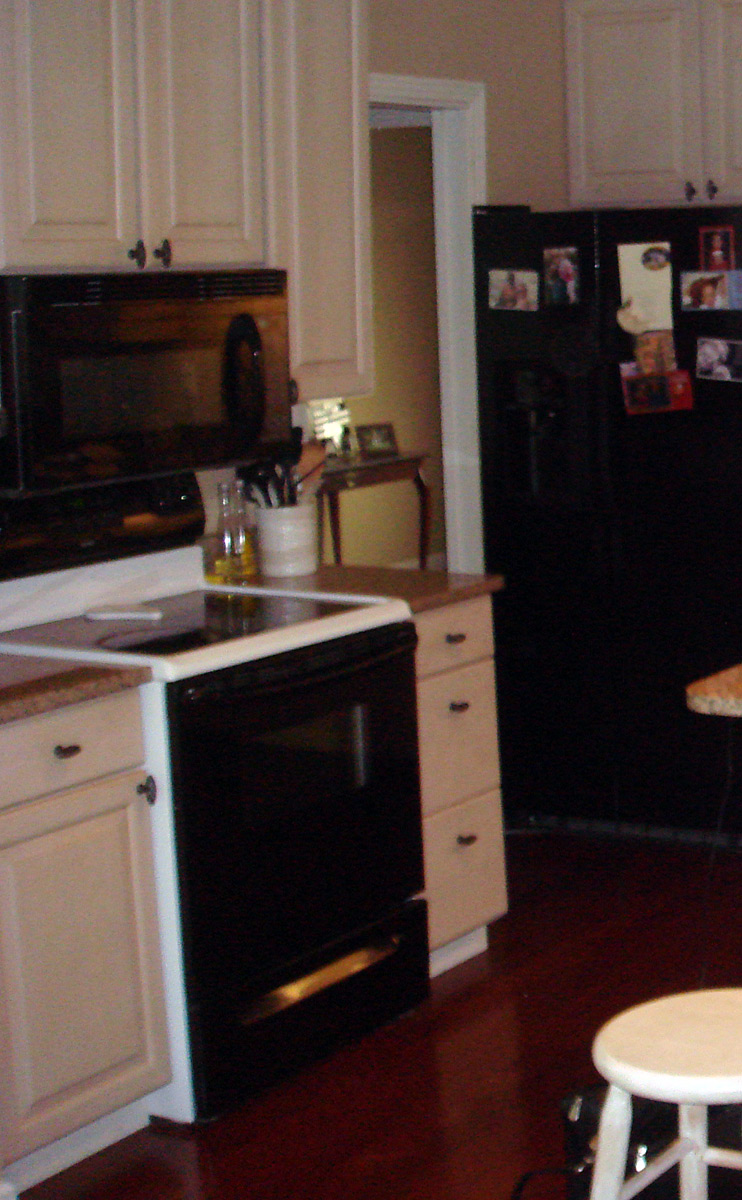
*photo taken during home inspection before we purchased the house
Earlier this summer, we decided we were ready to replace both the microwave and oven and finally address the height issue for the microwave. But...that meant we had to lose a cabinet that was way too long for that spot, and since the cabinets were installed about 15 years ago, we were unlikely to find a new shorter 24" cabinet to match. So we had to improvise.
Here's a little better photo of how it looked a few years ago before we painted the kitchen:
One Saturday in June, we removed the cabinet and took down the microwave to see what we had to work with. All summer, we've been cooking with the microwave on a 4ft table in the dining room, while we ordered new appliances and brainstormed ways to hang the new microwave higher. It seems like it would be a simple project, but there are *always* challenges to work around. When we removed the cabinet, we had to finish off the ceiling, build a shelf, notch around the wood in order to use the outlet that was exactly behind where the top of the microwave needed to hang, deal with a pocket door behind the wall (which makes anchoring a shelf & microwave tricky), and try to find trim that matched our cabinets to keep it all looking "on-purpose". Renovators deserve big bucks. This stuff is not easy.
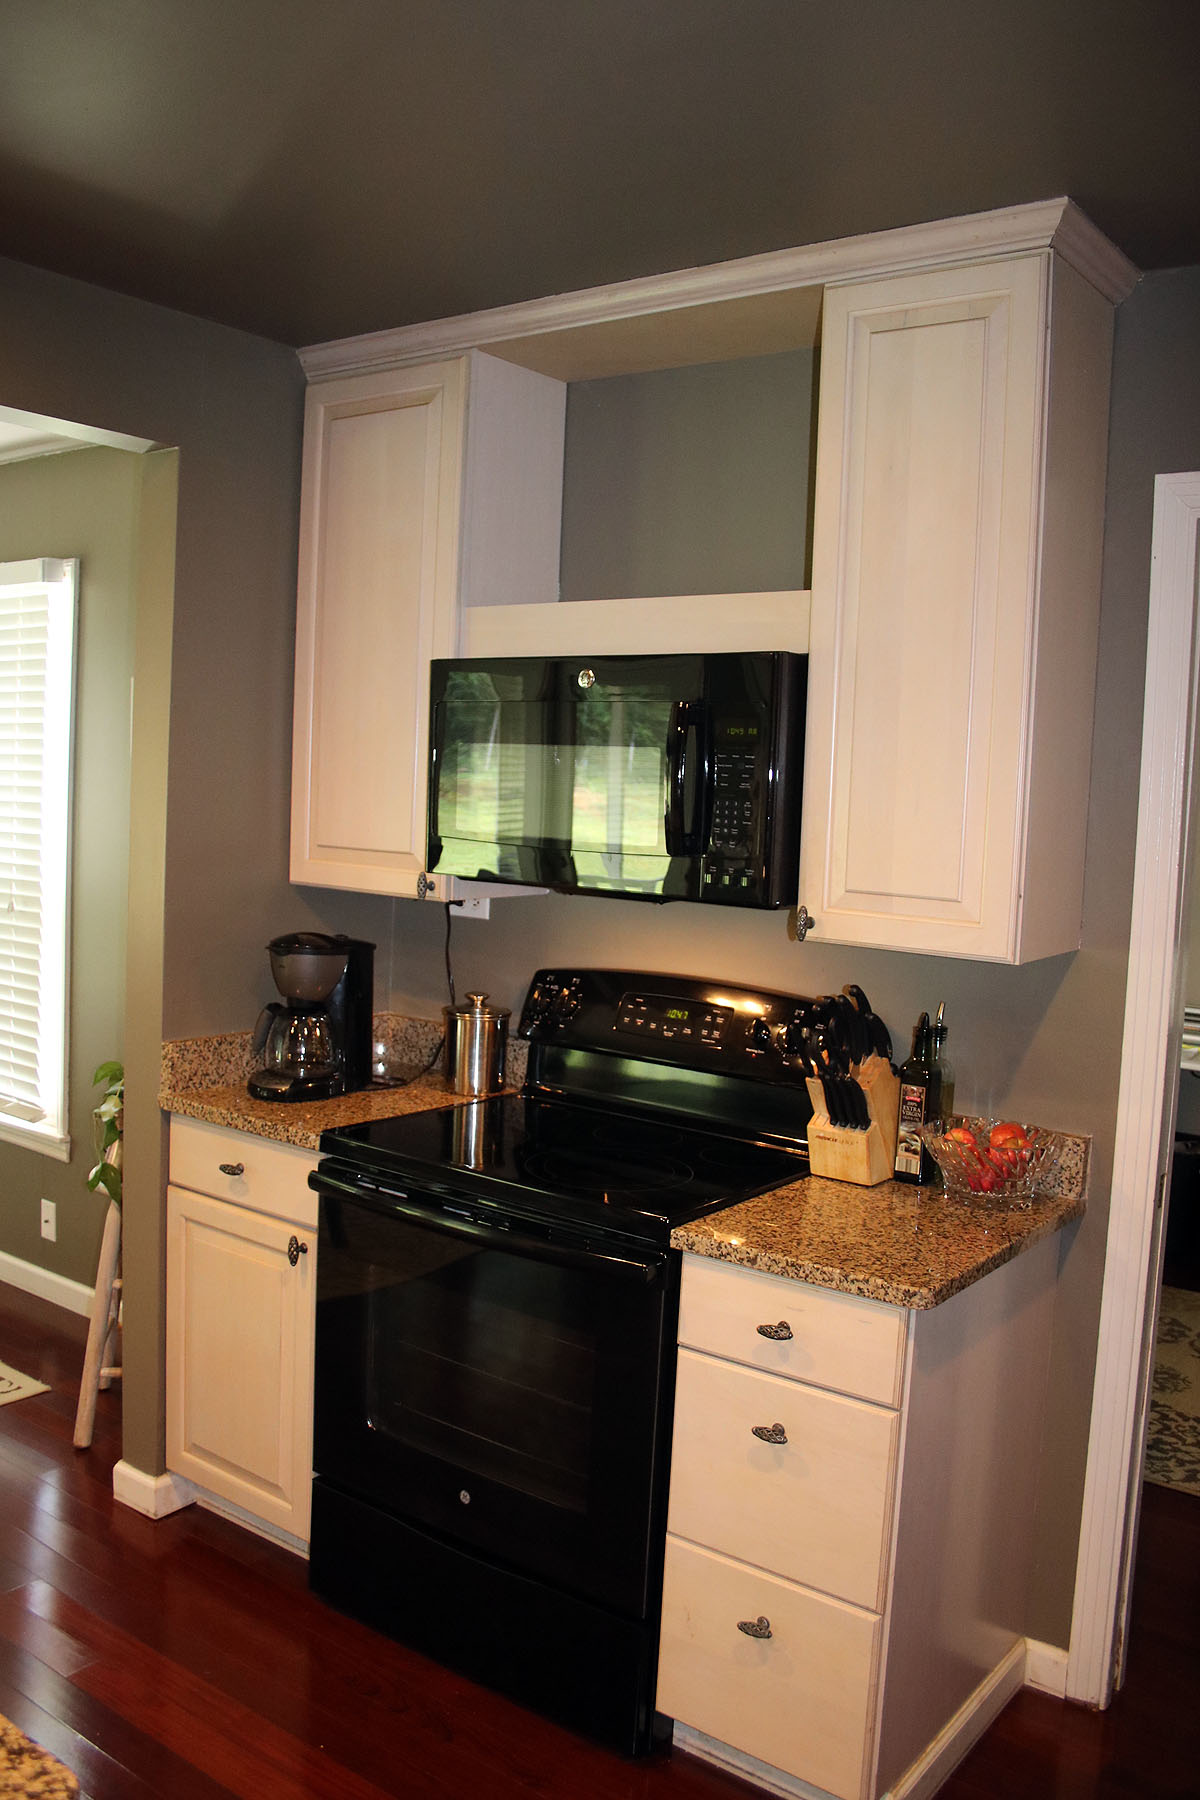
It took us all day, and LOTS of tools, but Ben built a new shelf (that we now need to find something cool to put up there), mounted the microwave at an appropriate height (though Paxton disagrees), and we can now enjoy our new appliances. Thankfully, we found a few strips of matching trim in the garage, an almost-same-color wood board to create a drop-ceiling, and we didn't kill each other or break anything else in the process!
It may not look exciting to you, but this is an 8-year-old annoyance solved for us!
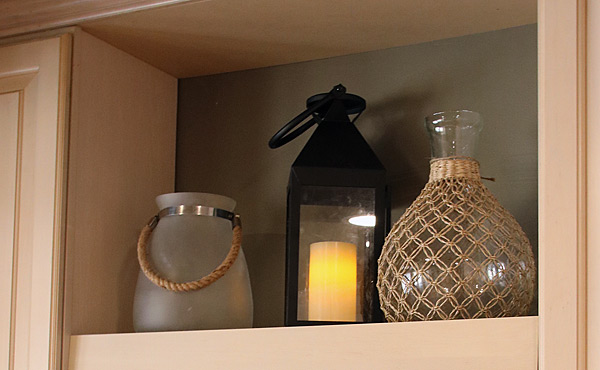
UPDATE: We filled the gap. :)
It's nothing special, and might get replaced one day if we find something with a little more meaning or sentiment, but for now, these three items from At Home will certainly do...
Summer Hair
I was looking to look a little different, and am not *quite* ready to chop all my hair off yet. (I'm tempted...but it sure takes a long time to grow out.) So instead, I added a little more sunshine to my dark hair:
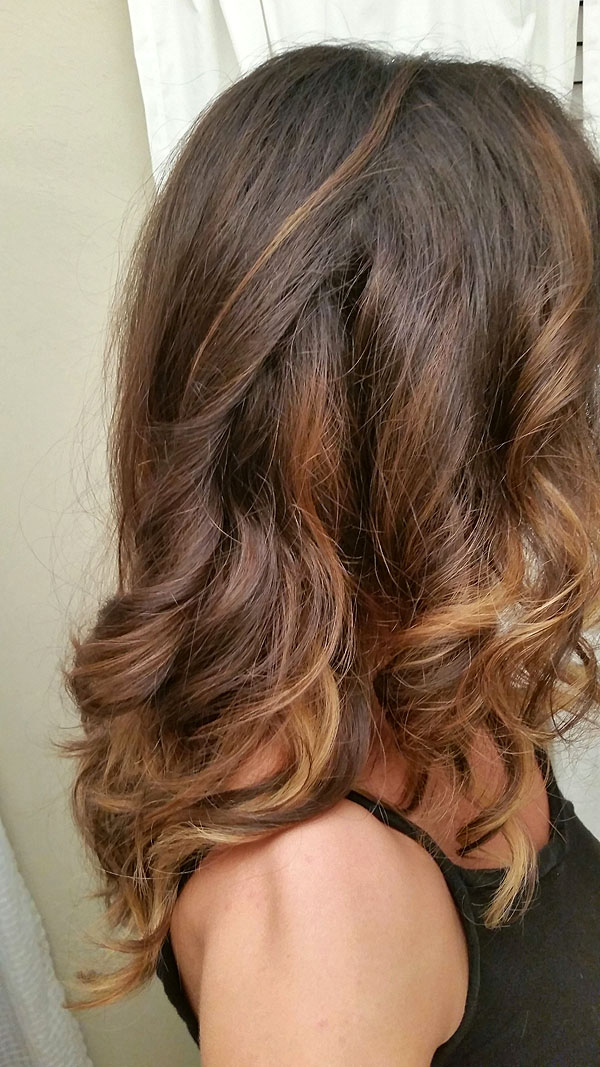
I had my hair stylist add more balayage highlights and some more layers. Looks pretty bright!
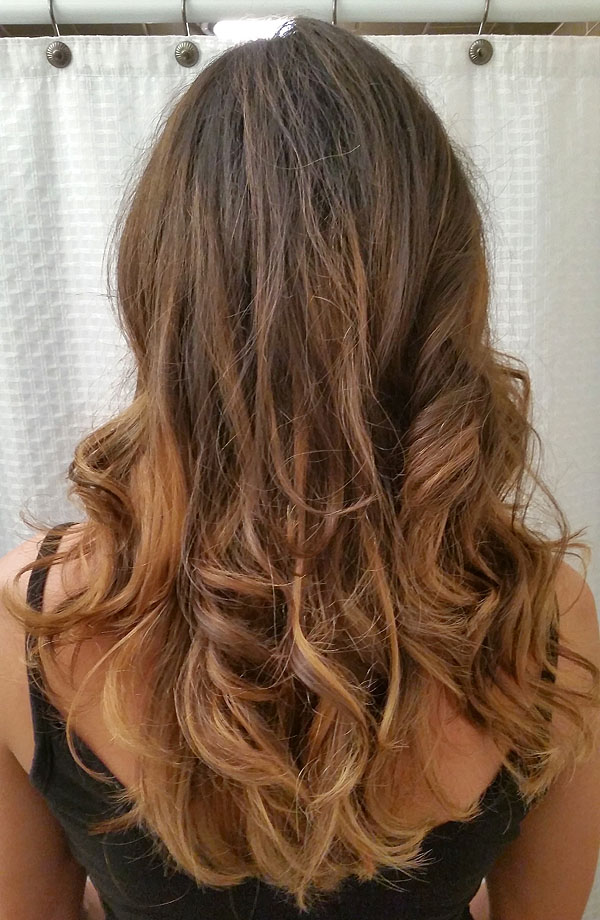

My hair has never been so light. But hey, why not? Summer is just around the corner...

Las Vegas Photo Scavenger Hunt
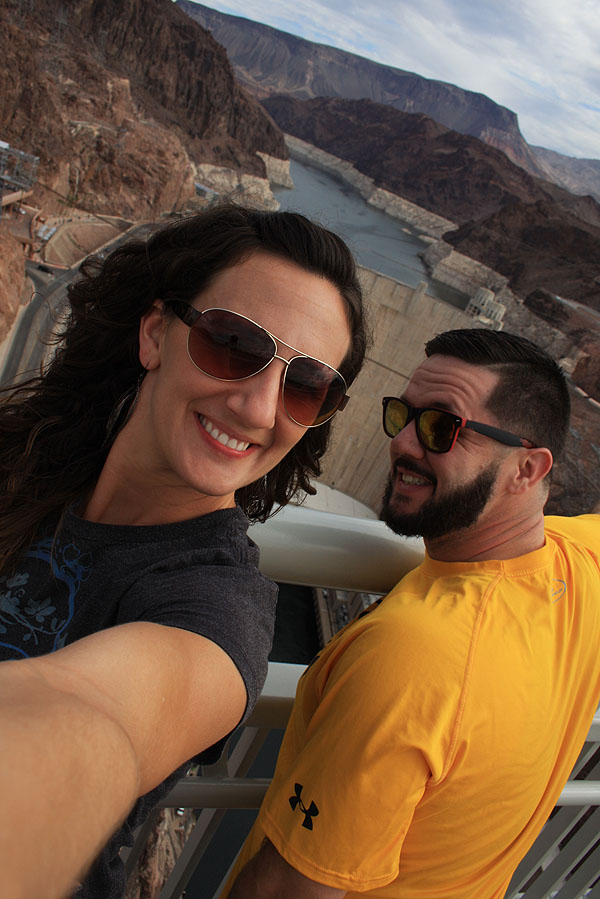
Last October, when my brother and I met my mom out in Las Vegas for a weekend visit, I told her she should make us a scavenger hunt like she used to do for our birthday parties when we were kids. She took me seriously!
She compiled a list of 100 things for us to find (and photograph) while we were there -- most were general "Las Vegas" things, and some are specific to her world in Las Vegas. While we visited and took in some Las Vegas sights, the hunt made for a really fun theme throughout our weeked of silly things to look for.
Since we had such a good time doing it, we wanted to share the list, a few of the photos we collected during our scavenger hunt, and offer a challenge for anyone else making a Las Vegas trip!

Download Printable PDF:
Las Vegas Scavenger Hunt List
Download Printable Word Document:
Las Vegas Scavenger Hunt List
This would be so much fun to do with a big group of people--or two groups, who could compete for the most points!
How many can YOU find in a weekend in Las Vegas?
-
Photo of everyone in your party doing a shot
-
Brochure from any wedding chapel in Las Vegas
-
A photo of you with a man or woman who has a Mullet
-
Take a picture with an impersonator

-
Sneak into a random strangers group photo
-
Photo of you with a guy named Steve (ID required)
-
Get a piggyback ride from a stranger
-
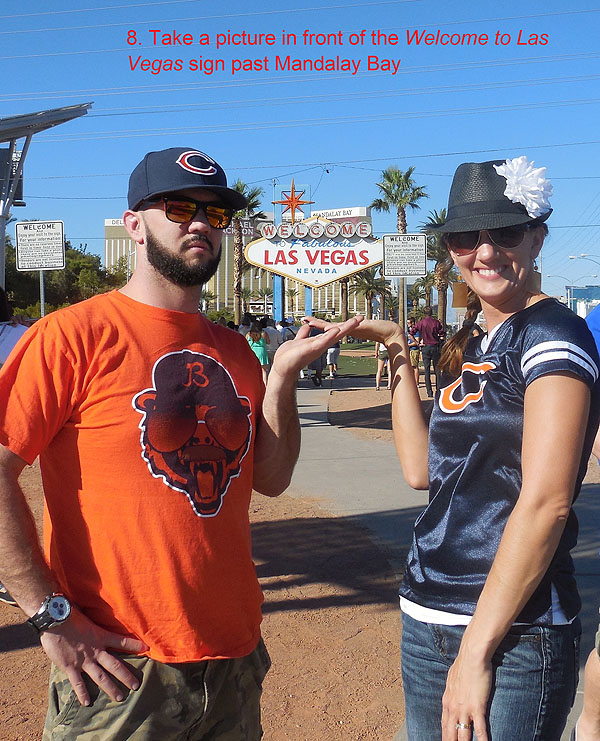
Take a picture in front of the Welcome to Las Vegas sign past Mandalay Bay
-
Take a photo with a Roman guard (they're only out at certain times) at Caesar's
-
Some moving sidewalk stunt
-
Teeny flash mob. Must draft four strangers into your crazy dance
-
Poker chips from 3 different casinos ($)
-
Menu from a fast food chain
-
Ticket from Venetian Gondola ride ($)
-
Coin bucket from a casino
-
Glow in the dark necklace ($)
-
Elvis related souvenir ($)
-
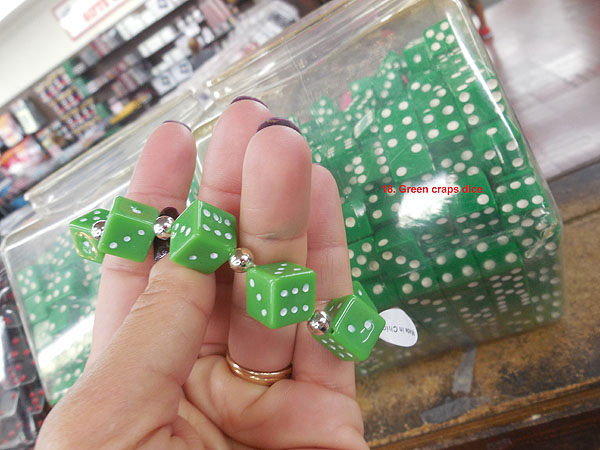
Green craps dice ($)
-
Porn slapper cards of brunette, blonde and red head
-
Cork from wine bottle
-
Post card with Eiffel Tower on it ($)
-
Timeshare promotional flyer
-
UNLV sweatshirt ($)
-
Beverage napkins from a casino
-
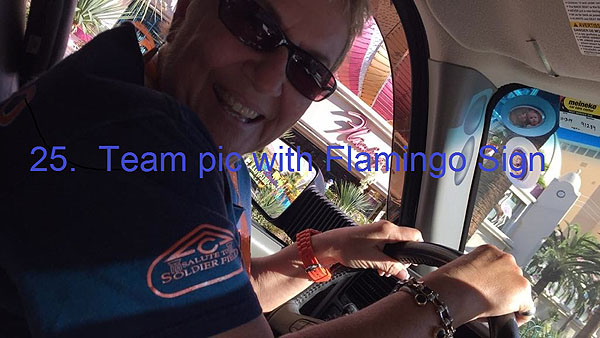
Team pic with Flamingo Sign
-
A musician playing
-
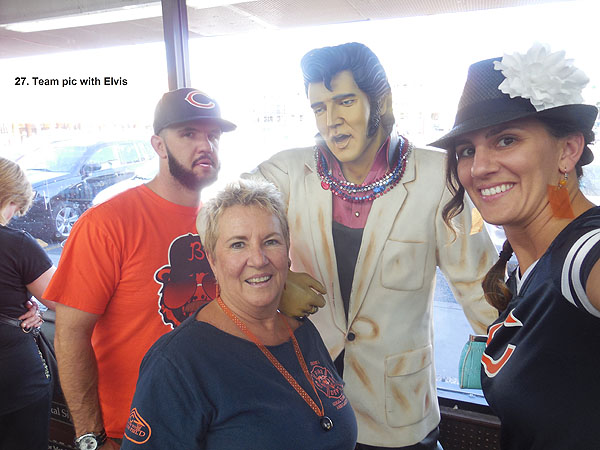
Team pic with Elvis
-
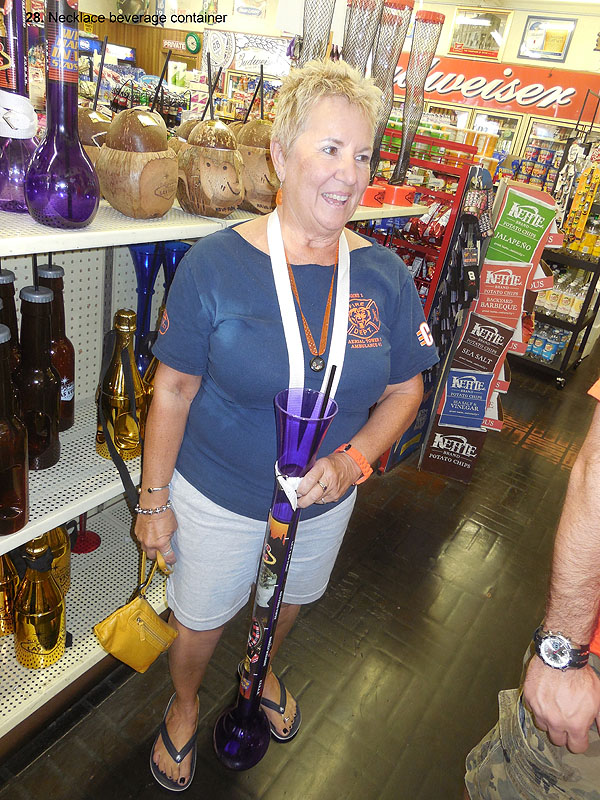
Necklace beverage container ($)
-
Deck of cards
-
Harley Davidson logo
-
Matchbook from casino
-
Mini salt & pepper from room service
-
Do not disturb sign from hotel room
-
Baggage check ticket
-
Coca cola souvenir ($)
-
Tacky Las Vegas souvenir ($)
-
Pic of a bachelor/bachelorette party
-
Paper place mat from Denny’s
-
Pic with one of the M & M's

-
Business card from a pit boss
-
Brochure from Madame Tousaurd's Wax Museum or the Titanic Exhibit
-
A coupon book from one of the malls
-
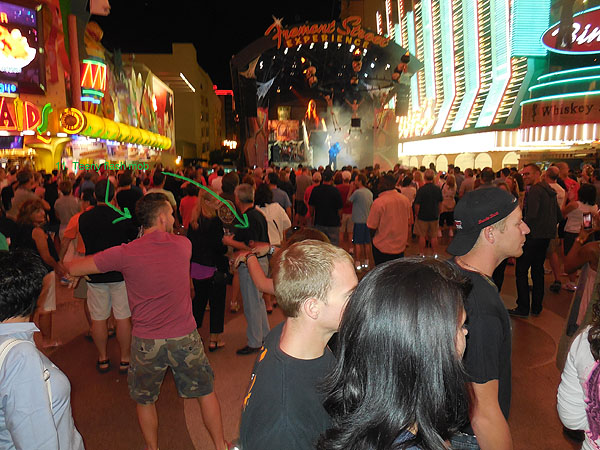
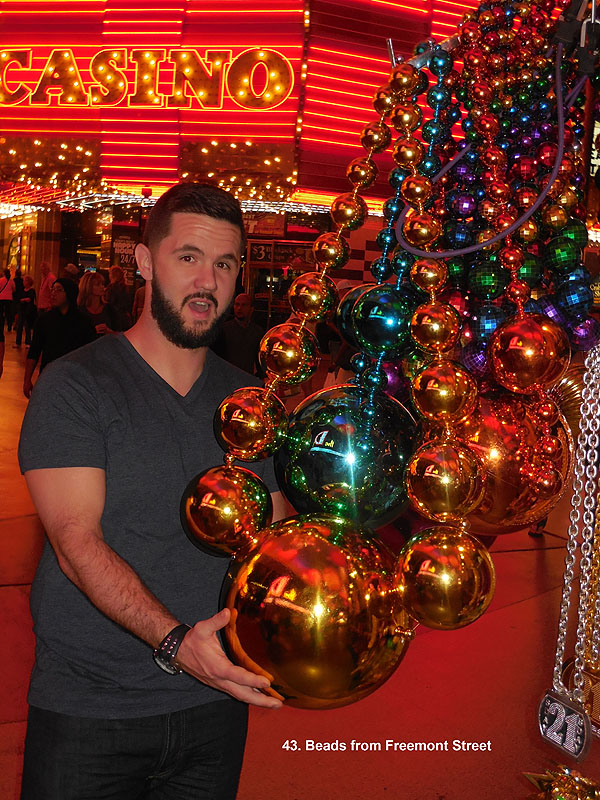
Beads from Freemont Street
-
Monorail ticket ($)
-
Picture with a Disney character
-
Picture with water beverage seller or of guy on bridges asking for beer
-
Picking an off strip casino/non Fremont Street casino and something from it
-
Picture with the butts of women on Riviera doors
-
Someone using a pay phone
-
A tiger
-
A shark
-
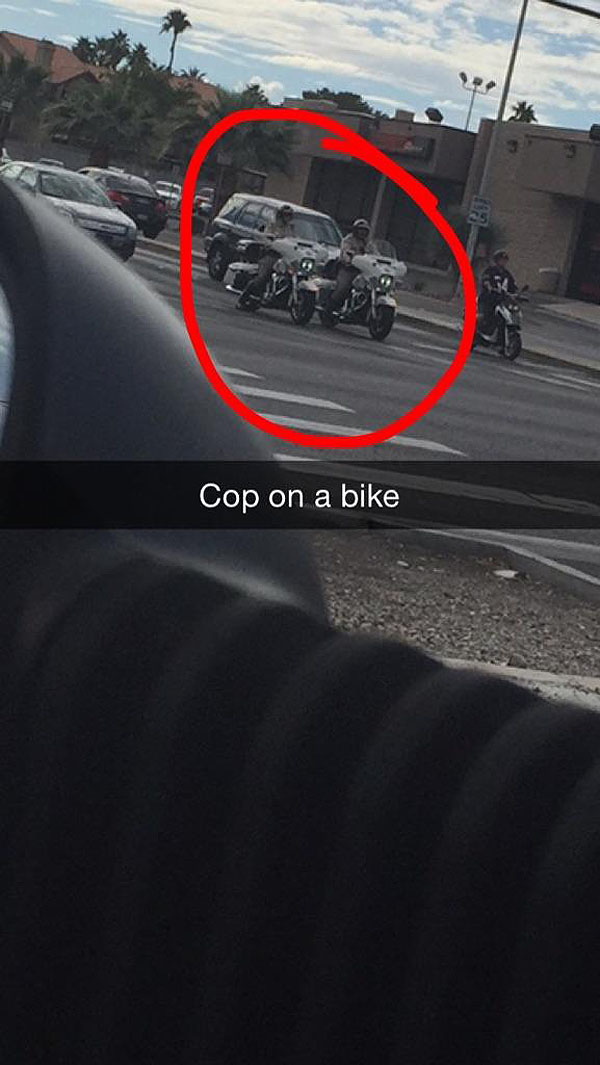
A bike "cop"
-
A crystal chandelier
-
A juggling bartender
-
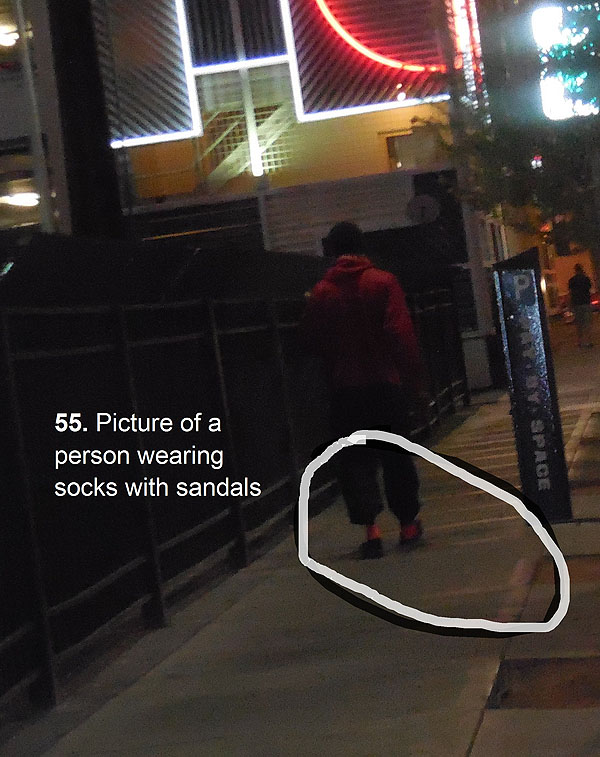
Picture of a person wearing socks with sandals
-
Picture of an armored truck
-
Picture of anything that displays the time in a casino
-
Roulette wheel displaying the number 00 was hit
-
Someone with a piece of clothing with Elvis on it
-
Sign with a "Z" in it.
-
Photo of a man with a handlebar mustache
-
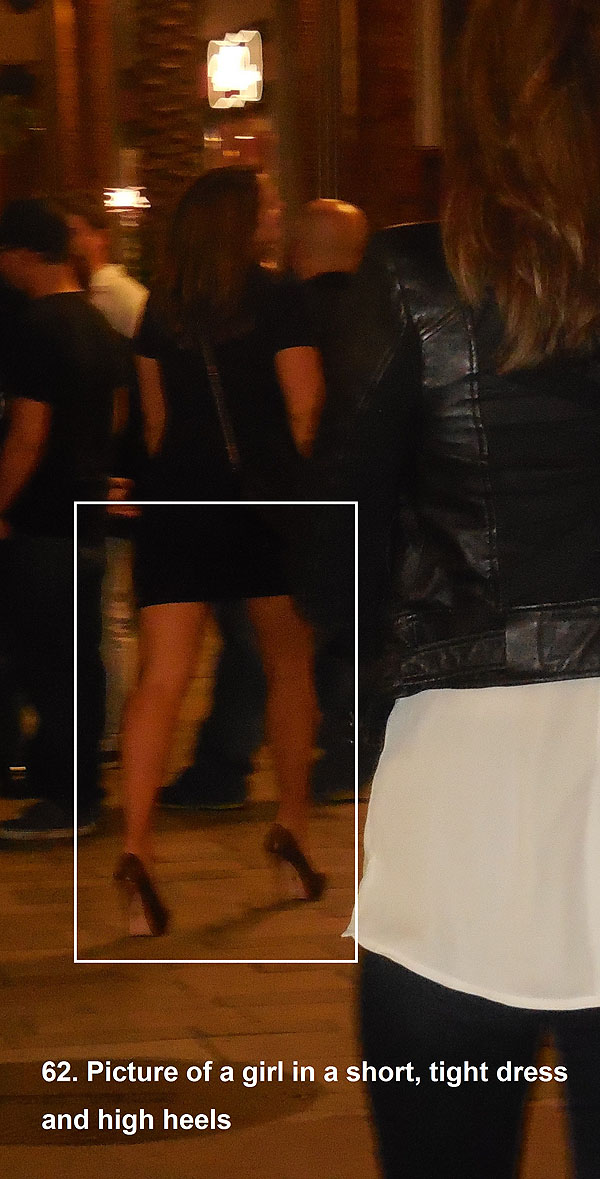
Picture of a girl in a short, tight dress and high heels
-
Photo of a bride
-
Photo of a divorcee (proof?)
-
Hotel water bottles
-
M&M's world bag
-
A team picture with the million dollars at Binion’s
-
Picture of a biker at Hogs n Heifers
-
A team picture with some of the pit dancers at any of the casinos.
-
Souvenir flat penny from a casino
-
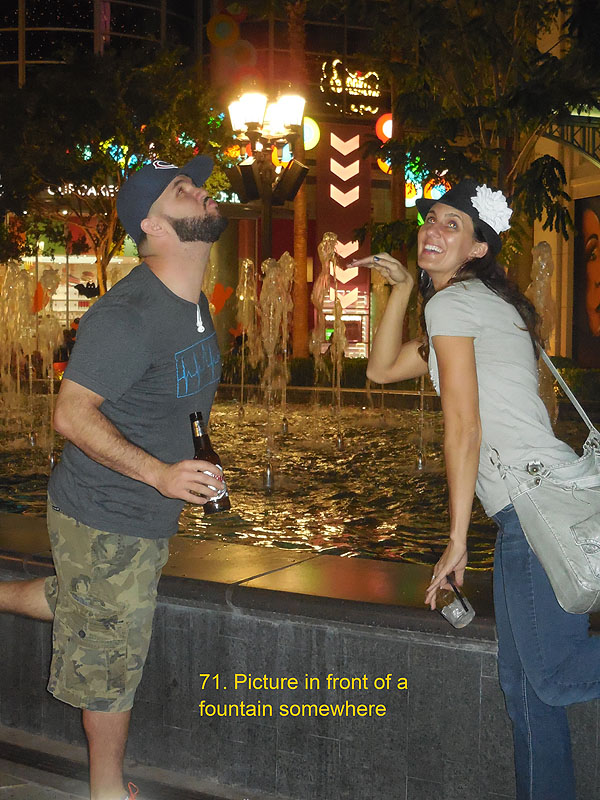
Picture in front of a fountain somewhere
-
A line of at least 10 taxis
-
A body of water
-
An intricate, inlaid tile design in a floor
-
An unusual handle on a door
-
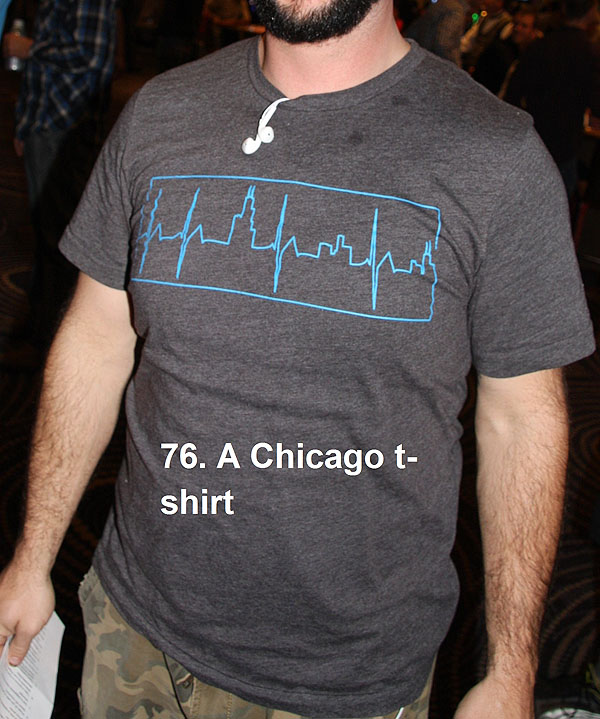
A Chicago t-shirt
-
Bellagio fountain
-
Replica Arc de Triumph at Paris
-
Pink flamingo's
-
Ceiling in Bellagio
-
Square tiny tiles on horse
-
Picture of one of the team giving a bride a kiss on the cheek
-
Bling
-
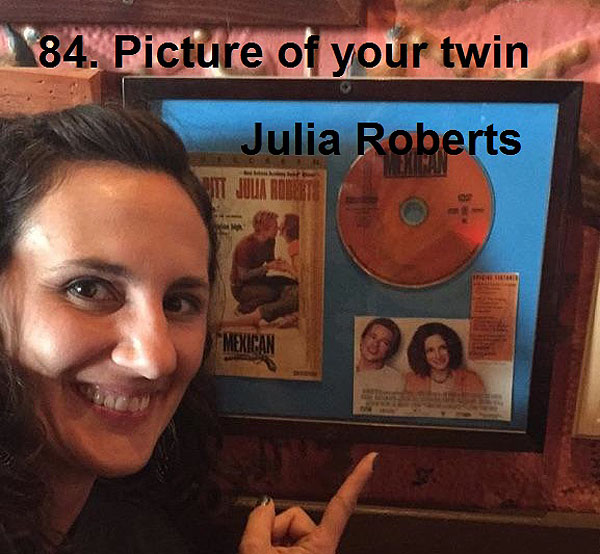
Picture of your twin
-
A beautiful arrangement of flowers
-
Someone teaching you a foreign song or dance and you guys singing/dancing it -bonus the farthest away foreigner
-
Picture with a naked person
-
Limo driver’s card
-
Picture with a wine barrel
-
Picture of you on TV
-
12 packets of salt - any fast food place
-
A losing ticket from a sportsbook
-
A pair of chopsticks
-
A photo of any celeb
-
A ticket stub to a movie ($)
-
A pen from a casino hotel - must be "borrowed" from reception
-
A picture of the inside of a toilet stall
-
A Wirtz Distribution truck
-
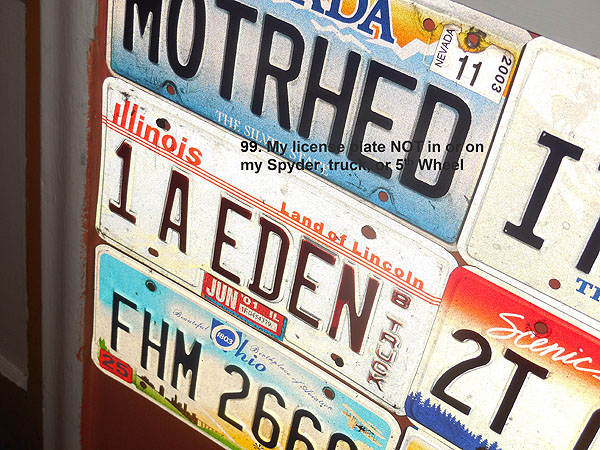
My license plate NOT in or on Audrey's Spyder, truck, or 5th Wheel
-
Something unique, NOT on this list
Have fun & good luck!
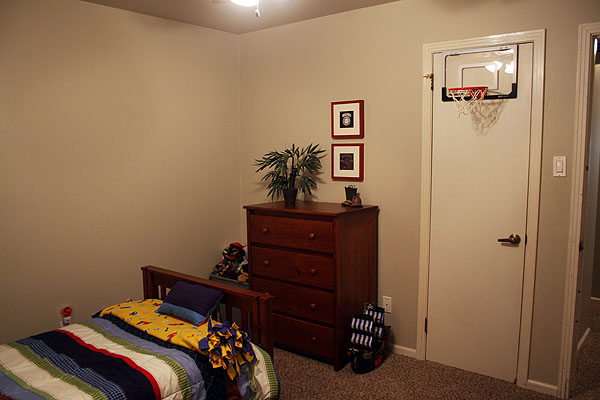
Paxton's Fire Department Bedroom
A couple of weeks ago, we scored a great deal on a set of used bedroom furniture for Paxton's room. His room had been a hodge podge of hand-me-down and Craigslist furniture, so this set was a very nice upgrade.
I finally got around to hanging all his fire department-themed artwork last week and thought I'd share the "finished" photos.

I've loved his bedding set that we bought at Target years ago. Unfortunately, it's no longer available (though this one is similar) but we saw the same comforter on a bed in an episode of Good Luck Charlie this week! Paxton thought that was pretty cool. :)

About the artwork:
PAXTON Fire Truck Canvas Print
Last summer we stopped in Paxton, IL to see the fire station with Paxton's name all over it on our way home from Chicago. While we were there, I took that photo hanging over his bed. Believe it or not, the photo was taken through the glass of the fire station garage with my phone's camera!
I had it printed at Zazzle as a 36" x 24" premium gloss canvas poster print, spray-mounted it to a cardboard backing and framed it in an open-backed barnwood frame that I bought on Etsy.
It's like having his very own fire truck! :)
Wood "P"
Both of my kids have one of my wood signs in their room. Paxton's is my basic brown Monogram Sign, though I've considered making him a "Paxton Fire Department" custom sign with hooks below it to hang costumes. Maybe one of these days...
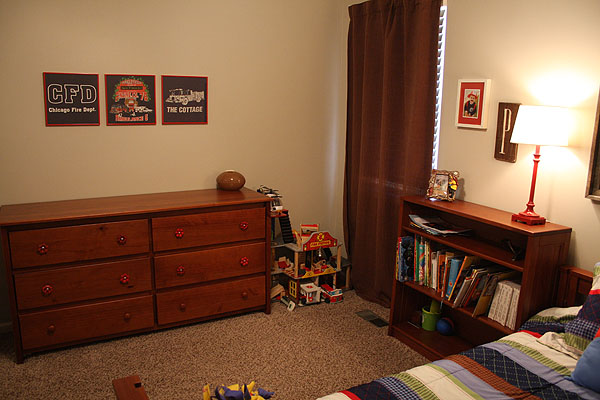
Framed T-Shirts
My dad (a retired Chief from the Chicago Fire Department) has provided us with TONS of CFD t-shirts over the years, so I used several of them in the artwork for Paxton's room. Instructions for how I framed them are provided here in my Framed T-Shirt Art Tutorial. The frames are all spraypainted red.

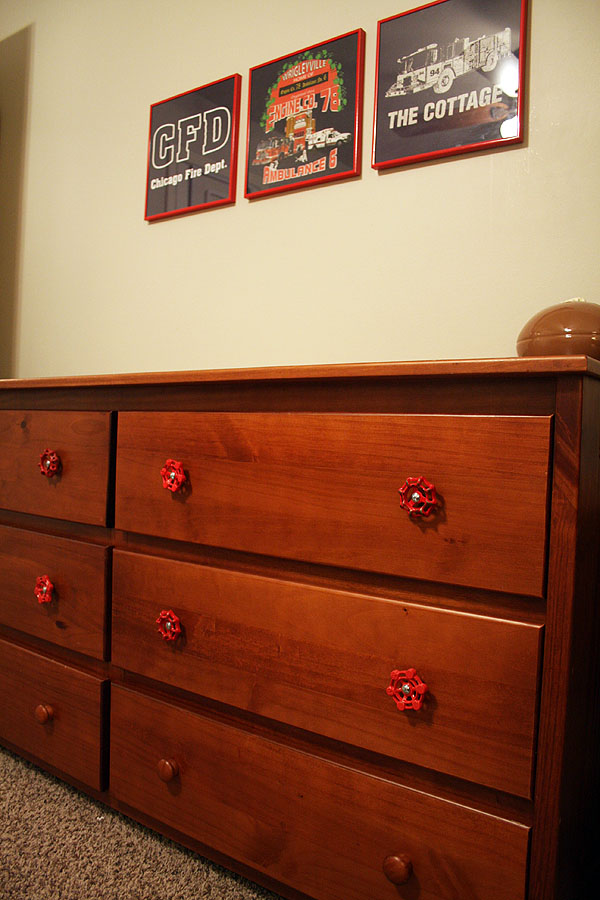
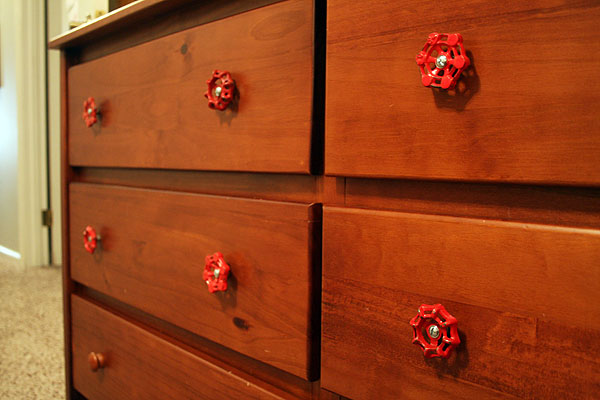
Red Vintage Water Valve Drawer Pulls
Several of the drawer pulls on his large dresser were not staying on very well, and the baseball & football pulls that the seller had used in her son's room didn't really go well with Paxton's room.
I've been eyeing some vintage water valve handles for years as an accent in his Fire Department bedroom, so this seemed like the perfect opportunity to buy them! I found two sets of 4 red handles on Etsy from a store called palacecastaway.
Brick Wall!?
I'll probably never ACTUALLY do this, but if I was a regular home-decor DIY project blogger, I'd totally get some faux brick wallpaper and turn that back wall into a brick wall -- just like at the firehouses I grew up seeing in Chicago. :)
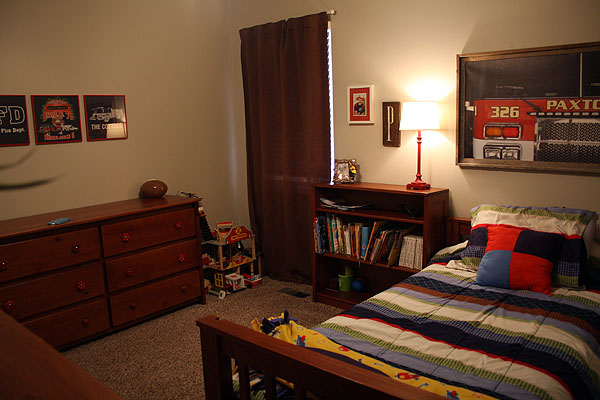
So that's it, Paxton's new room.
His reaction? He gave me an appreciative nod and a "This is pretty impressive!" comment.
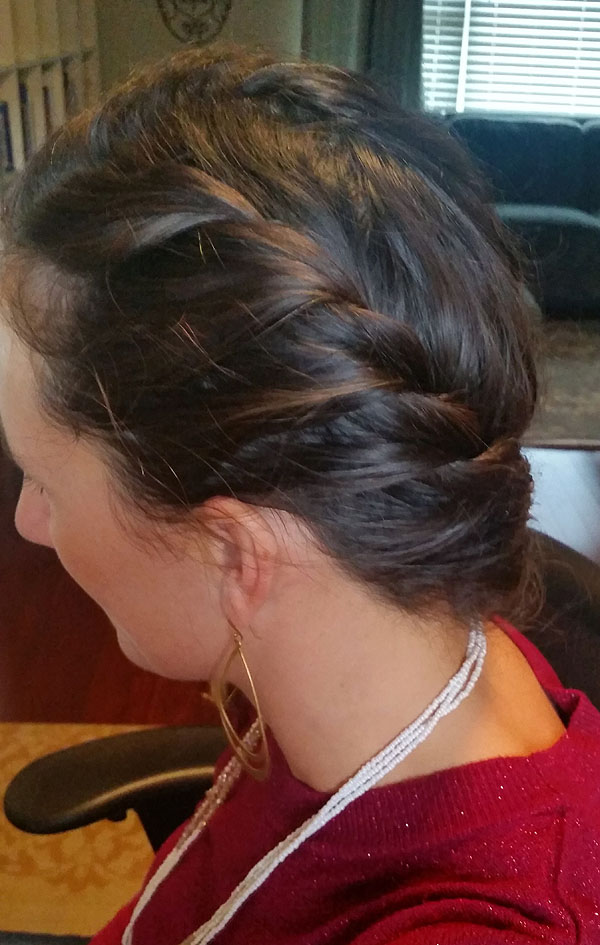
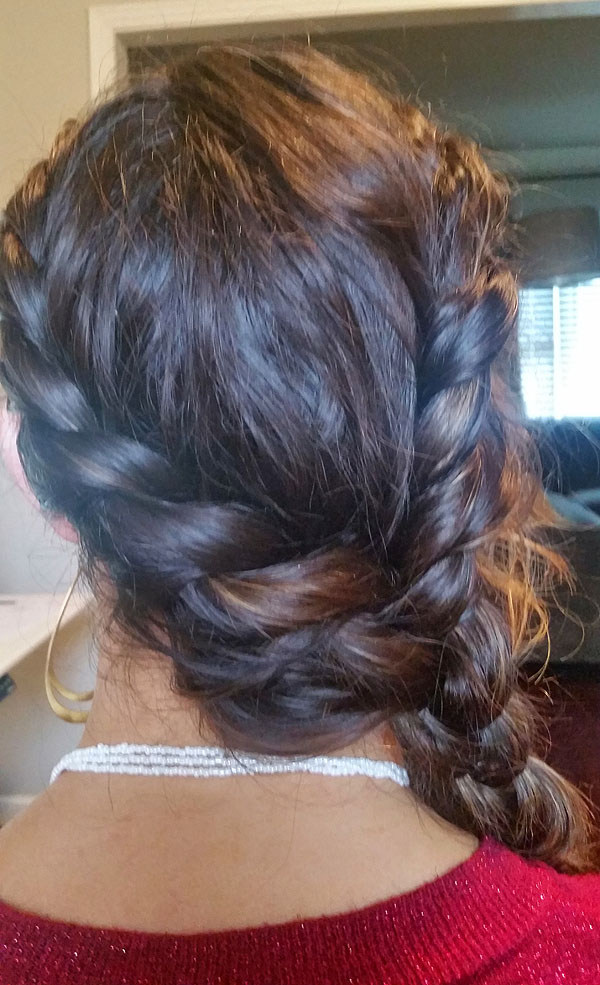
Quick & Easy Rope Braid Tutorial
When your hair is as long and as curly as mine is, you tend to look for a hairstyle that looks decent, tames the mane, and most importantly is FAST and EASY. A plain ponytail just looks messy on me, so this Rope Braid (I also call it my "Katniss Braid"--but it's not exactly like hers) has become my go-to hairstyle on days when I don't have time to mess with wearing (and fixing) my hair down.
People ask me how to do this ALL. THE. TIME.
It literally takes less than 2 minutes--and you don't even have to have clean hair or even brush it! Sometimes I even put it up like this straight from the shower while my hair is still wet.
All you need is a ponytail holder...and maybe a clip (if you aren't like me--I just use my teeth...You'll see.)
So, first...here's what it looks like from the back:
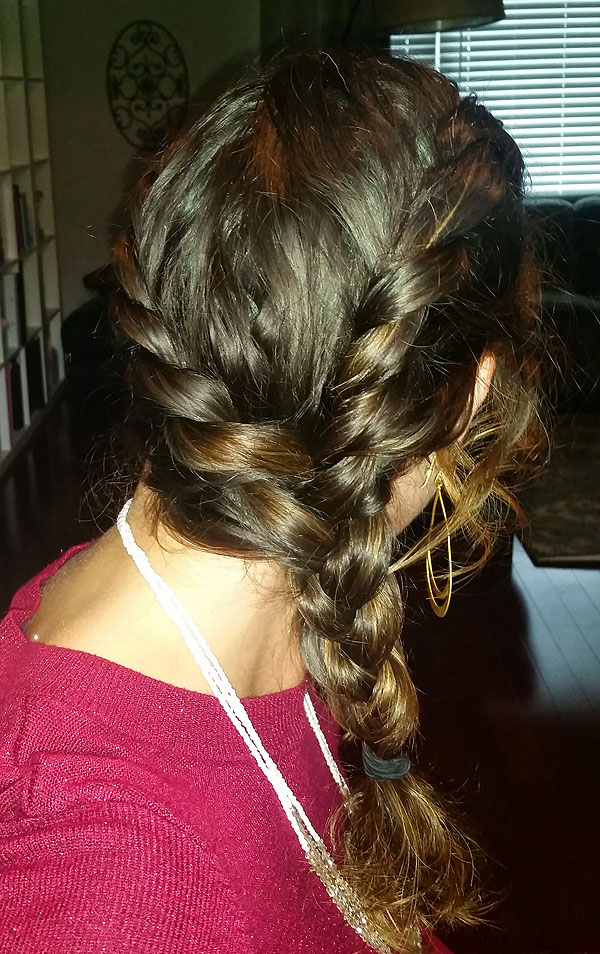
Pretty, right? Looks complicated...but it's really not.
I had Ayla (my 8-year-old) help me make a quick video tutorial one day when I was fixing my hair. I'm SO not a video-blogger, so this is a VERY basic and non-professional video. Ayla seemed to have a little trouble holding the camera up high enough (even though she was standing on the toilet), which is why I spent a lot of the video bending down to make sure my hair is actually in the frame! :) She did good though...
Here's how it's done...
In case you have trouble understanding me, or if I talk too fast or don't explain well enough in the video what I'm doing, here are the step-by-step instructions, written out:
- Part your hair to one side and separate out a small bit of bangs (if you want) on the deeper side of the part.
- Start your twist on the narrow side of the part and section out two small pieces from the top, around your face.
- Twist the lower piece (B) over the upper piece (A), letting the top piece (A) come down.
- Add another small section from the front of your hair to the piece that was twisted around (A).
- Then twist that piece (A) over piece (B).
- Add another section of hair to piece (B) and twist again.
- Continue all the way around your head until you reach the other side of your neck.
- Twist that piece to hold it all together and either clip it in place, or do like I do, and hold it in your teeth while you twist the other side. :)
- Leaving the bangs out, begin again on the other side of your head, twisting the lower section over the upper section until you reach the bottom of your neck.
- At this point, you will have three pieces sectioned. The original twist from the narrow side of your part, and the two pieces you have been twisting from the deep side of your part. Braid them with a normal 3-strand braid to finish it off. If the three sections are uneven, you can re-section them with your fingers before you start the braid.
- I like to curl my bangs back with a large-barrel curling iron to finish off the look.
Viola!

An easy, fast hairdo that stays put all day, keeps your hair off your neck, and looks pretty fancy! :)
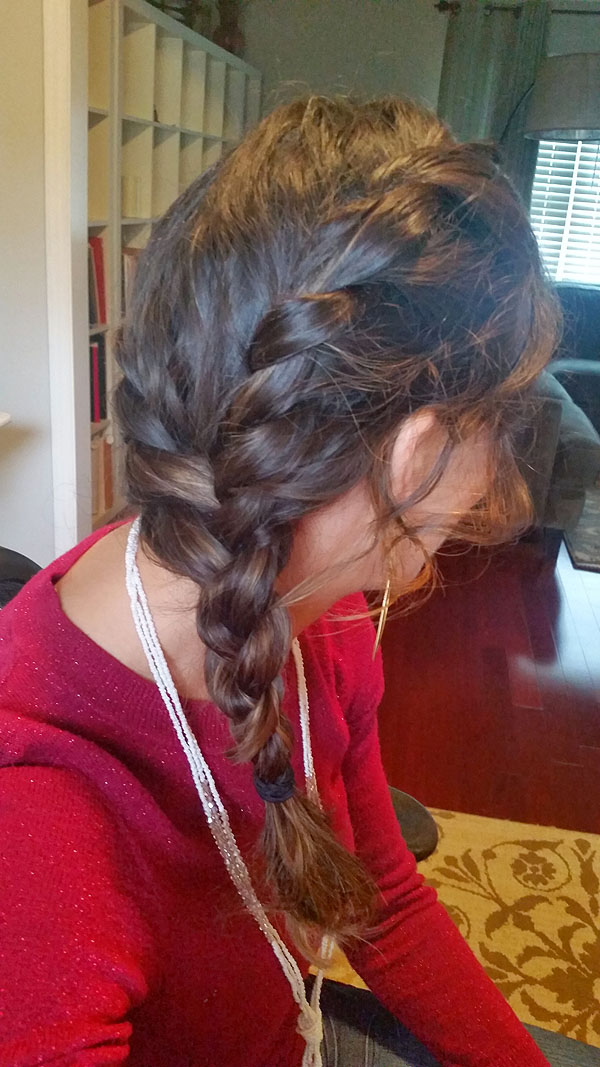
This style is great for layered hair, since it pulls in the layers as you twist around your face.
If your hair is shorter, you can just put it into a ponytail at the bottom instead of continuing a braid down your shoulder.
Natalia at MaNouvelleMode has a great tutorial on how to do a version of this as well as well as tons of other great hair tutorials! Check hers out too!