Places We've Lived Scrap Wood Frame
While Ben was out of town for a few days and the kids were both sick and watching movies, I started itching to do a small project. I settled on this scrap wood framed print of our personalized "Places We've Lived" subway art. (It's easy to make your own! Just use the Subway style and add your "locations" with my Custom Family Rules Builder).

It was pretty easy to do, and only took about 10 minutes - truly.
I had already ordered the 8" x 10" poster print through my Zazzle store a while back (though you can also get an instant personalized downloadable version for only $9, and print it at home on cardstock or photo paper). It features all the important places in our lives together -- which started almost 18 years ago!

I had recenly collected a bunch of 4" scrap wood that had some really cool color and grain, so I rough-cut a few boards down to size - three 18" boards for the back, and two 12" boards for the front. They aren't perfect, but that's kind of the point. :)
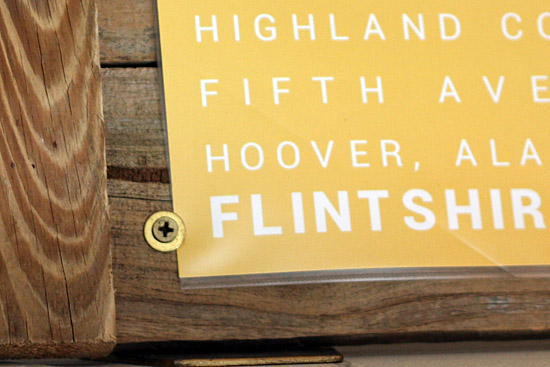
I used some brass screws that we had at our workbench in the garage to attach the front two vertical boards to the three back horizontal boards, and then used more brass screws and washers to wedge a page protector (trimmed down to 8" x 10") onto the front of the board. An 8" x 10" piece of plastic would work well too, but I didn't have any on-hand, and the page protector covers both the front and the back of the print, which seemed like a good idea.
Since the wood was pretty soft, I didn't have to pre-drill, but if it had been harder wood, I'd recommend pre-drilling.
That's it. Then I just propped it up in the corner of our bookshelf and admired it. (Then I probably had to go clean up some vomit...the kids were sick, remember?)

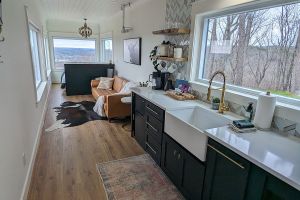
I've been looking to find something substantial in size to put at the top corner of my living room bookshelves that wasn't a vase or a photograph (I have plenty of those!). So, this "Places We've Lived" print and some natural wood seemed like a good choice, since I've started using a golden yellow as one of the accent colors in our livingroom, that I've been slowly working on redecorating.

Now if I could just find a coffee table that we both like...


10 comments so far:
Crystal said:
Very cool! Thanks for sharing!
Amanda said:
Beautiful! Thanks for sharing at I Made It! Monday. Be sure to grab a featured button when you link up this week.
Kaysi Gardner said:
This is so much fun, I love that you put the places that you lived on it! I'm featuring this on MMM tonight!
Mary Beth said:
What a fabulous frame! I found you through The Inspiration Board at Carolyn's Homework.
Mary Beth
Ana said:
Great idea! Love the rustic look of the frame!
Laurel@chippingwithcharm said:
Looks great :)
Amber said:
WOW!! I LOVE this so much! I live in Hot Springs Village, Arkansas but I'm originally from Cabot, which as you know, is right by Searcy. How fun!! Thanks for sharing.
I'd love for you to link this post up with me for Moonshine Monday at The Honeysuckle Bus Stop!
Thanks!
Amber @ The Honeysuckle Bus Stop
http://thehoneysucklebusstop.blogspot.com/
Nancy @ Artsy Chicks Rule said:
I think it turned out great!! And I love the color
Nancy
kristina @ school time snippets said:
Looks great! And I am glad to hear it is easy to do-- I've wanted to do a similar piece of art but with my baby's birth info.
It looks awesome on the bookshelves, too!
Gretchen@Boxycolonial said:
That turned out great! I keep thinking of buying antique maps of all the places we've lived together, but this looks a lot easier (and cheaper!)
Post new comment